

[ad_1]
Download this free pumpkin template as a PDF or SVG to make gorgeous Halloween and Fall decor using felt, faux leather with metallic touches, or card stock. Then check out my peeking monster SVG for something a little creepier! This post contains affiliate links. Materials were provided by Cricut free of charge so I can share with you.
A year ago, I sketched out this potential template in my “idea book”, having in mind to do it with paper. Then I became a fresh Cricut owner and the possibilities opened up…
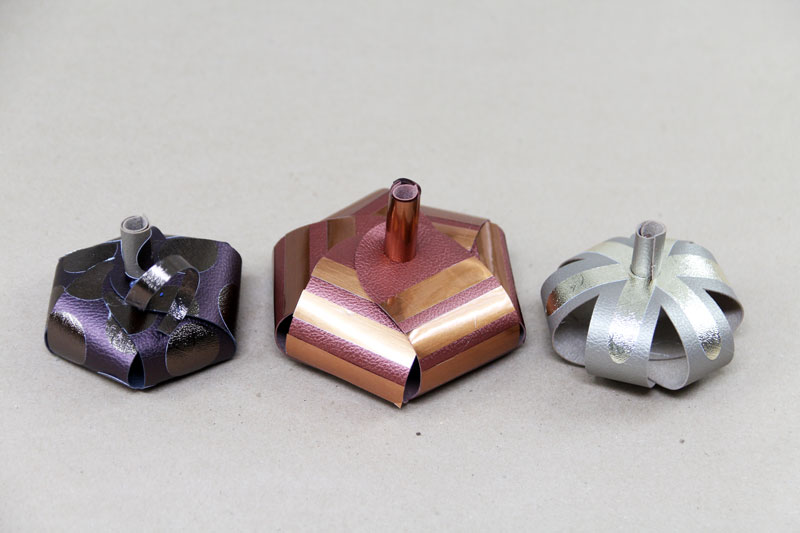
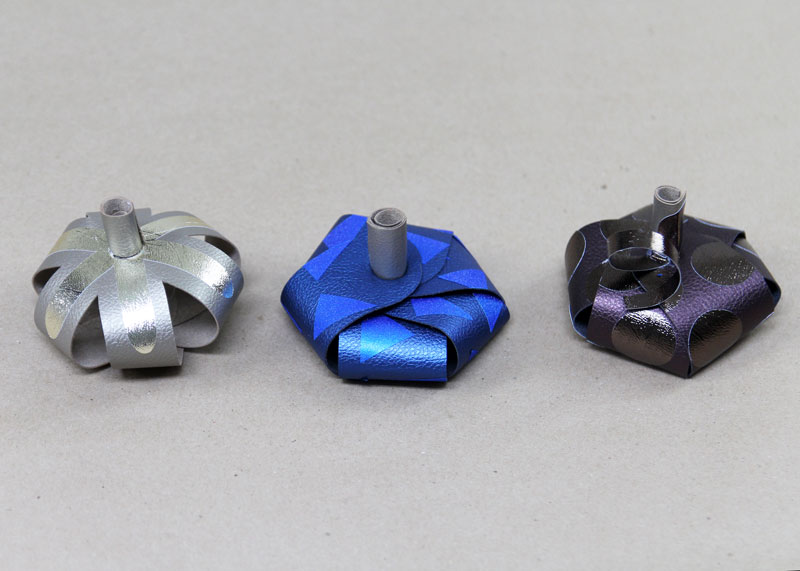
I created three versions of this just to show you what you can do with it.
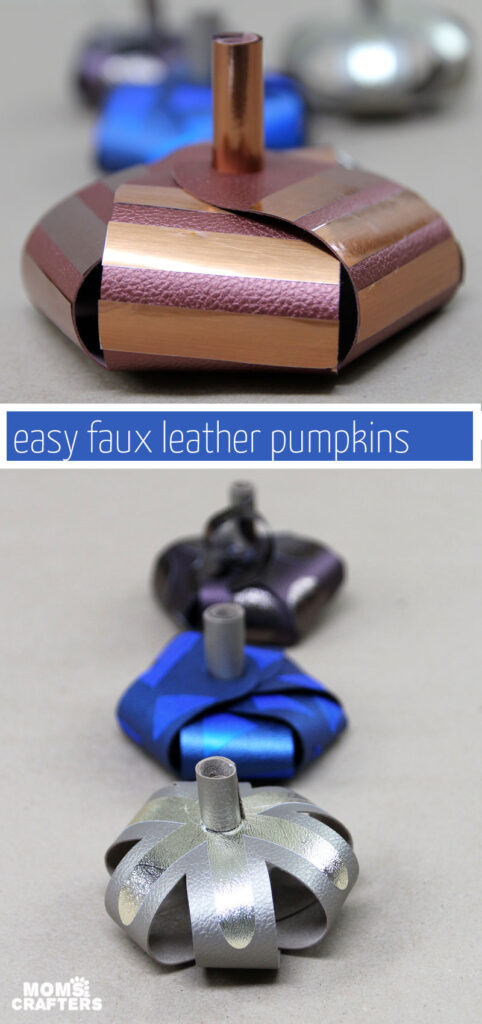
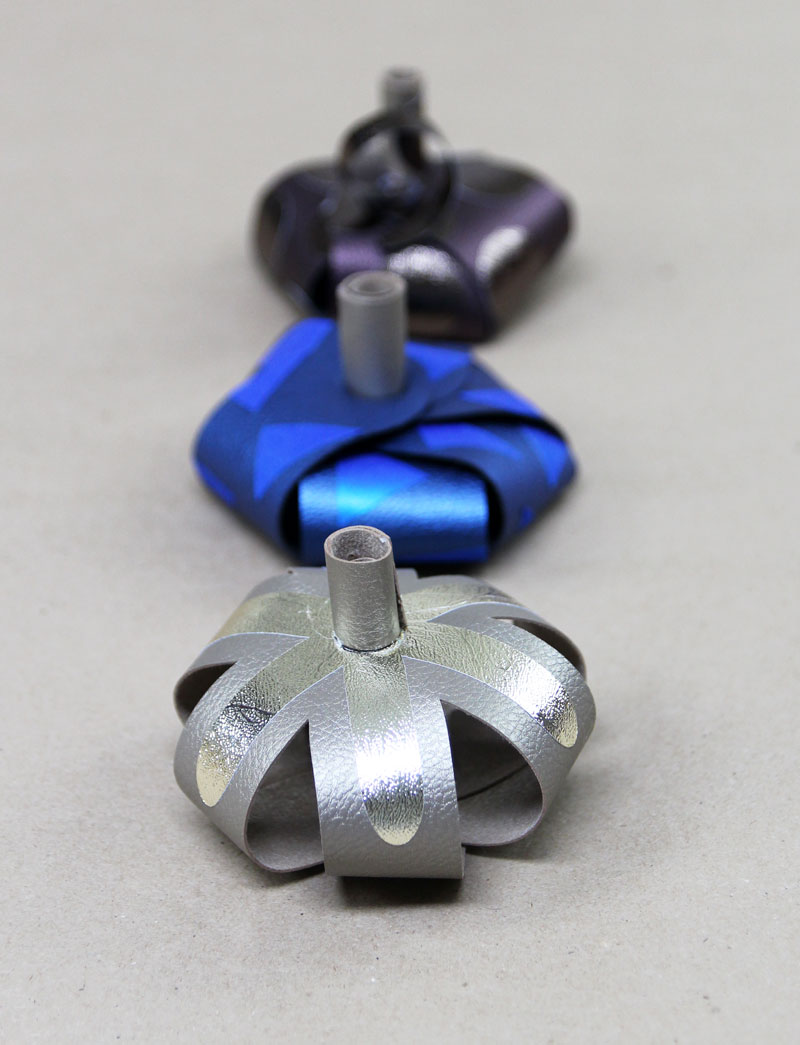
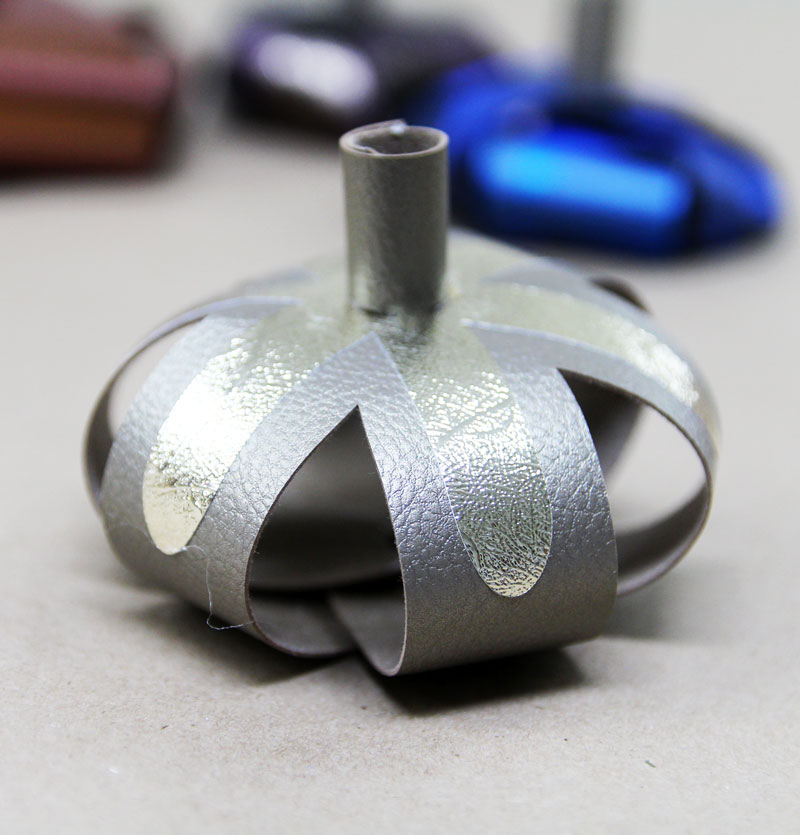
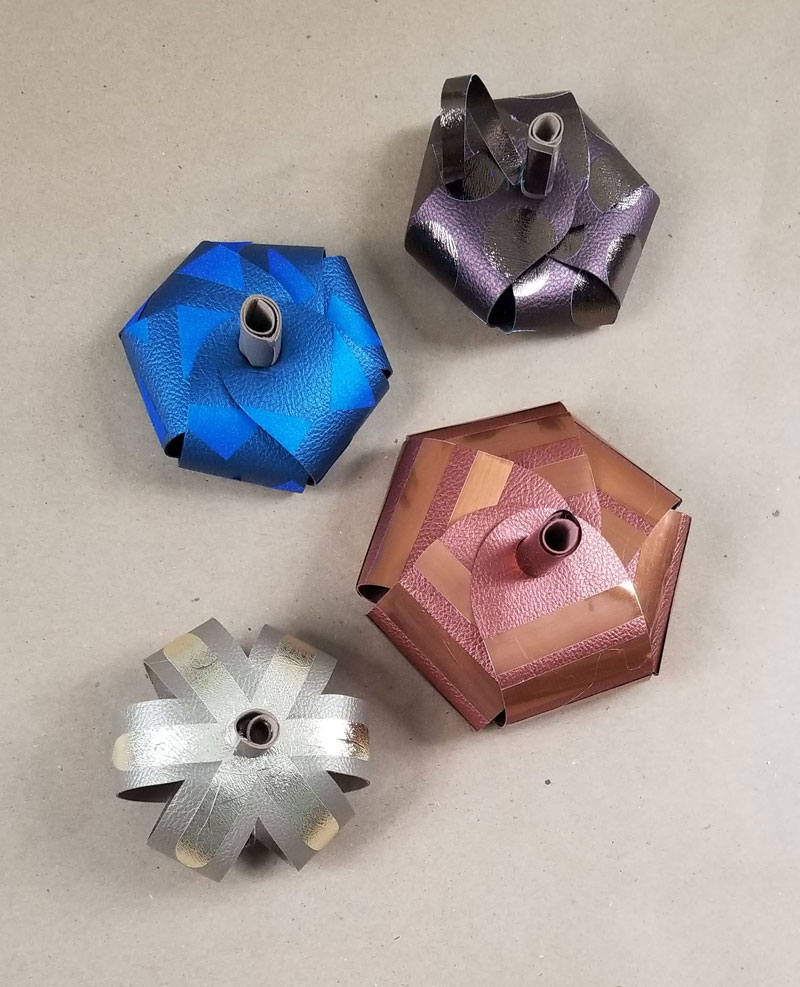
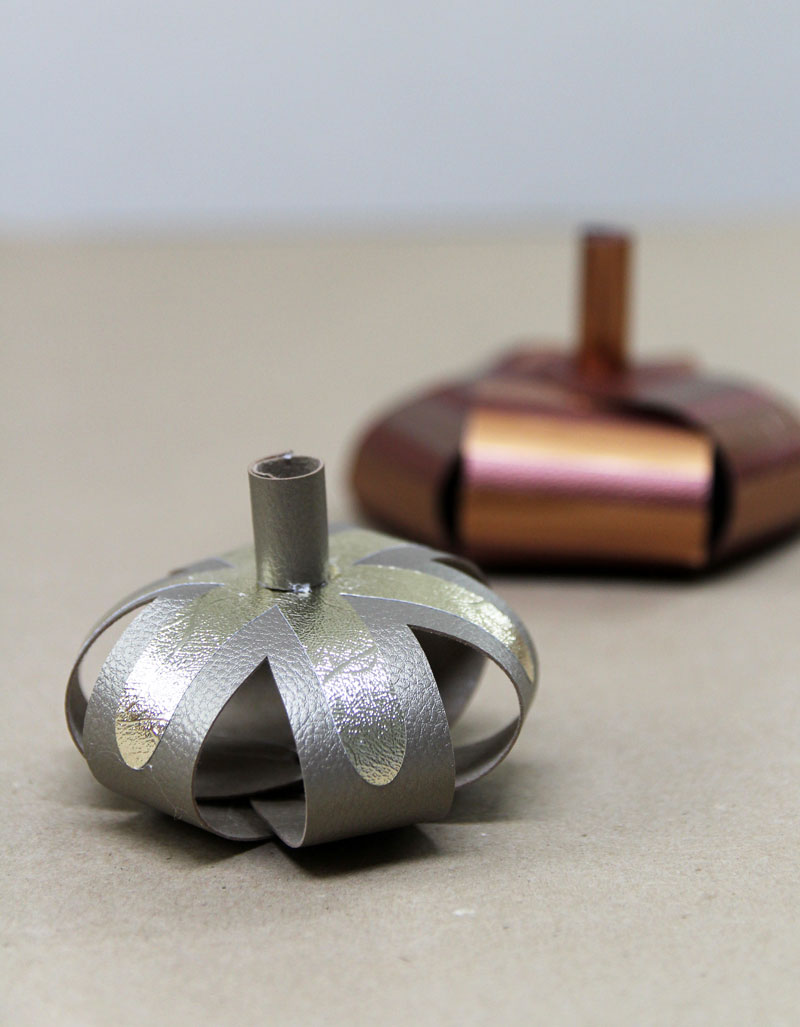
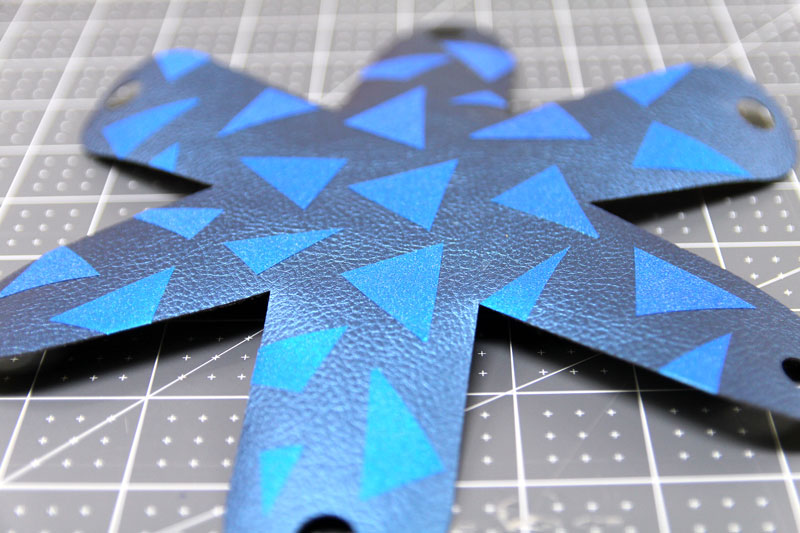
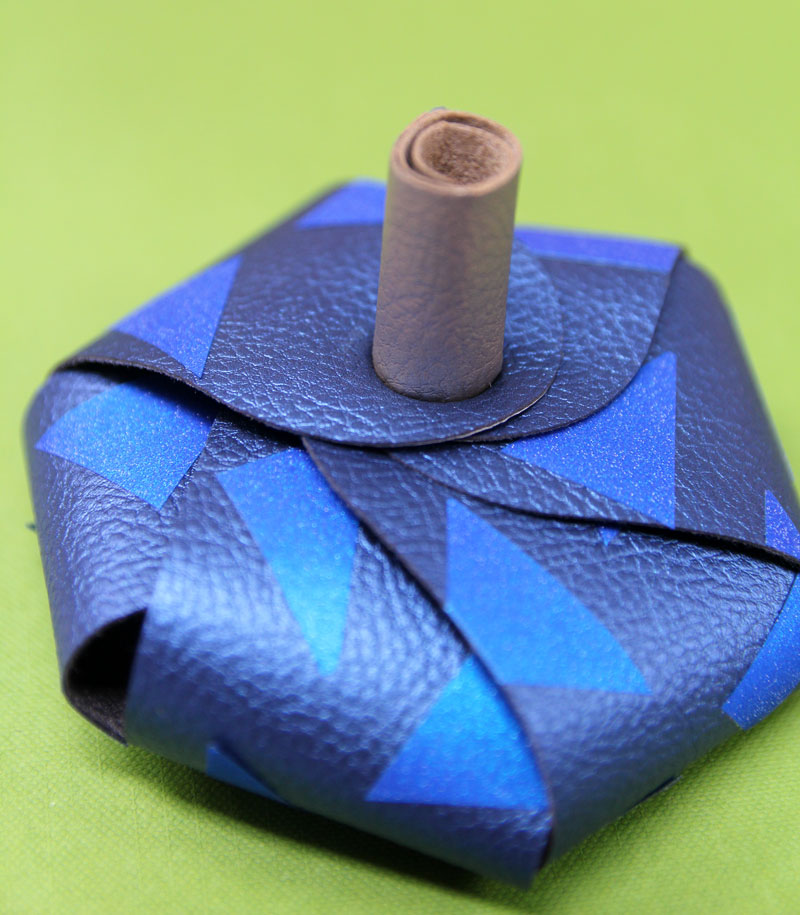
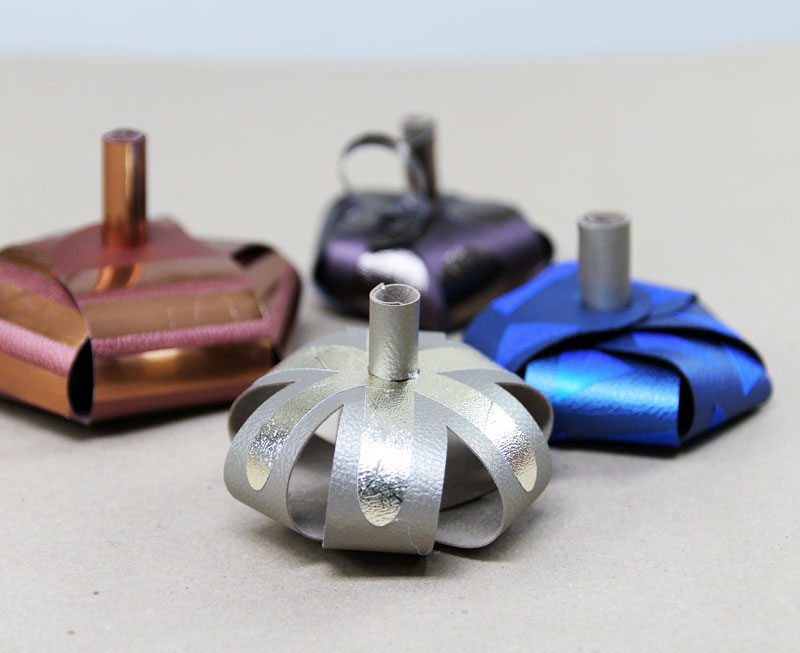
My favorite, and the main application of this pumpkin craft template that I wanted to share is the “home decor” version. I made it using faux leather with permanent vinyl accents.
Contents:
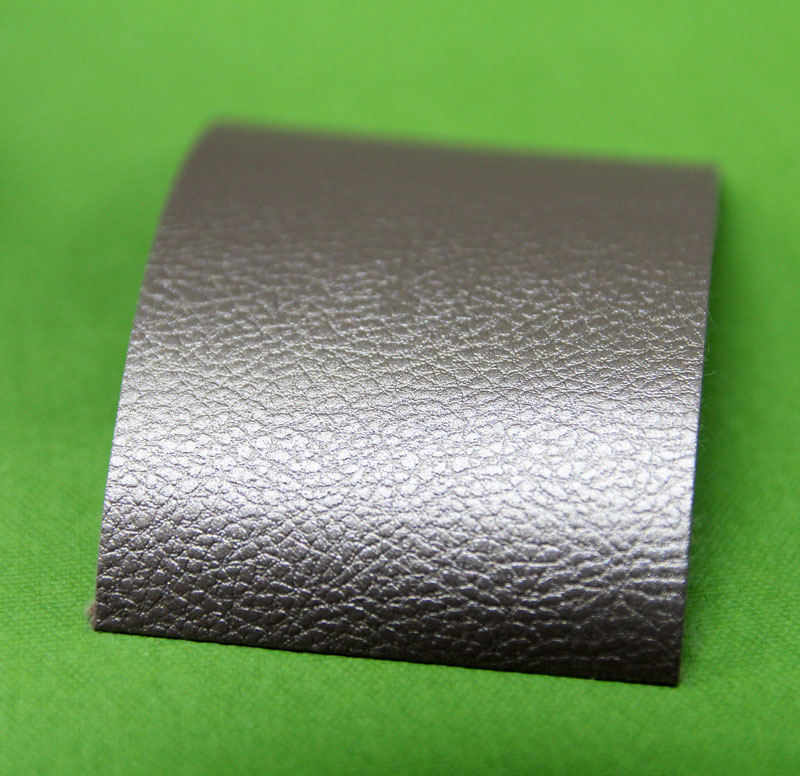
When it comes to home decor I LOVE playing with texture. Cricut’s paper thin faux leather has a gorgeous pebbled texture. It’s also SO easy to cut (as opposed to some others I’ve tried which require backing to use, multiple cuts, and are simply harder to work with).
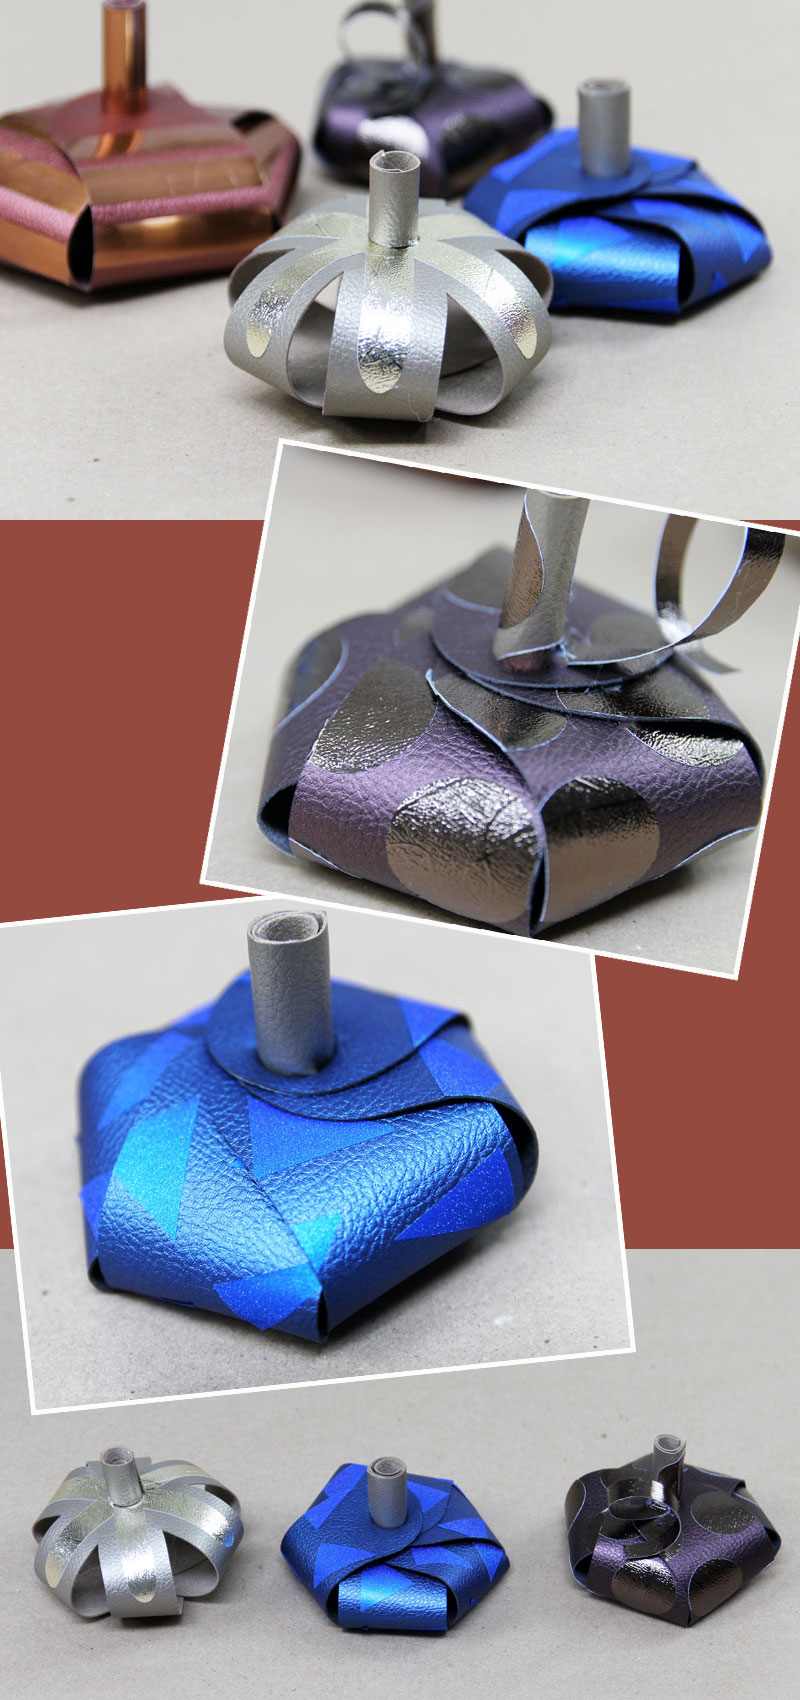
I added fun patterns with permanent vinyl. My favorite is the textured metallics but the stainless steel texture is also insanely cool! I also tried the shimmer vinyl, which is harder to work with but fun as well. All these metallics add an elegant touch to your pumpkins and fall decor.
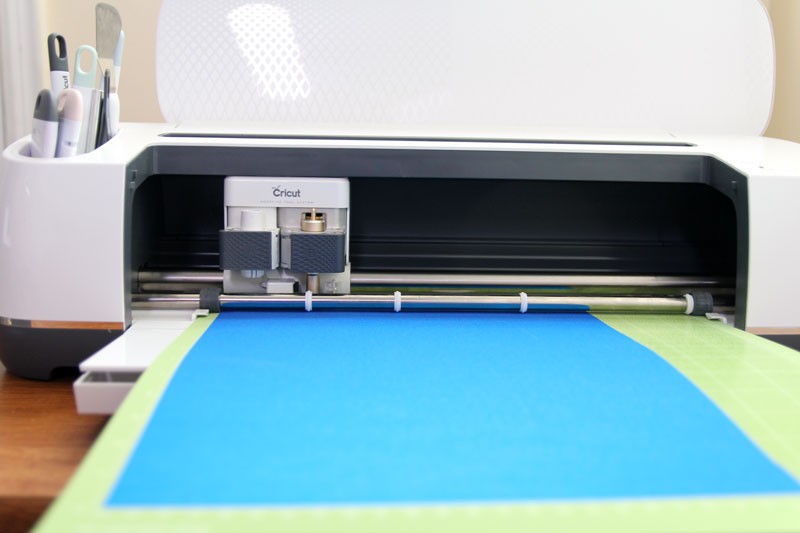
The blue pumpkin was really inspired by teal pumpkins (which symbolize “allergy friendly”) but Cricut was out of their Peacock faux leather so I used Sapphire.
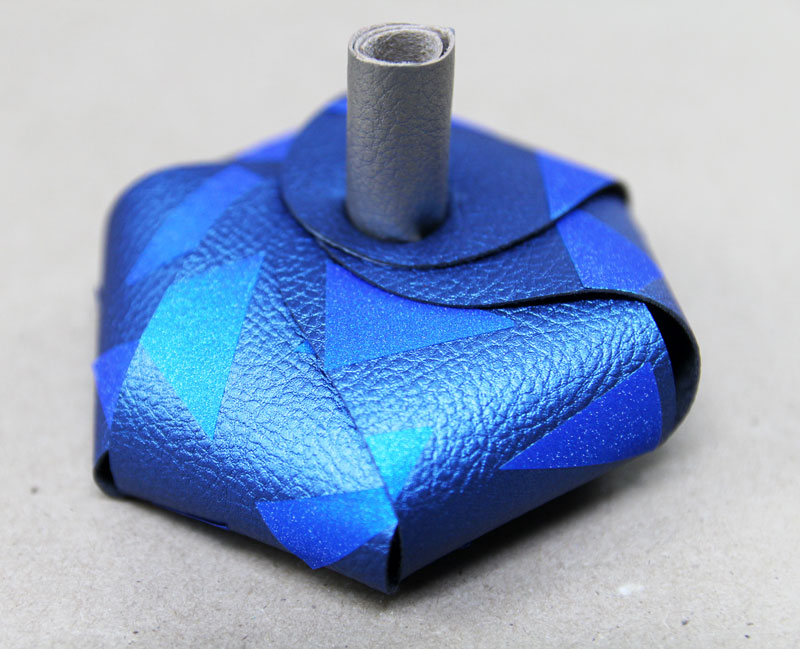
And finally, one of my favorite Cricut tricks when adding vinyl or iron-on to anything is to work “color on color”. Add vinyl in the same color as your surface – in a slightly different shade – for a gorgeous texture and simple, beautiful effect.

On one of my pumpkins, I flipped the design upside down, glued together the sides, and glued the stem to the top. I love how it looks this way too!
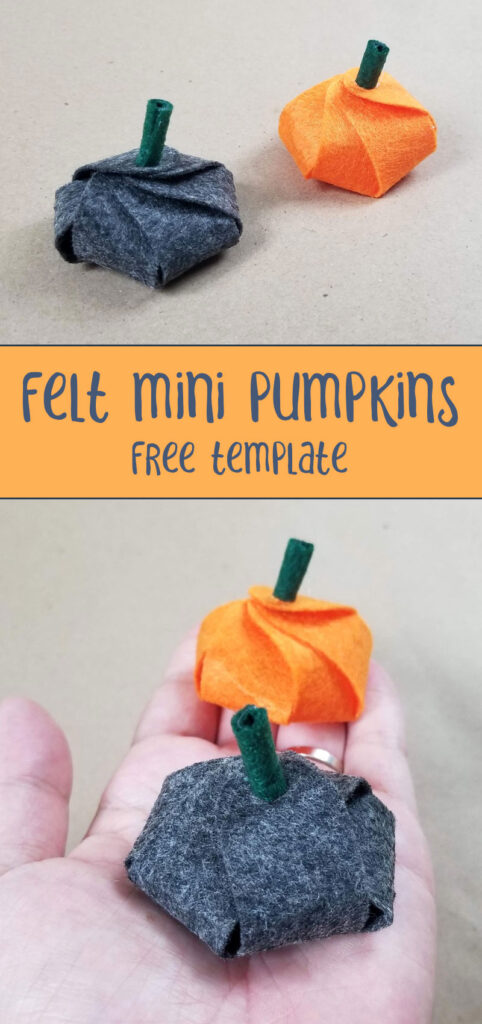
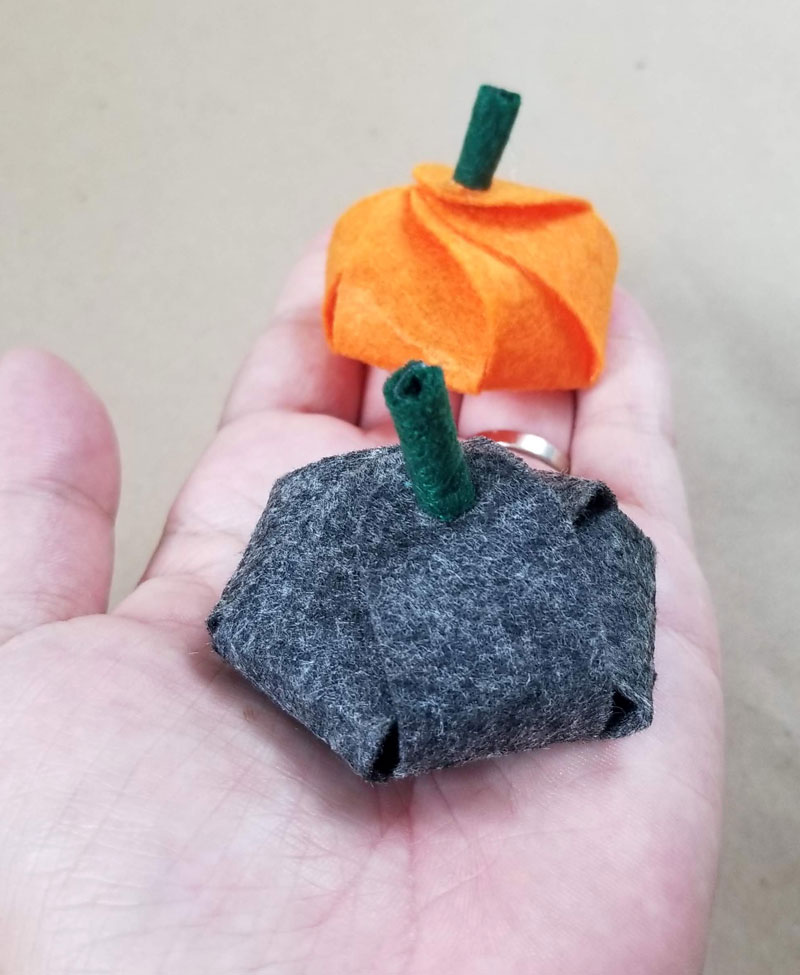
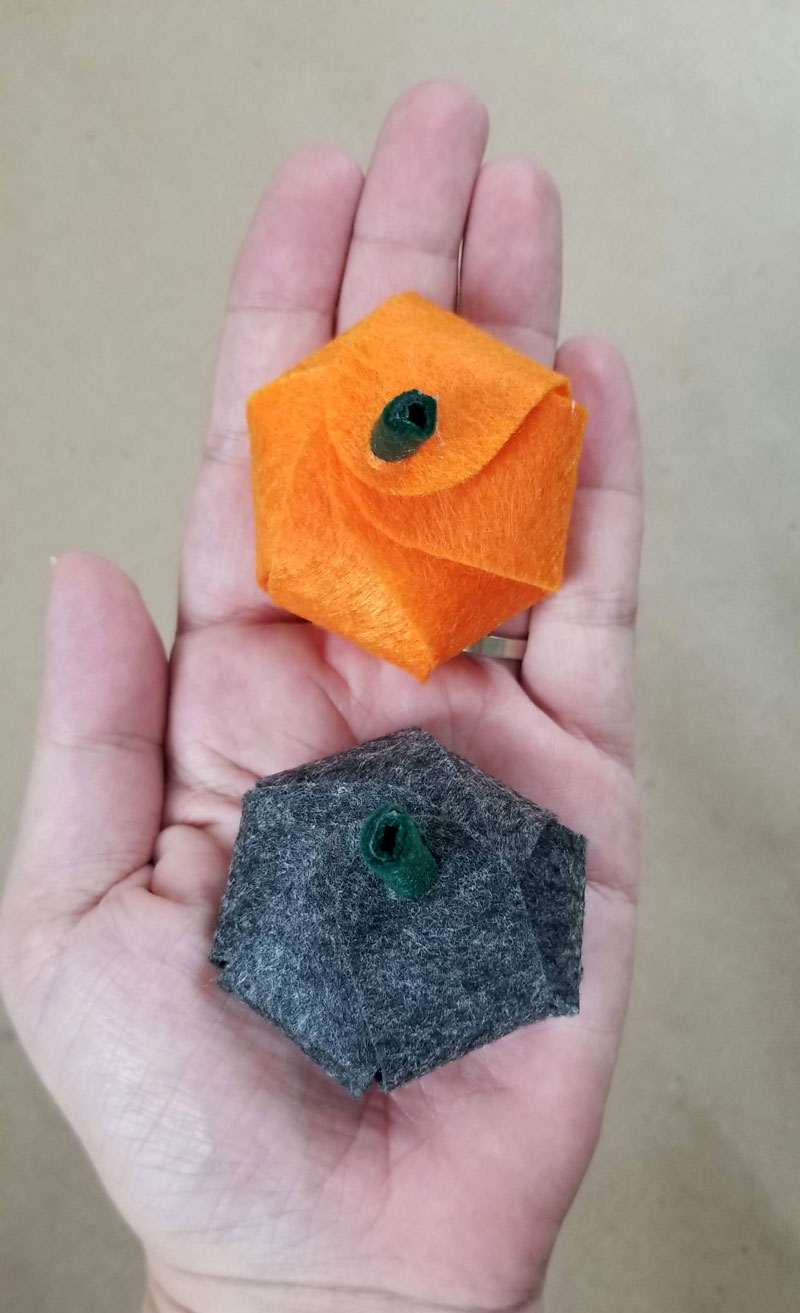
Another pumpkin craft template variation I tried was making small felt pumpkins. They were slightly harder to work with but look fantastic!
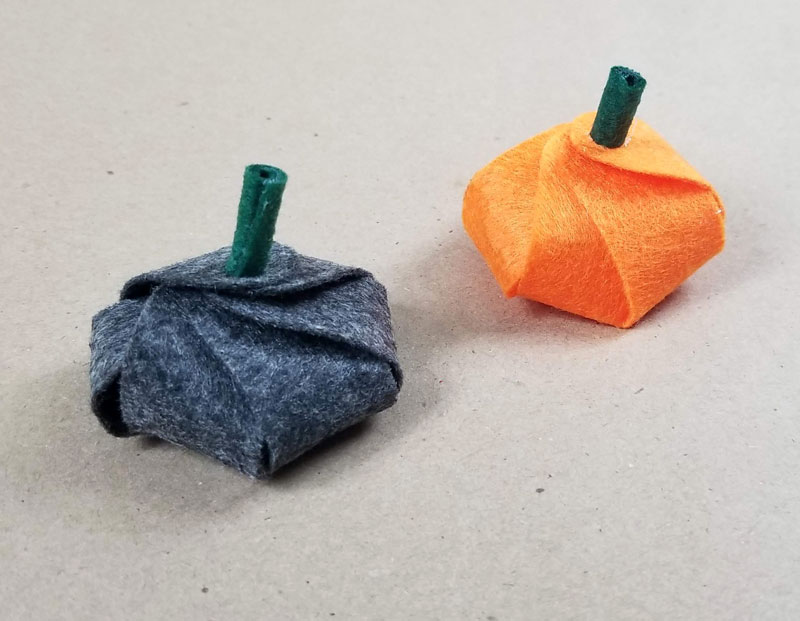
I love the gray.
You can turn these into fall or Thanksgiving accessories. Just glue them onto clips, headbands, or safety pins. You can use felt instead of leather for home decor as well, just swap out the vinyl for iron-on.
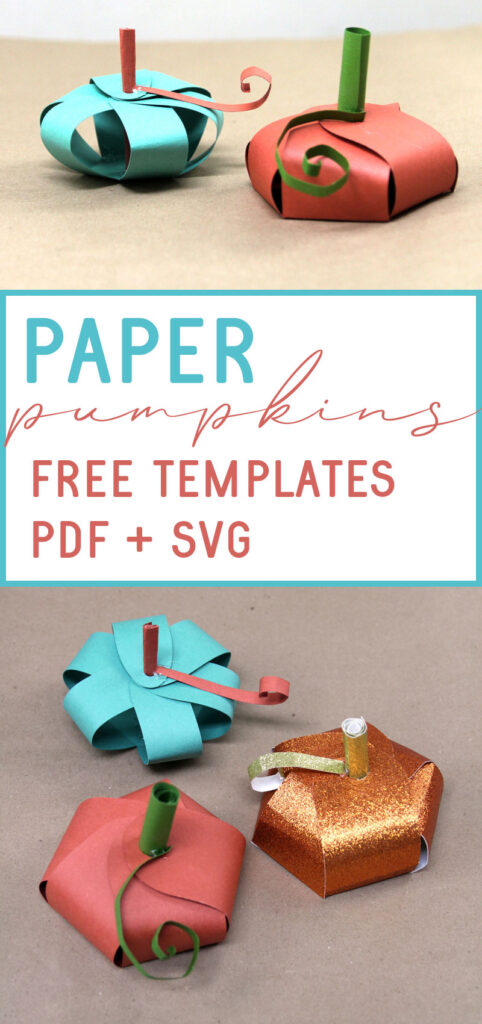
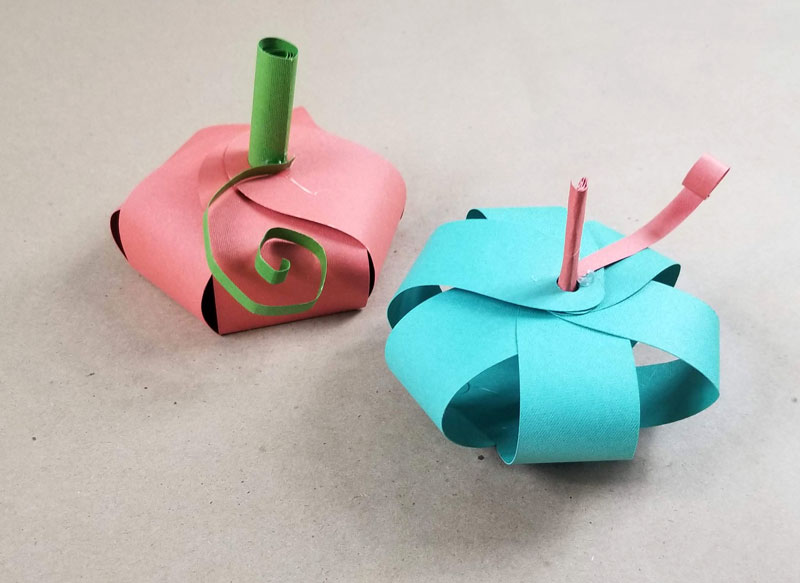
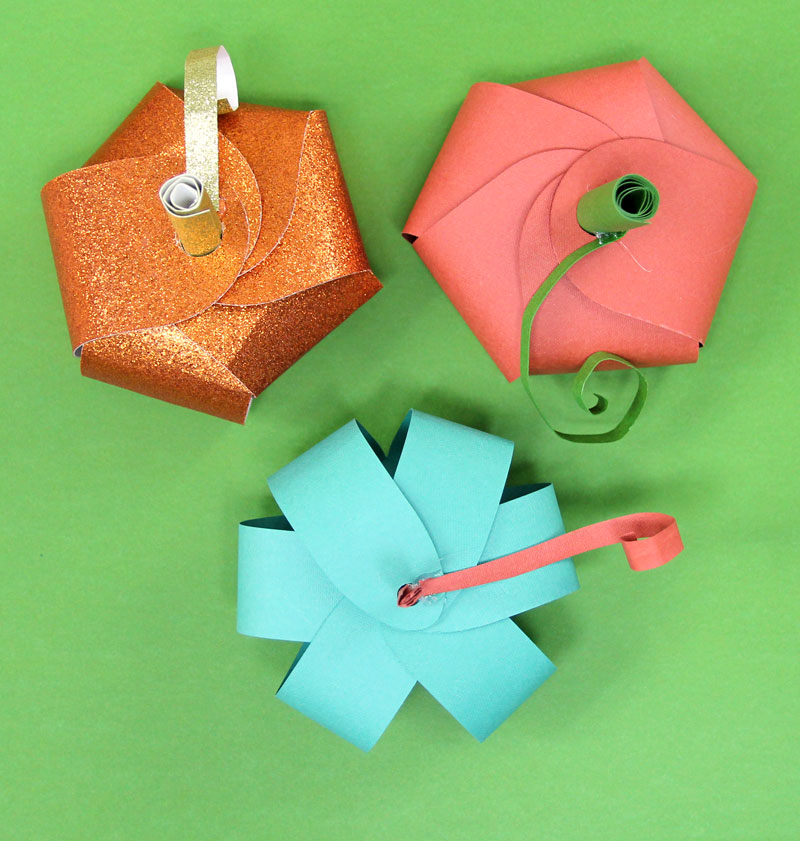
And finally, I used the pumpkin craft template to make card stock pumpkins as originally intended. These are fantastic for party decor, place settings. Try hand lettering a name on one of the sides before assembling and using them as place cards.
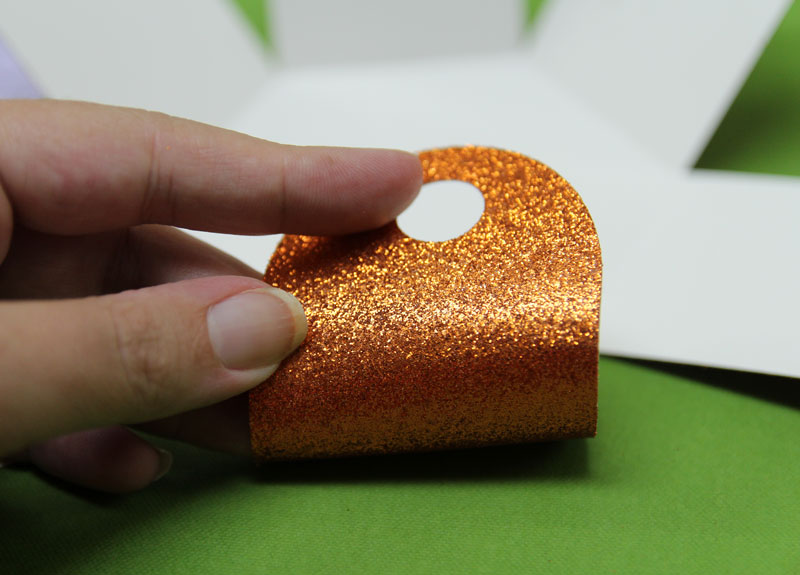
I made some with glitter cardstock too. Since it’s really thick, it doesn’t bend easily and has a really sharp look when you’re done.
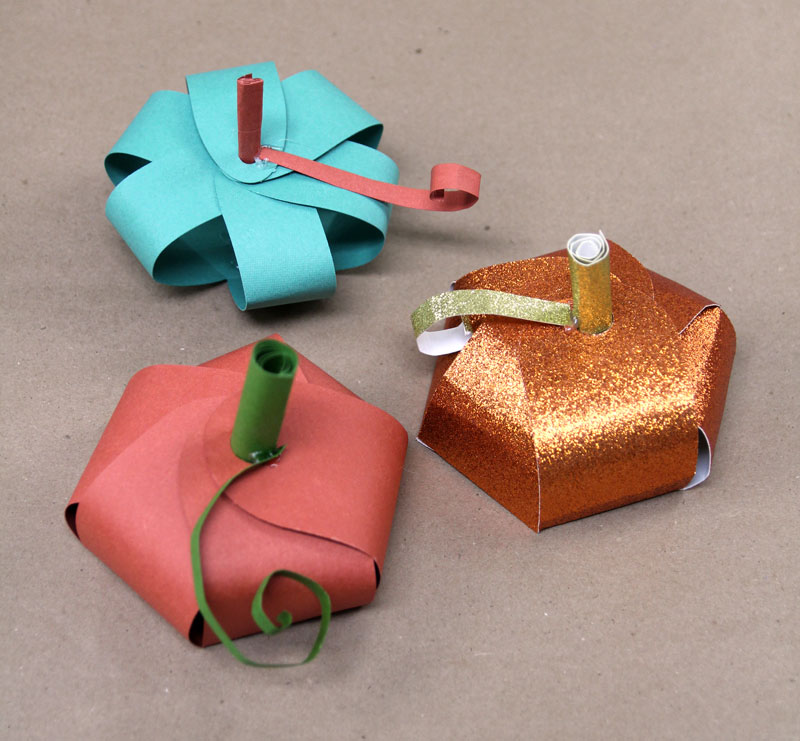
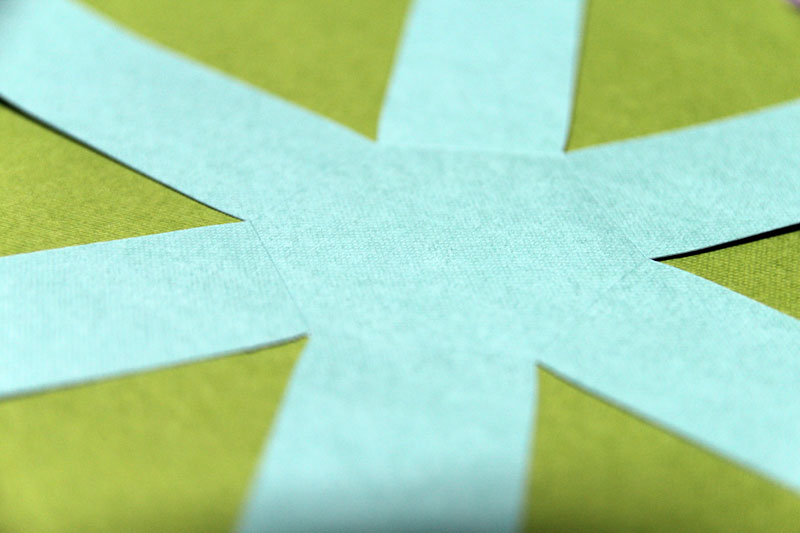
When making this with card stock, the pumpkin craft template do include a score layer. That means that you can score the hexagon at the bottom for really sharp lines and a more intentional shape.
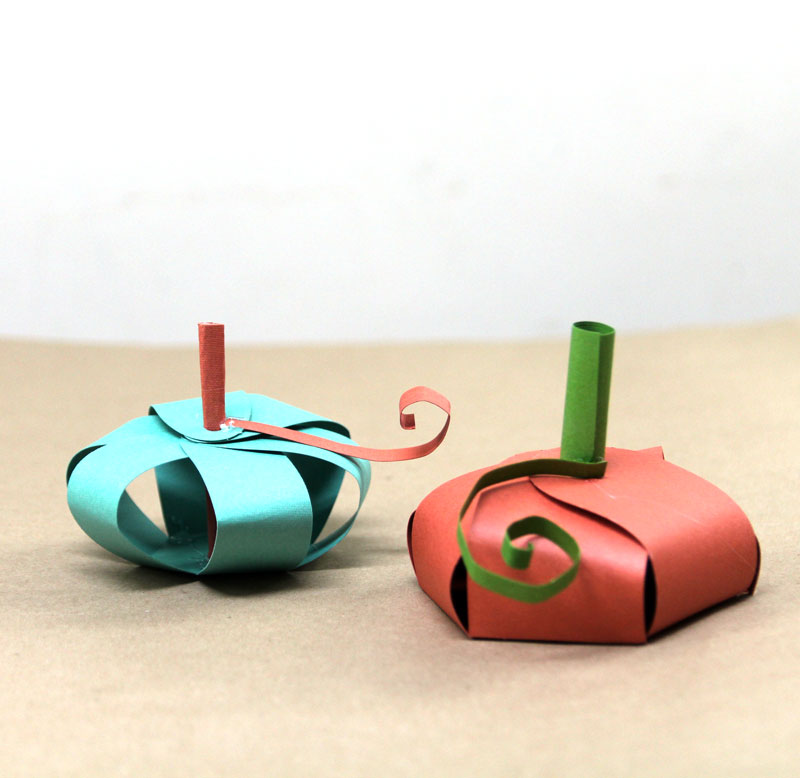
When you download your pumpkin craft template (below), you’ll see that you get two sizes – a thin one and a thick one. The thin one has more of that loopy look that’s popular in crafts now. You can see what’s in the center.
The thicker one has a spiral look that overlaps. You don’t see the inside.
I created thispumpkin craft template as an SVG for cutting machines, but I also threw in a PDF version for those of you who need to cut by hand!
Download the free pumpkin craft template here
You’ll receive a ZIP folder with the SVG (for machine cutting) and PDF (for hand cutting) files. To unzip files, follow these instructions.
To download: enter your email address in the form below and submit. Your download will arrive in your inbox. By submitting your email address you’re consenting to receive email updates from me and me only. I will not share your information with anyone.
If you have any issues or need help, please reach out to me at menucha@momsandcrafters.com.
What you need to make Cricut fall decor from this pumpkin craft template
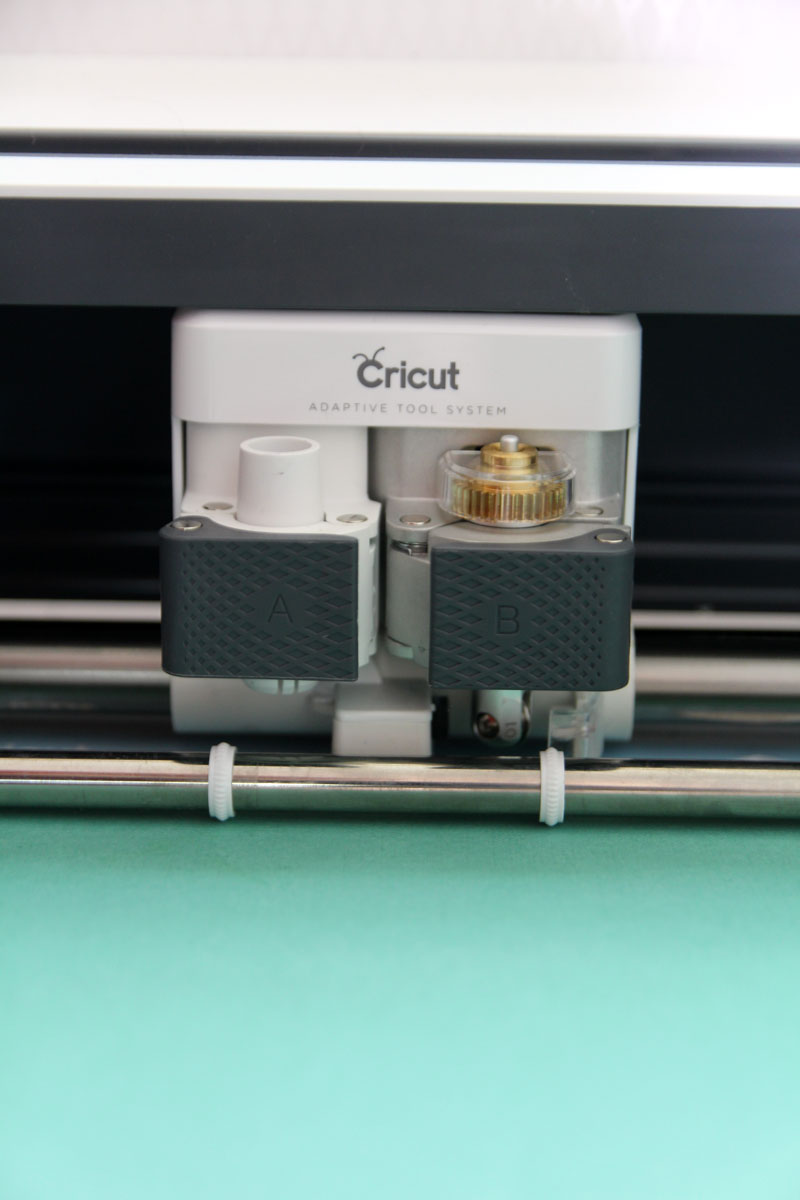
Cricut Tools
Materials
- Faux Leather + Vinyl:
- Felt:
- Cardstock:
- Leaf Green for all pumpkin toppers, etc
- For pumpkins, go by your preferred color. I used Dark Orange and Teal-Green
- Glitter Cardstock from the Classics sampler
- Hot glue gun and glue sticks
How to assemble the pumpkin craft template
Setting up your file in Design Space
1. Upload your file and if needed resize your template. Ungroup it so that you can edit each one separately. If you’re making this from a score-able material, change the line type of the center hexagon to “score”. Otherwise delete it.
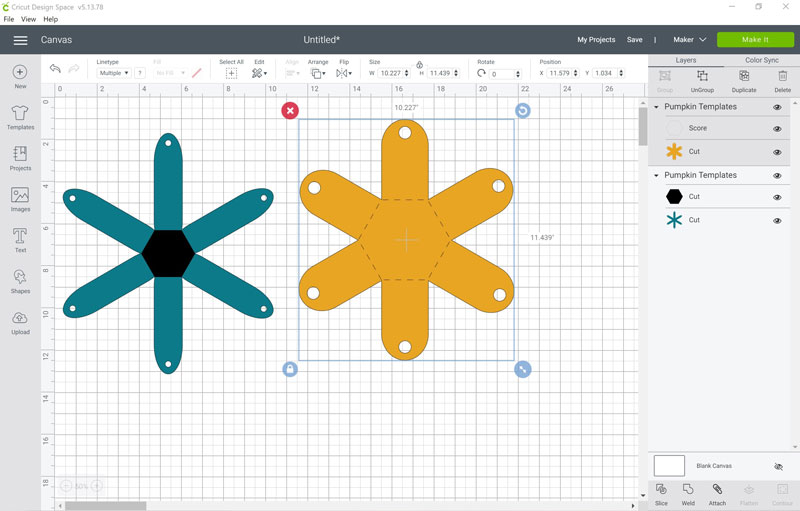
2. Select your template and score layer and hit “attach”
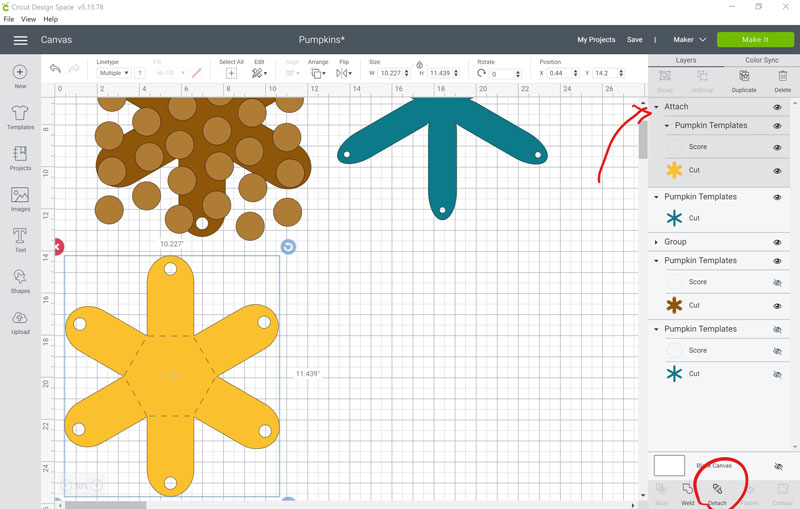
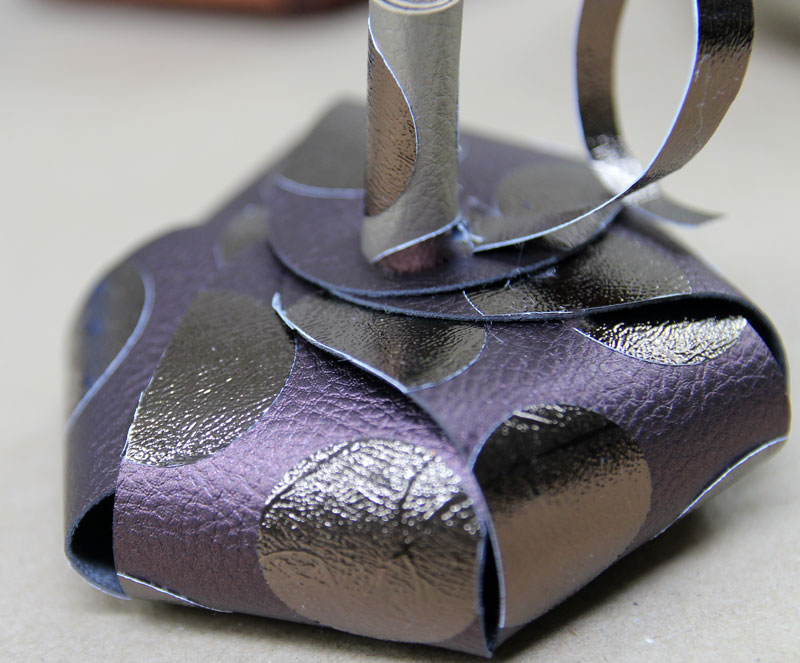
3. Add your design. I did not premake designs as part of the template because this is YOUR time to get creative. Here, I made circles for a polka dotted pumpkin.
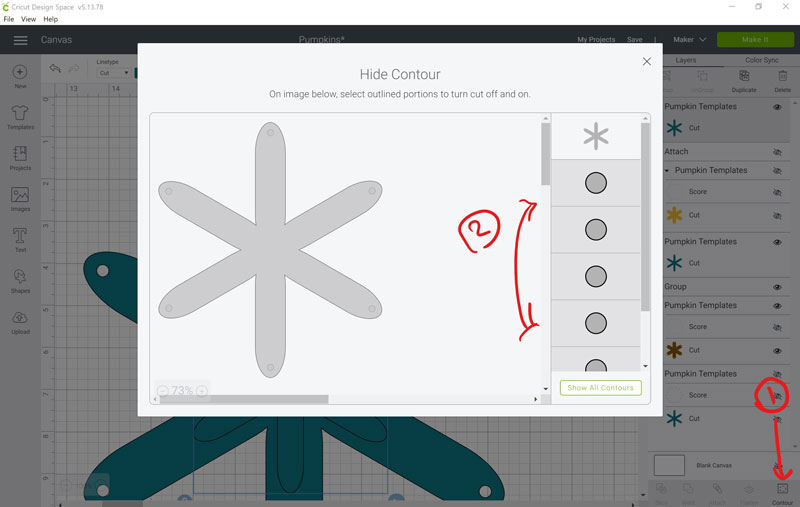
If you want to make a smaller template shape like I did on the “upside down” pumpkin, duplicate the template, hit “contour” and disable all the holes.
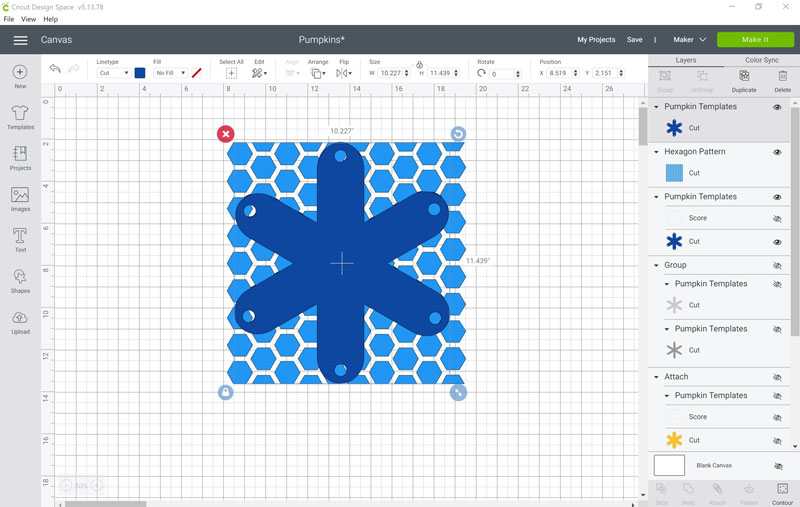
If you’re an Access subscriber, you have access to loads of Cricut patterns (read: is Cricut Access worth it?) The honeycomb pattern I show here is free for everyone.

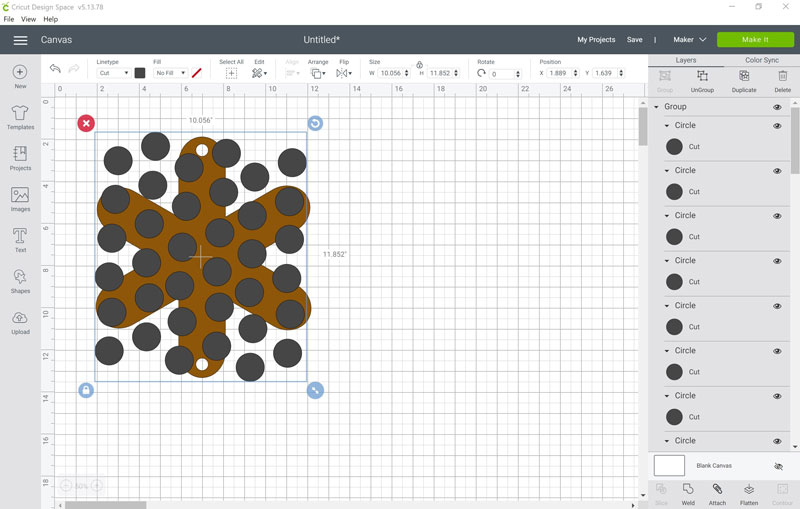
4, Place your pattern over the template and resize. Duplicate the template.
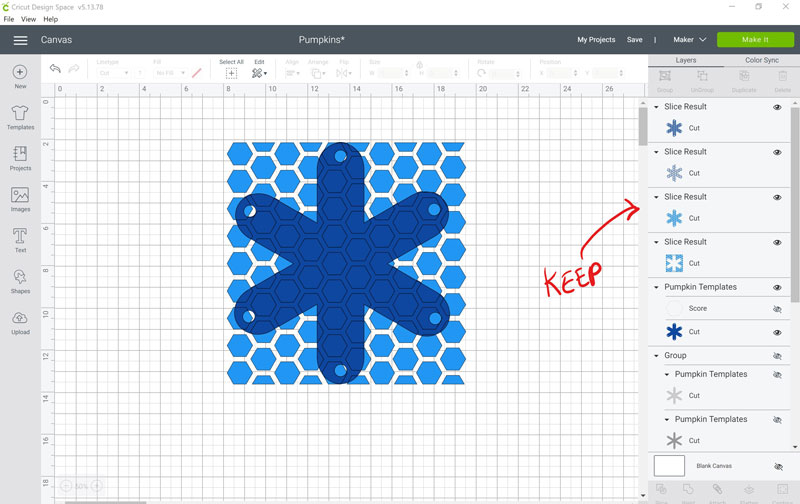
5. Select the top template and the pattern and “slice”. From the four layers selected, keep only the pattern that is shaped like the template in the color of your vinyl. Delete the others.
Hit “make it” when your project is set up and follow the machine prompts to load your materials and cut.
Cutting the Pumpkins
Different materials have different cutting needs, so as you cut your pumpkin craft template and embellishments, follow these basic directions.
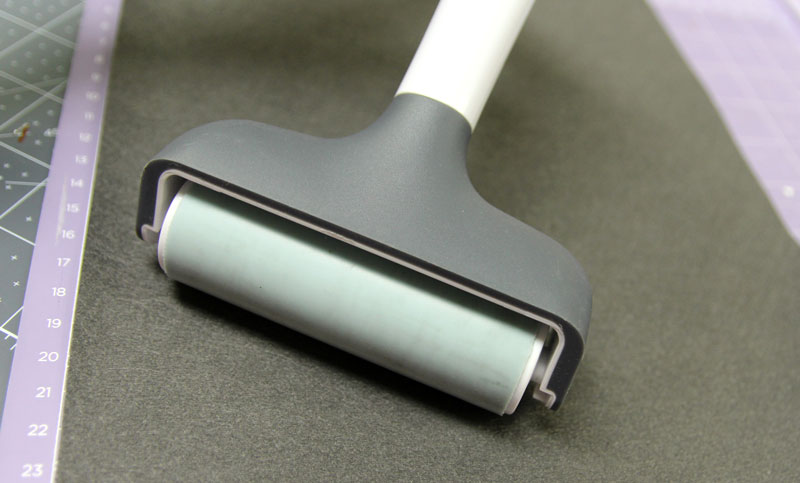
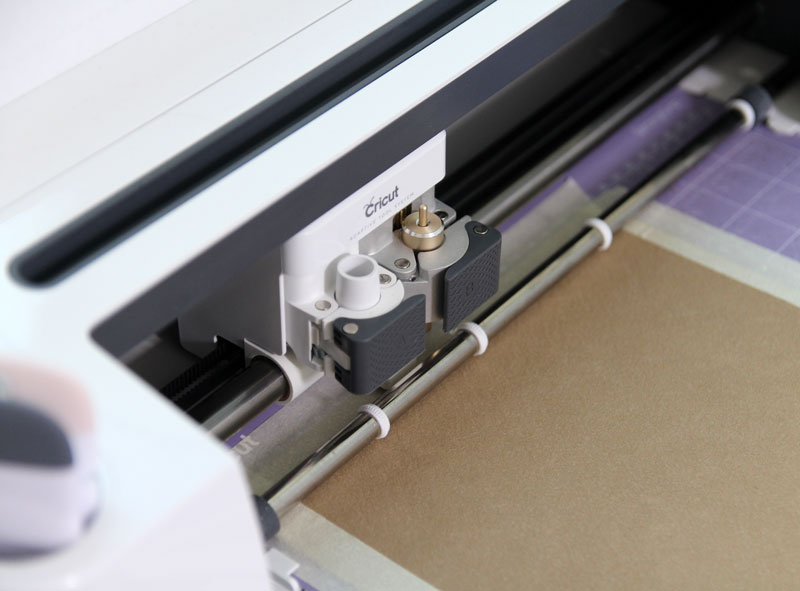
- Trim your faux leather to size. I like to use the Precision Cutting Kit to get a good measurement. Place it on the StrongGrip mat face down and use your brayer to make sure it’s adhered well.
2. Tape your material around the edges, load your fine point blade, and cut!
3. For vinyl, use the StandardGrip mat. I like to use a scraper to remove any air bubbles and make sure it’s attached well to the mat and the XL scraper not only does it quicker but also does a more thorough job.
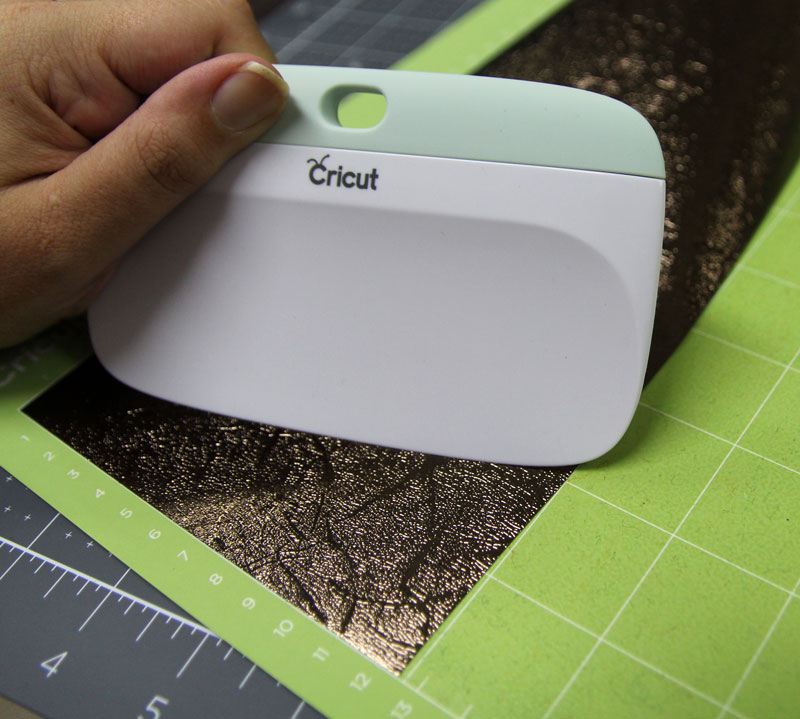
Cut your vinyl right side up and untaped…
4. For cardstock, use the LightGrip mat. If you’re scoring as well, you’ll start with the scoring tool and then load your fine point blade.
5. You can cut simple embellishments by hand. I used the Precision Cutting Kit to make the brushed metal stripes on my largest faux leather pumpkin.

Assembling your DIY Fall Home Decor
1. To transfer your vinyl design from the carrier sheet to the faux leather, use transfer tape and the XL scraper. Check out this personalized lunch box for a step-by-step tutorial on how to do this if you haven’t tried it yet. Textured vinyl like the shimmer pictured here would require StrongGrip Transfer Tape.
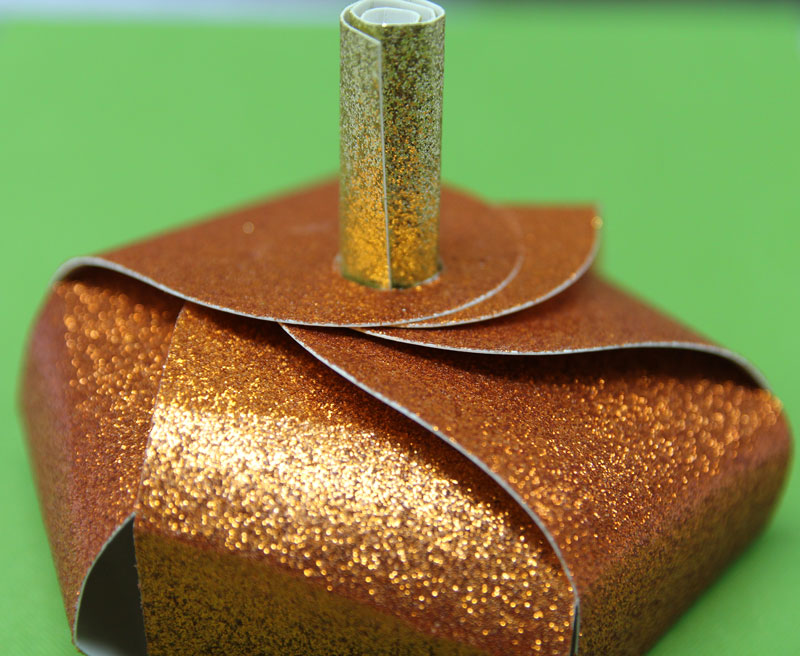
2. To make a stem: Cut a scrap of faux leather (it can be from your cut scraps) about double the height you want your stem to be. The width will depend on how tight you roll it – you can trim this later. I didn’t create a template for this either because the dimensions depend on too many factors (thickness of material, how tight you roll it, how you want it to look…) and it anyway doesn’t need to be a neat cut.
3. Roll it so that it fits somewhat snugly (but not too tight) into the hole of your template. Trim any extra and hot glue the edge shut.
4. Start with the side that came out best. Place your stem into the circle from the outside toward the inside. If you made it tight enough it should really hold (if not, you may need some glue in the end. Continue sliding the stem into one hole at a time.
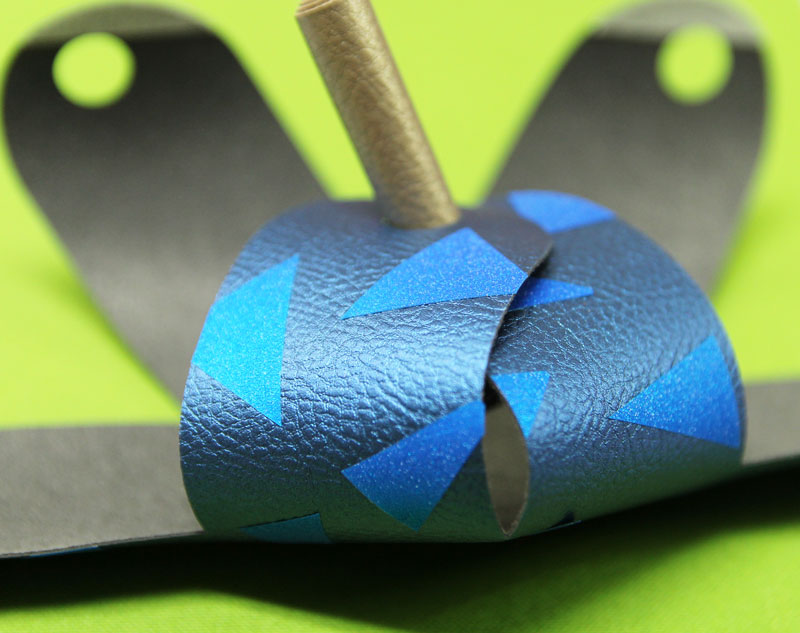
5. The last side will need to be threaded into the pumpkin and might require a little more manipulation. When you’re done, adjust the sides as needed, and straighten out your stem.
Variation: Felt pumpkins
You can make these from felt too! Just cut it using a fine point blade if you’re using Cricut brand felt (make sure it’s clean before you use it or it won’t cut nicely). If you’re doing mini ones for hair accessories like I did, you will probably do only one roll of the stem. Glue the stem in place.
Variation: Card stock pumpkins
1. Fold your pumpkin on the score lines.
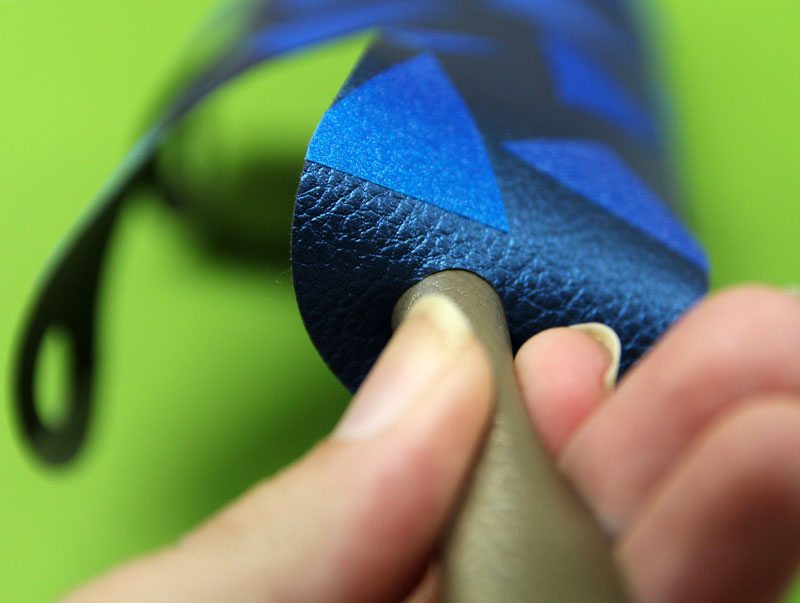
2. Curl up the edges a little with your fingers.
2. Make your pumpkin stem as you did for the faux leather pumpkins.
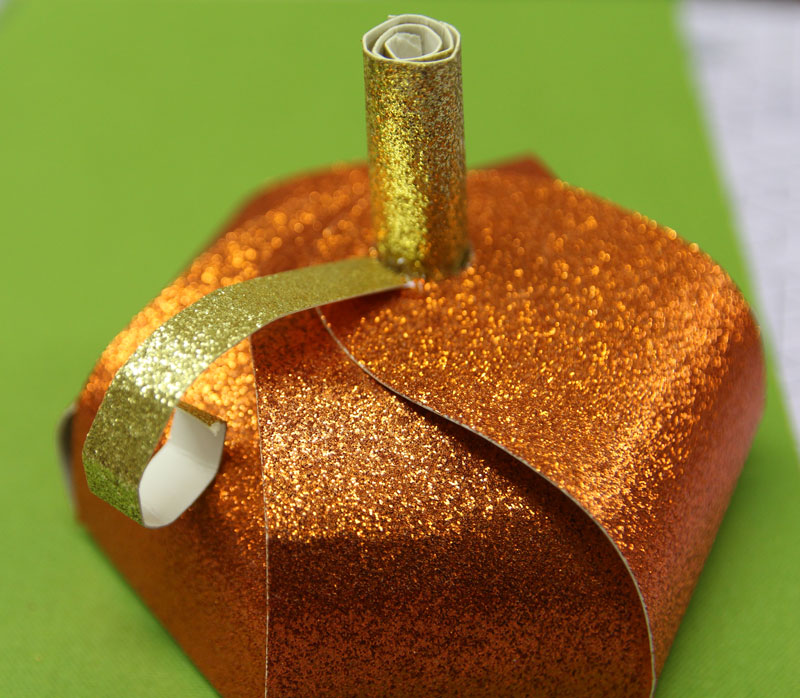
3. To add vines, just cut a little strip of card stock and curl it around a pencil – or with your fingers – leaving the end flat.
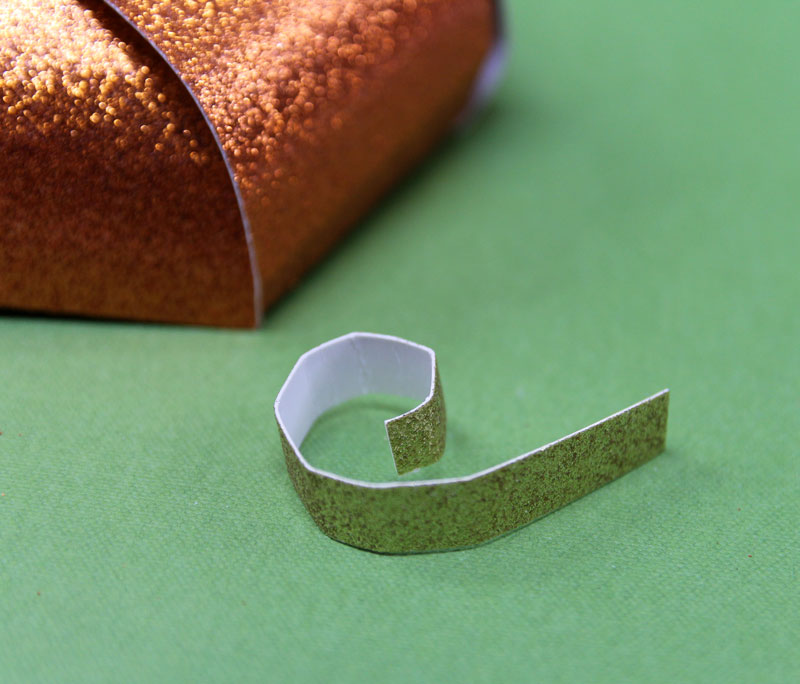
4. And hot glue it near the stem!
I hope you enjoyed using this free pumpkin craft template to make some gorgeous fall decor! Which version are you making? Comment below!
Want more cool ideas for fall?! Check these out!
[ad_2]
Source link


