
[ad_1]
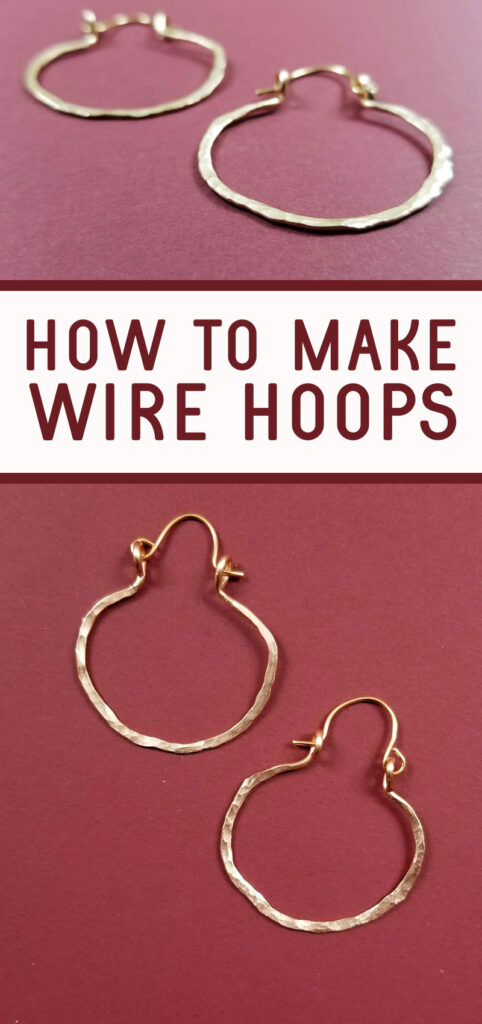
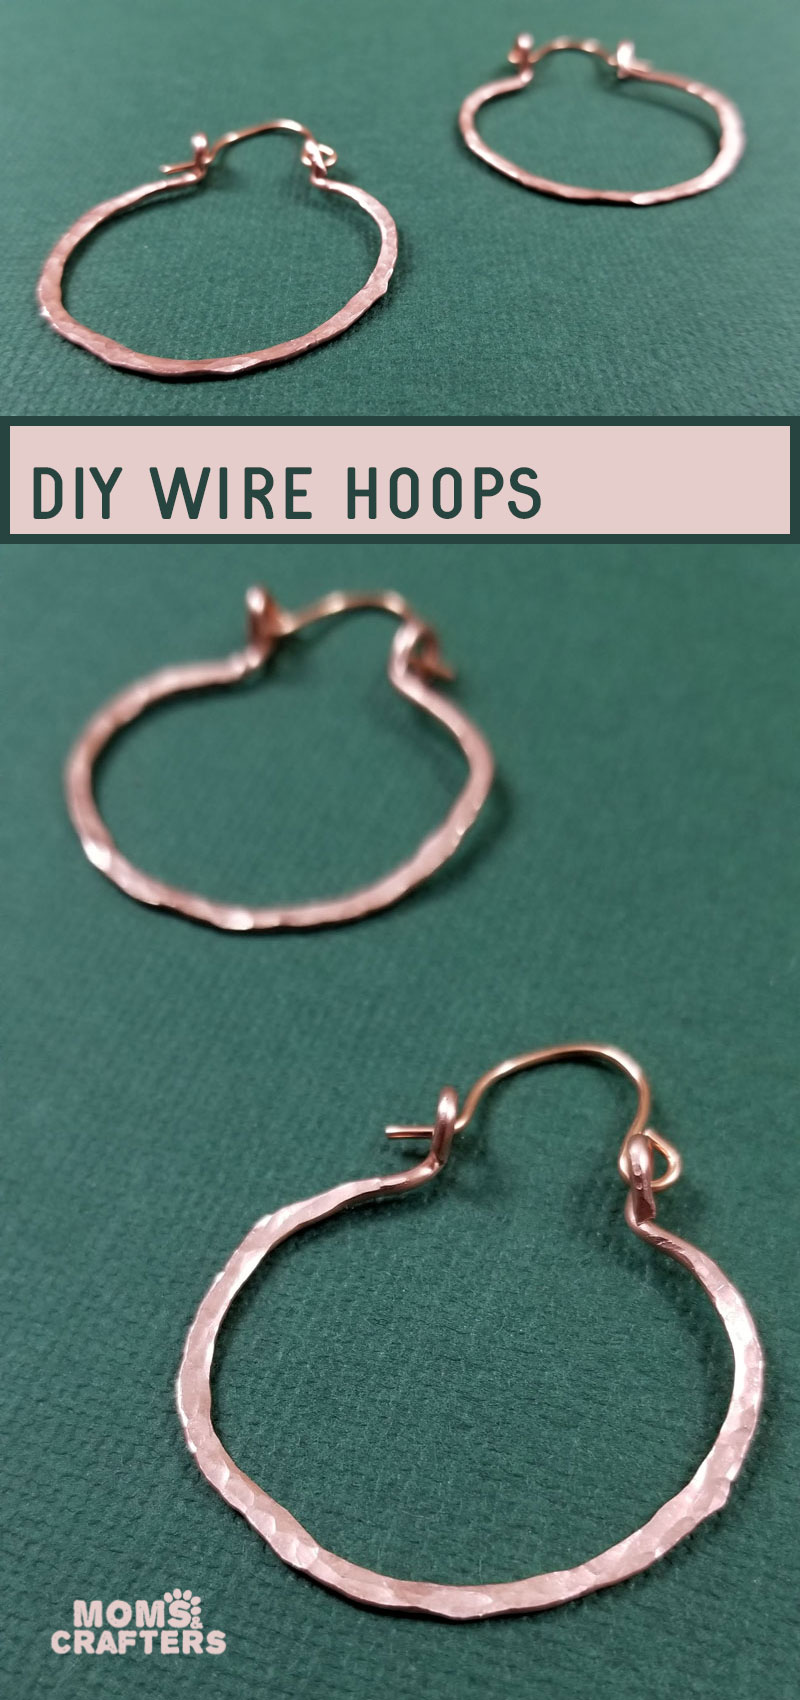
There are so many “real metal” jewelry ideas that can be made without advanced metalsmithing skills, so I’m thrilled to share with you today a very basic, beginner tutorial on how to make hoop earrings with wire. Before you start, you can check out this full tutorial on copper jewelry making. This post contains affiliate links.
I’ve shared so many unique DIY earrings and jewelry crafts over the years. Sometimes I just like to go back to some basic skills that can allow you to take your jewelry making knowledge to the next level.
Learning how to make hoop earrings with wire is much easier than you might think. No soldering, no sawing – just use some basic jewelry skills.
Skip to the part you want to read:
My secret power when it comes to making these types of jewelry crafts is hammering. When I made these hammered wire heart pendants I shared some basics, which I’ll do here as well.
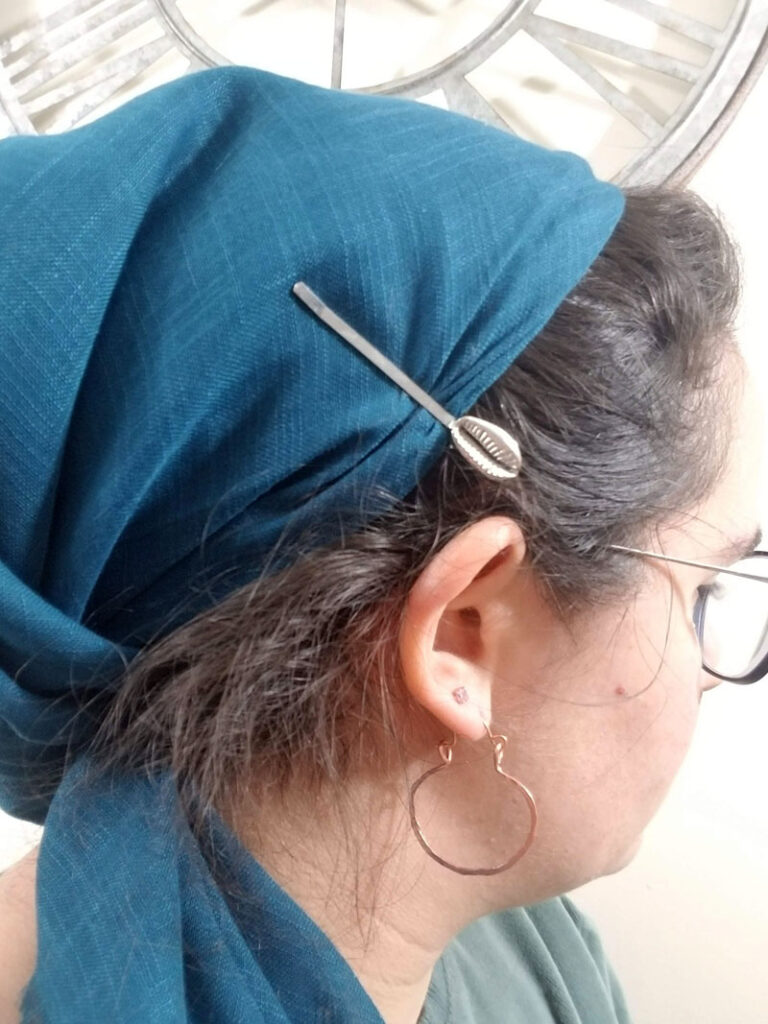
The same goes for these DIY metal earrings where a single piece of wire makes up the body of your earring, giving you a professional, polished look that’s easy to achieve.
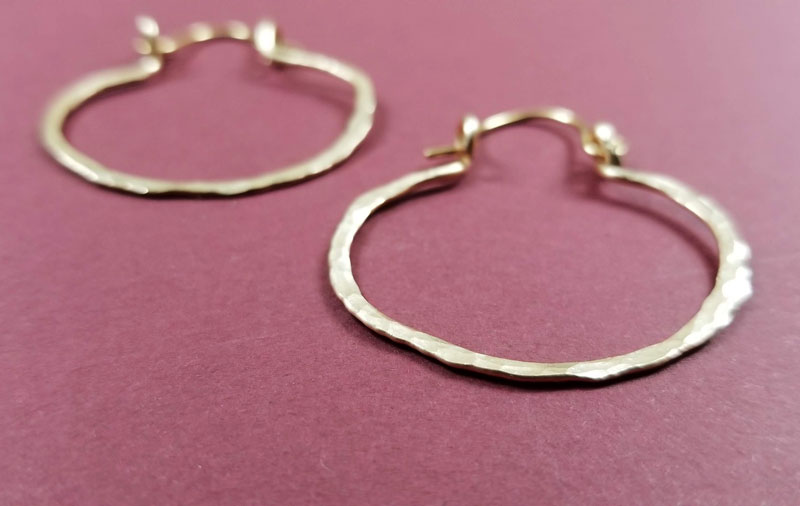
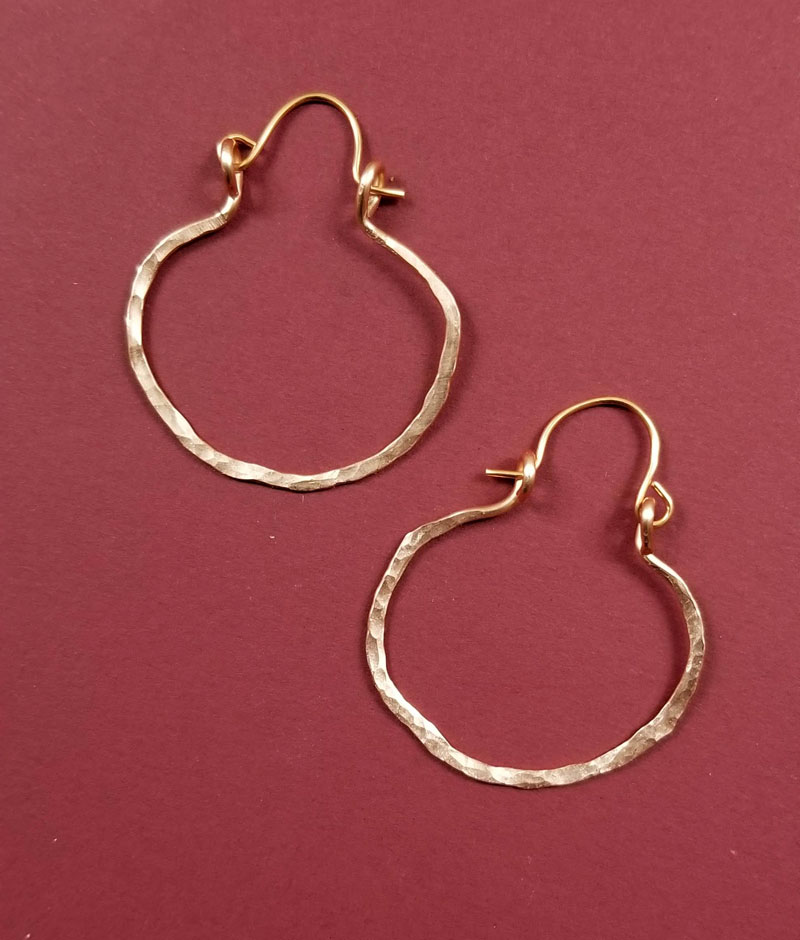
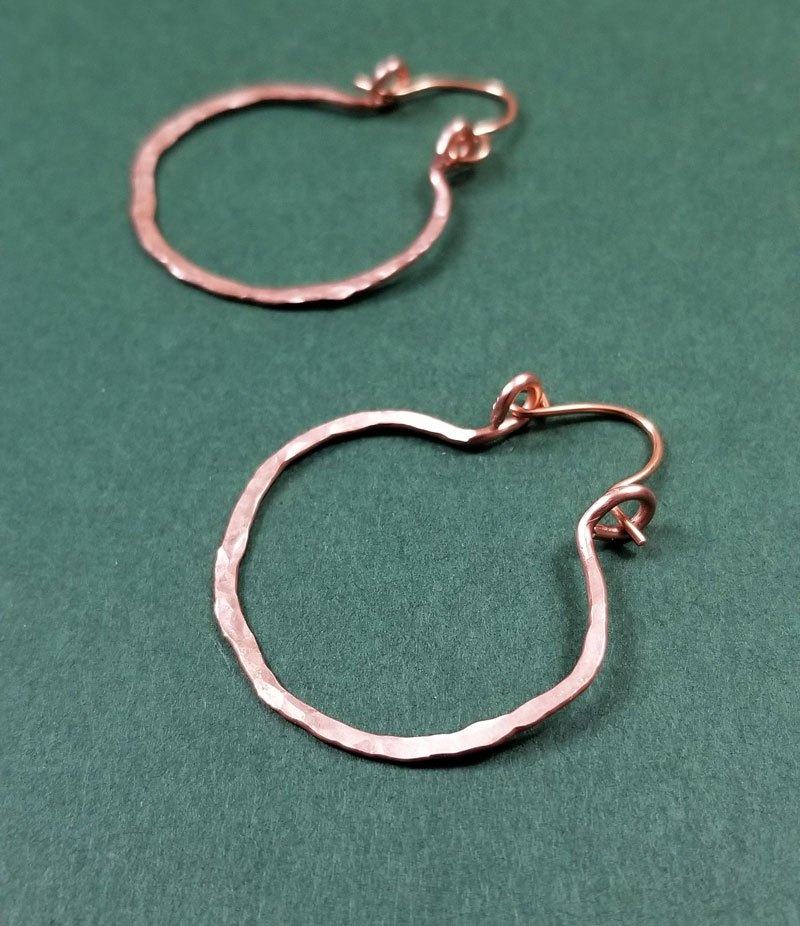
When you learn how to make hoop earrings with wire this way, you’re opening up a new level of possibilities. You’re seamlessly combining two pieces of wire in different thicknesses so that your piece really works well.
2-piece Hoops vs. 1-piece hoops
While you can make this with a single piece of wire (which is a tutorial I’ve already photographed to maybe share one day) I prefer the two-wire method and prioritized it.
The reason for this is as follows:
- There are some limitations when making earrings as to the thickness of wire you want to put into your ear. It needs to be solid enough to hold its own, but not too thick that it irritates. I find that 20 gauge works best for me, but for more sensitive ears you may want 21 gauge.
- Most wire jewelry designs are easier to make with dead soft wire. However, earwires will hold their shape better if you use half-hard wire. Making it in two pieces allows you to go thinner on a half-hard wire, while using a thicker dead soft wire for your design (in this case the hoop). Your design will be hardened by hammering it anyway.
- I made the hoop using thicker 18 gauge wire so that it has more substance and hangs better. I can do this because I can make the ear-piece separately.
- And finally, a two-piece design gives the hoop a bit of dangle instead of being a solid piece. I personally prefer this on a smaller hoop.
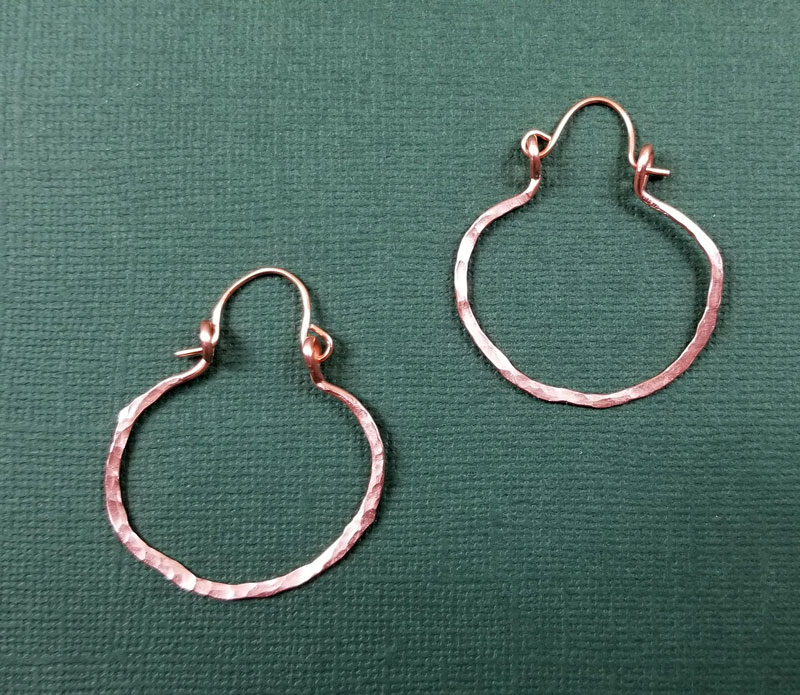
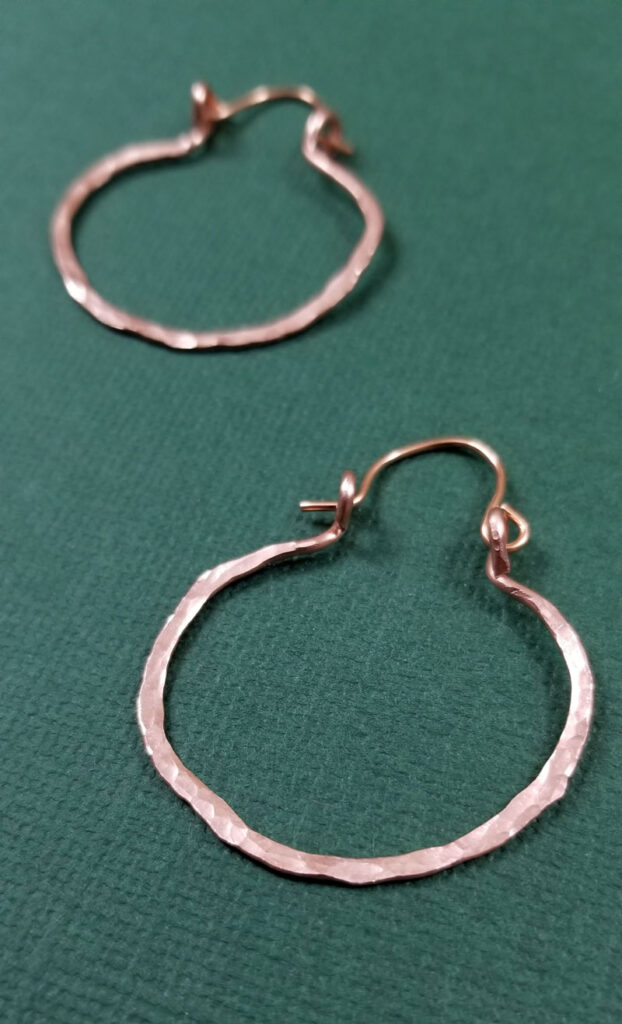
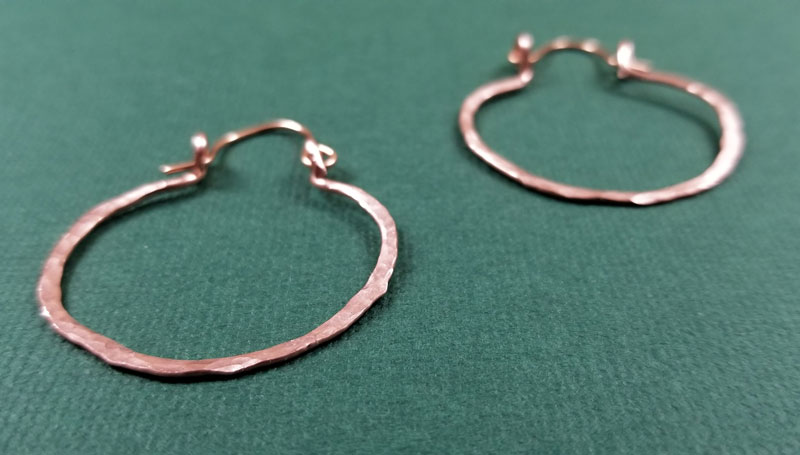
These DIY wire hoops have a big of a lyre harp-like shape which I absolutely love!
And if you want to learn a jewelry making skill that is fun and endless, learn how to make DIY leather earrings!
What you need to make wire hoop earrings
How to Make Hoop Earrings with Wire
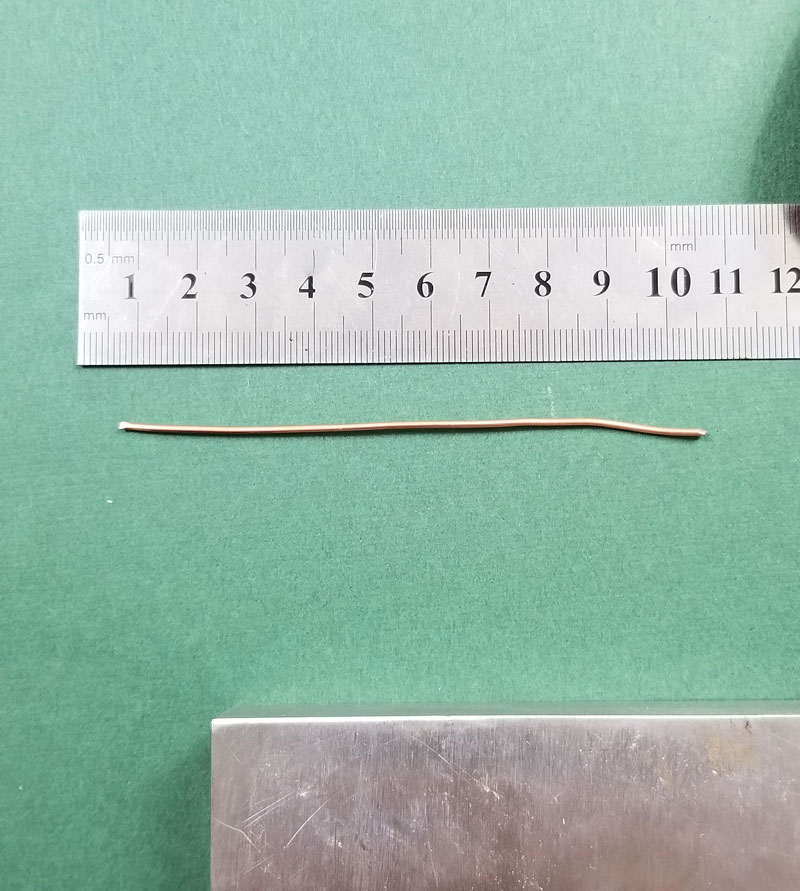
1. Cut Wire
Cut your main hoop wire (18 gauge) to your desired size – mine was 10 cm.
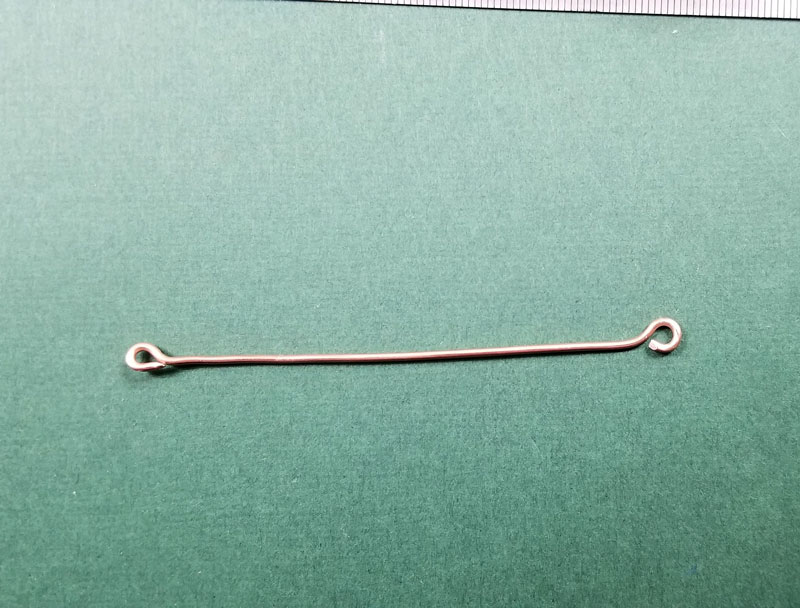
2. Basic loop
Make a basic loop on each end. If you’re not sure how, learn how here.
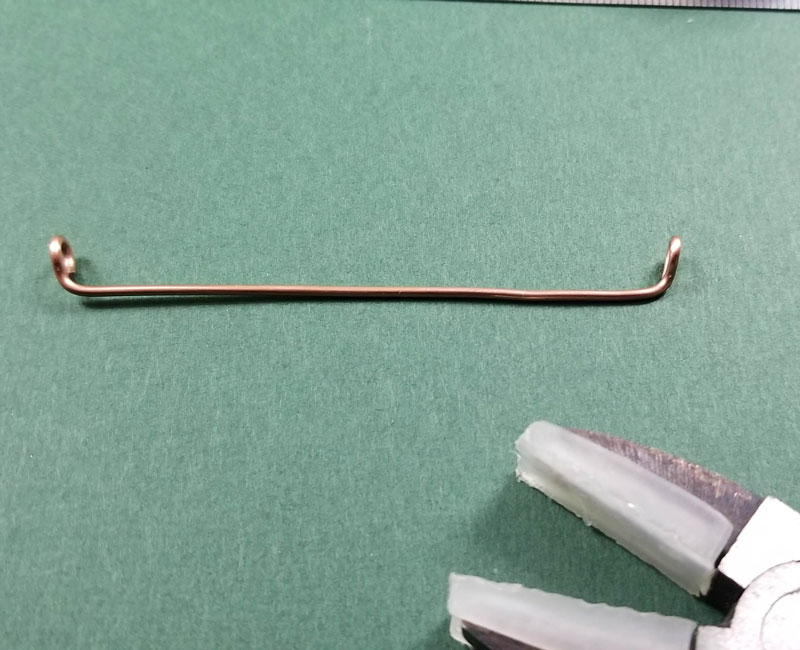
3. Bend ’em upward
Bend each loop upward at the base so that the openings of the loops face each other. Using nylon jaw pliers for this part ensures you don’t nick or mark your wire.
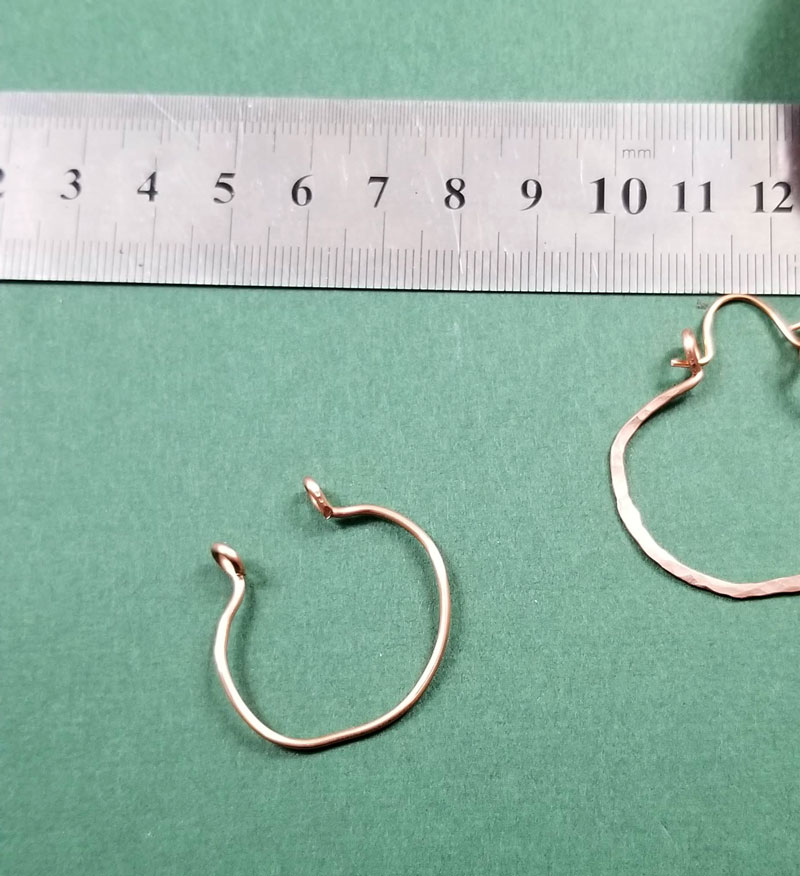
4. Form a circle
Curve your wire into a circle so that the two loops continue facing each other, only much closer. The opening should be about what you want the opening for your earlobe to look like. Don’t worry if your circle isn’t perfect. I didn’t use anything to help me form the curve, but you can do it around a ring mandrel for better accuracy.
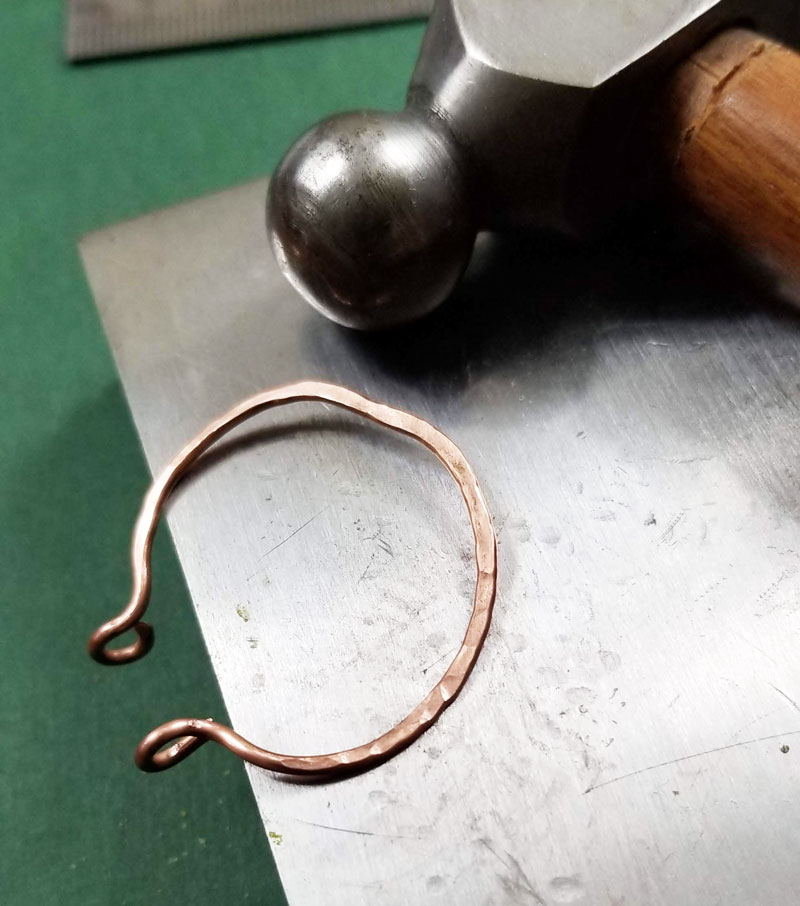
5. Hammer
Place your wire on your bench block so that the loops you made are off the block and safe from your energy… and let that energy out! Hammer to flatten your hoop, working with how it responds to your hammering. To add texture, hammer with the ball side. If your wire curves, flip it over, and hammer that way.
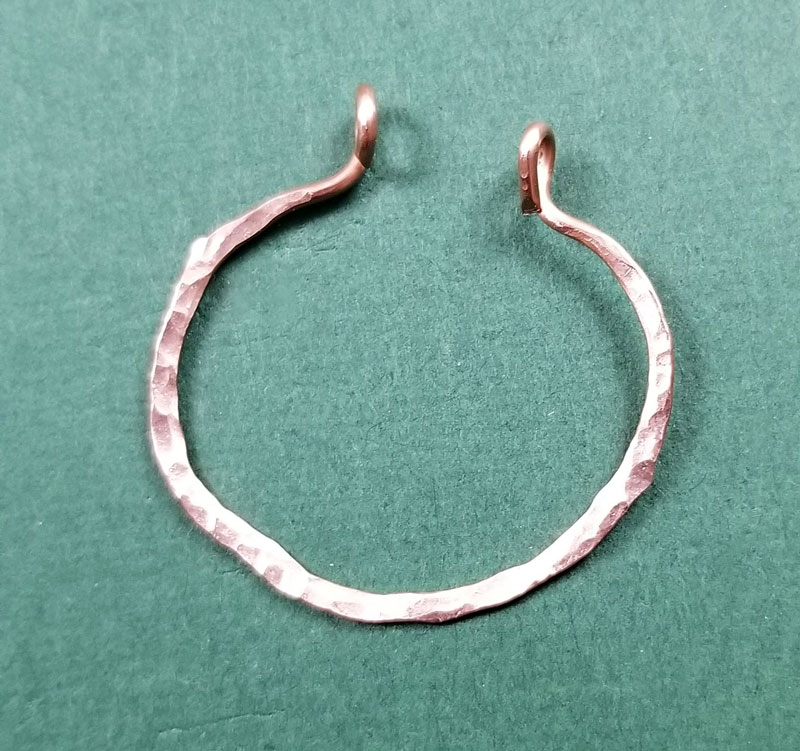
Keep hammering until you’re satisfied. Once you’ve hammered, the slight imperfections in shape don’t matter anymore – it just adds to the organic, textured look of your hoops.
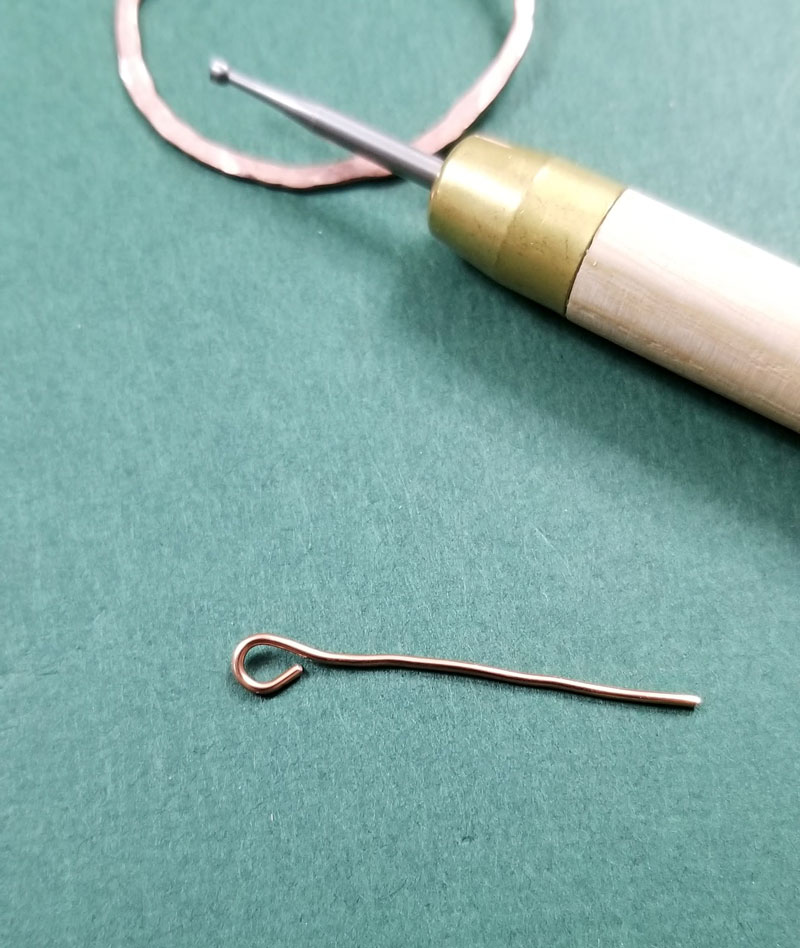
6. Make Earpiece
The next step is the earwire that goes through your ear. I didn’t give an exact measurement for this because preferences will vary. Mine is about 3cm. It’s a small piece of wire, so definitely play around with that you like – just make sure both sides are even.
Start by making a basic loop at one end of this wire. File/round the other end to remove any burrs left from cutting that’ll irritate the ear.
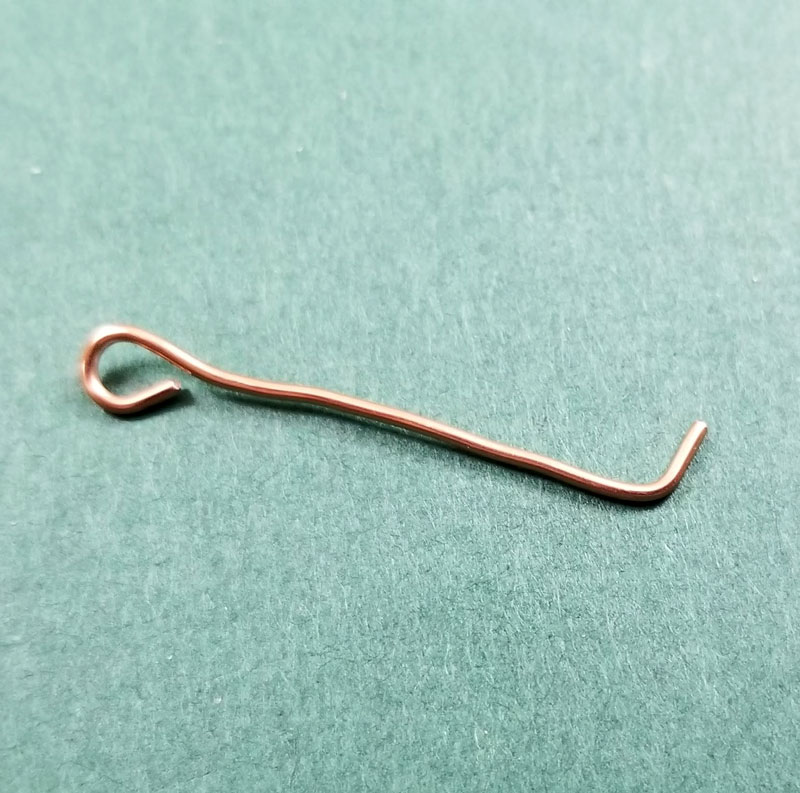
7. Bend end
Bend the other end (the one that you filed) to make it easier to close and to put into your ear.
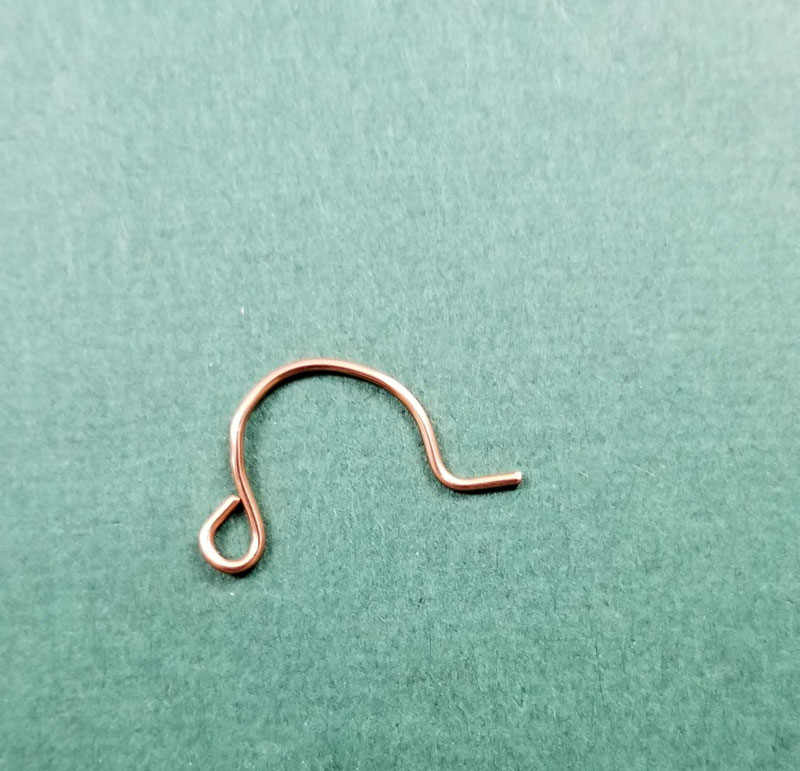
8. Curve
Curve your earwire to fit the size of the opening of your main hoop. The curve part should match the opening and be just the right size that you can close your earring – and it stays closed.
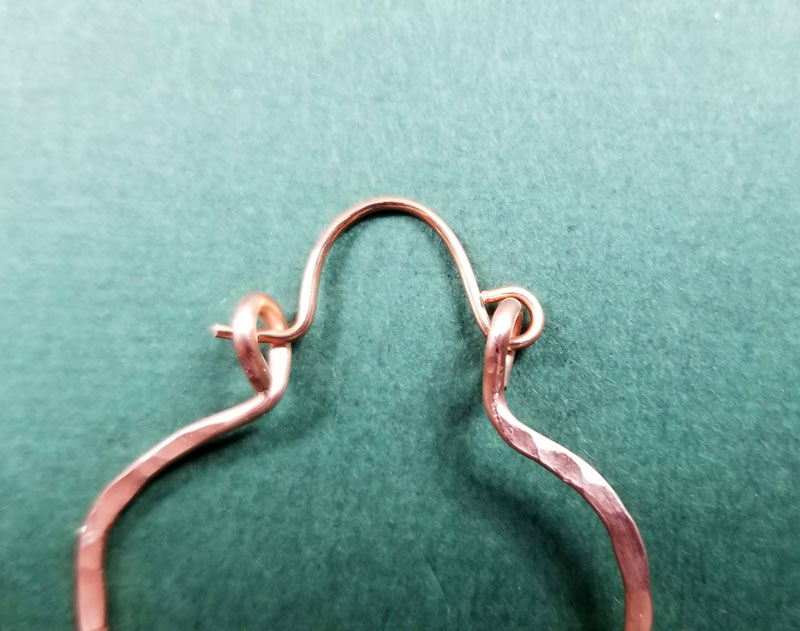
9. Attach your parts
Open your earwire loop and attach it to one loop on your hoop. The bent end goes into the other loop to close it.
Polishing up your act and making it sellable
I make jewelry for fun and to wear. However if you want to learn how to make hoop earrings from wire so that you can sell it at craft fairs, you’ll want to be consistent.
I recommend making a few pairs for yourself and your friends first so that you can really get the hang of it.
Play with a few wire types, a few hoop sizes, and really get your own feel for things.
Ask five jewelry makers how to do the same thing, you’ll get five different answers. So if you want to really make a brand with something basic like this, the idea is to get to the point where you have your own opinion on it.
Get your own style, your own feedback, and your own ideas for how to make hoop earrings with wire in the best way possible.
Want more like these DIY wire hoop earrings? Check out these cool ideas
[ad_2]
Source link