
[ad_1]
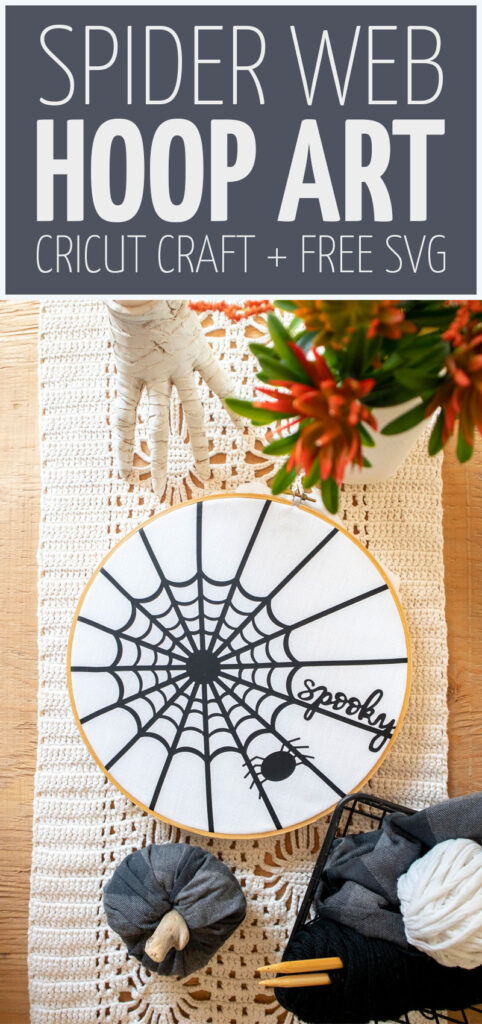
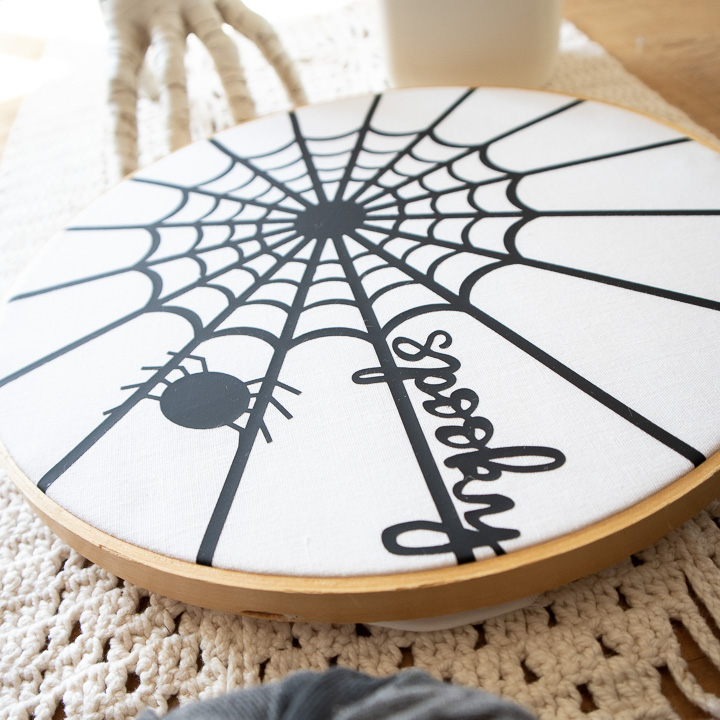
Create some Cricut Halloween Decor with a free SVG of a spider web! Use an embroidery hoop to make your art and then go and try my peeking monster SVG here for more spooky Halloween decor. This post contains affiliate links.

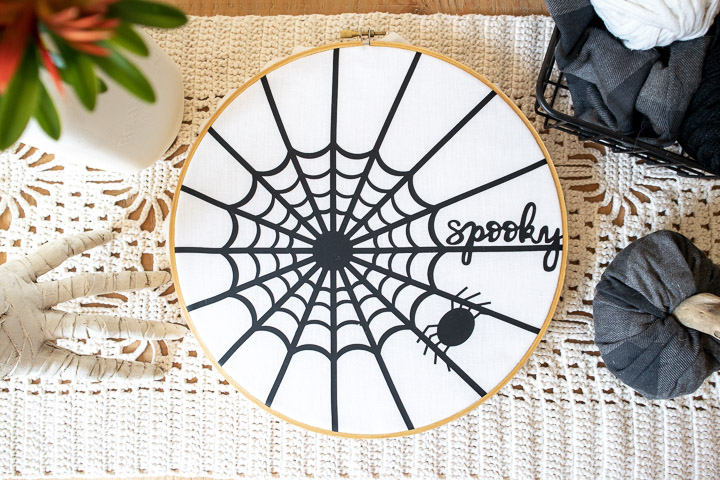
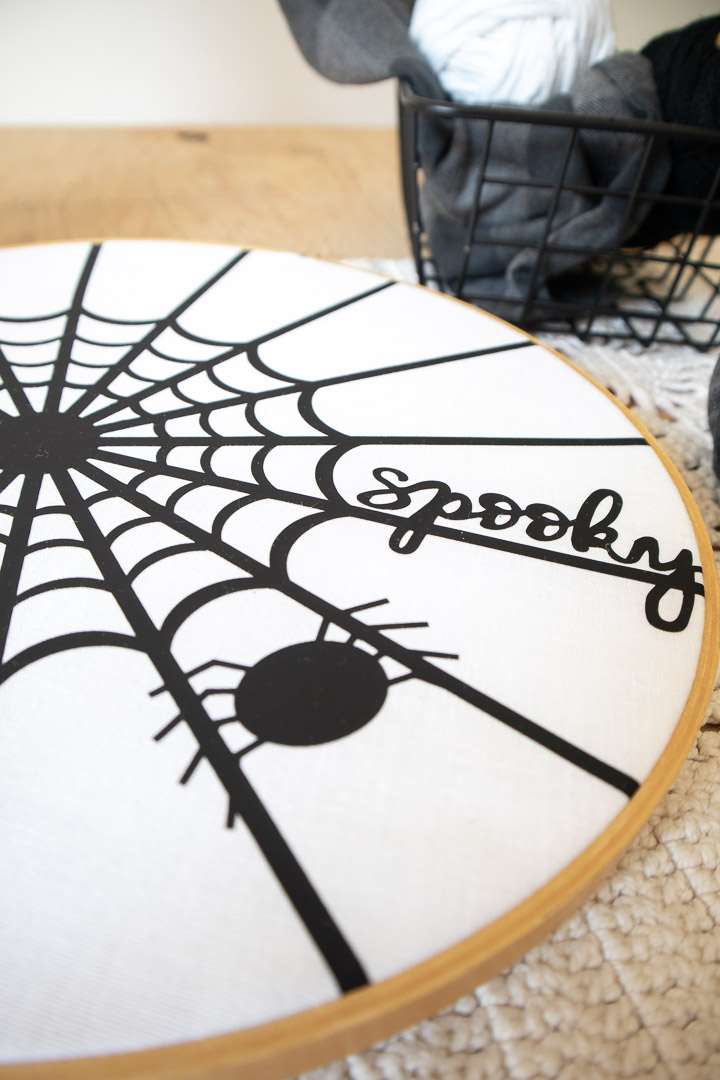
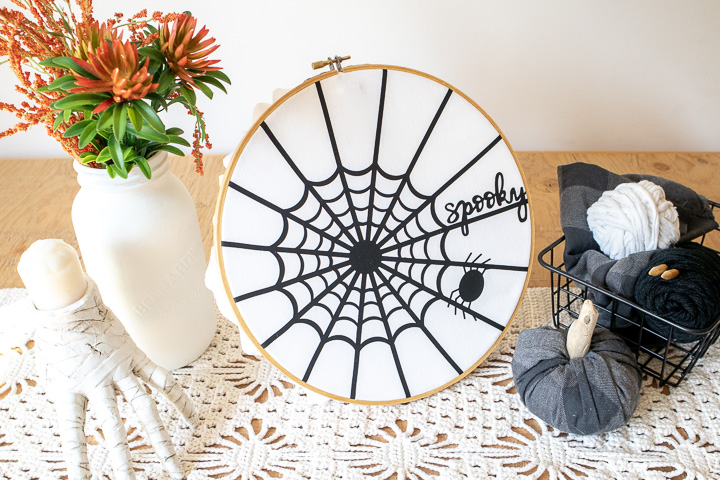
If you want a fun Halloween decor idea you can make with your Cricut, this one is so perfect! It’s got a touch of irony to it: it’s a spider web that says “spooky” but it’s really a simple, classy, neutral piece of decor, perfect for your front door or for perching on a mantel, bookshelf, or anywhere.
It adds a touch of Halloween spirit (see what I did there?) But it doesn’t get tacky or overwhelm.
The free SVG can be used in other Halloween decor applications as well. The hoop art is very easy to assemble, and the SVG is designed for use on a round surface, but you can work with wood rounds too, canvases, or whatever you want.
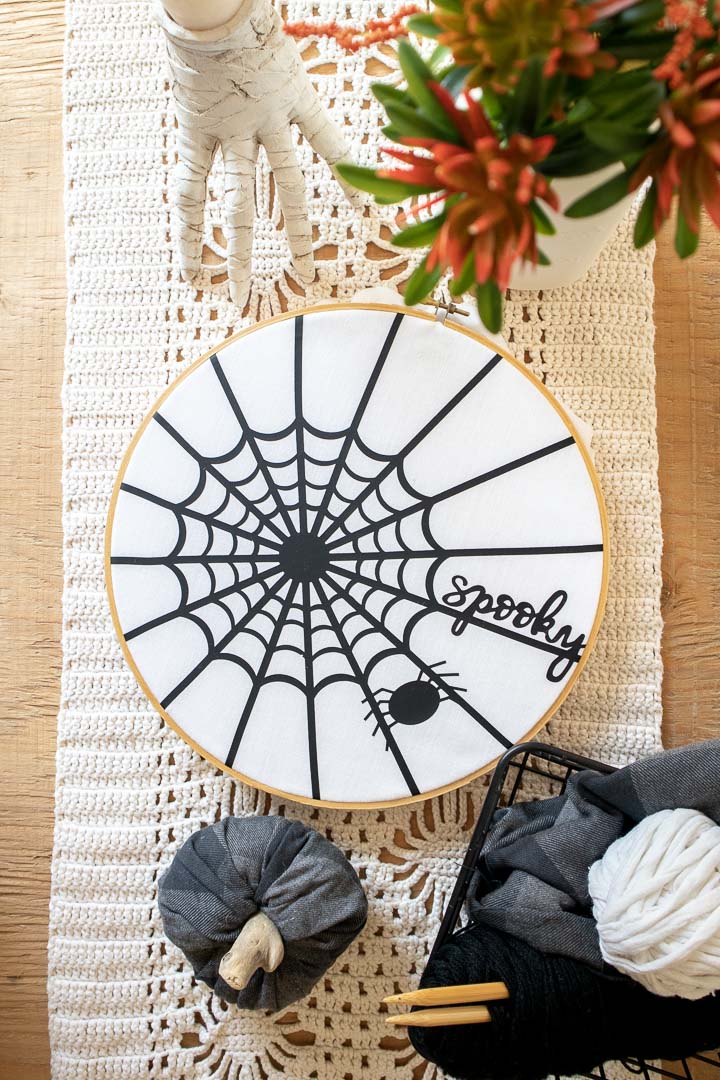
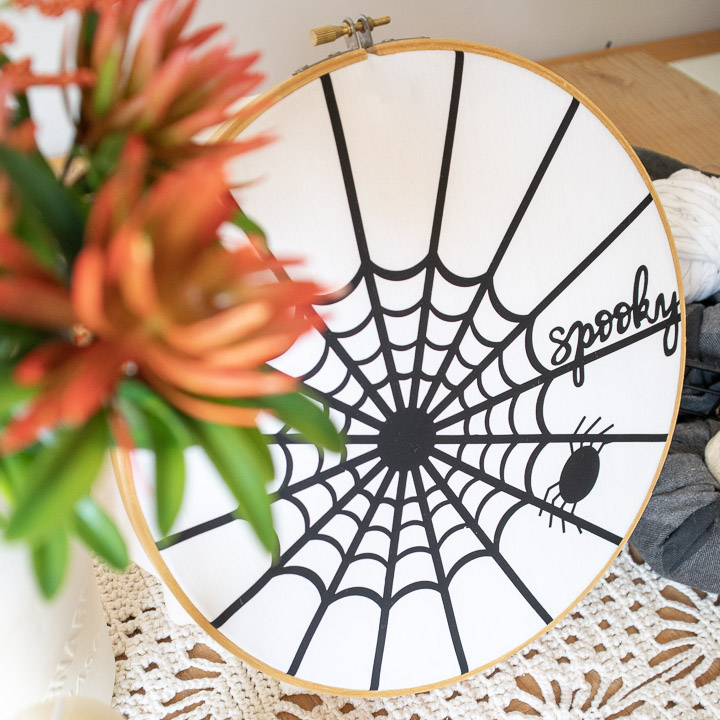
Start with black iron-on and a length of cotton fabric. The sample project is simple and monochromatic, but if you really want to add an extra touch, you can paint the fabric, use another color, or hang some spiders from string on the bottom macrame-style.
Download your free Cricut Halloween Decor SVG
You’ll receive a ZIP folder with the SVG. If you need help, this article can help you unzip your file (it’s really easy once you learn).
To download: enter your email address in the form below and submit. Your download will arrive in your inbox. By submitting your email address you’re consenting to receive email updates from me and me only. I will not share your information with anyone.
If you have any issues or need help, please reach out to me at menucha@momsandcrafters.com.
What you need for your Cricut Halloween Decor
How to make this Cricut Halloween Decor
Before you start
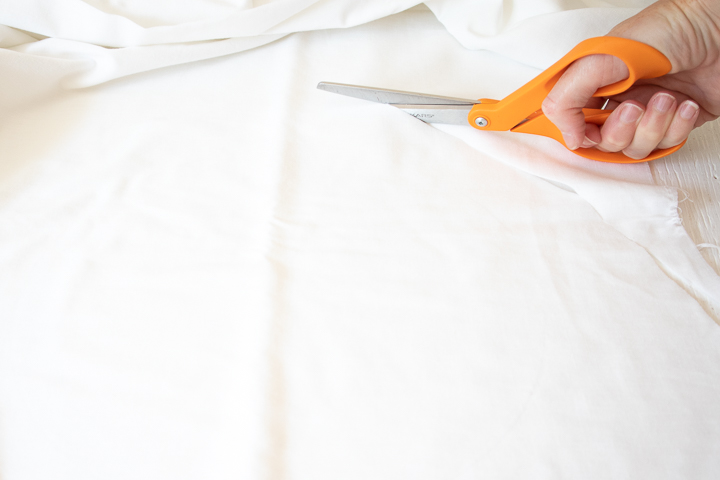
1. With a pencil, trace the outside of the embroidery hoop on the fabric.
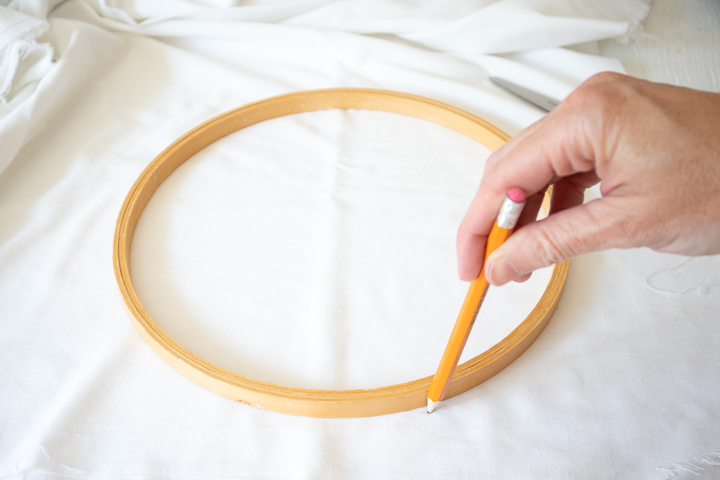
2. Leave about 2” around the pencil line and cut out a circle shape.
Setting it up in Design Space
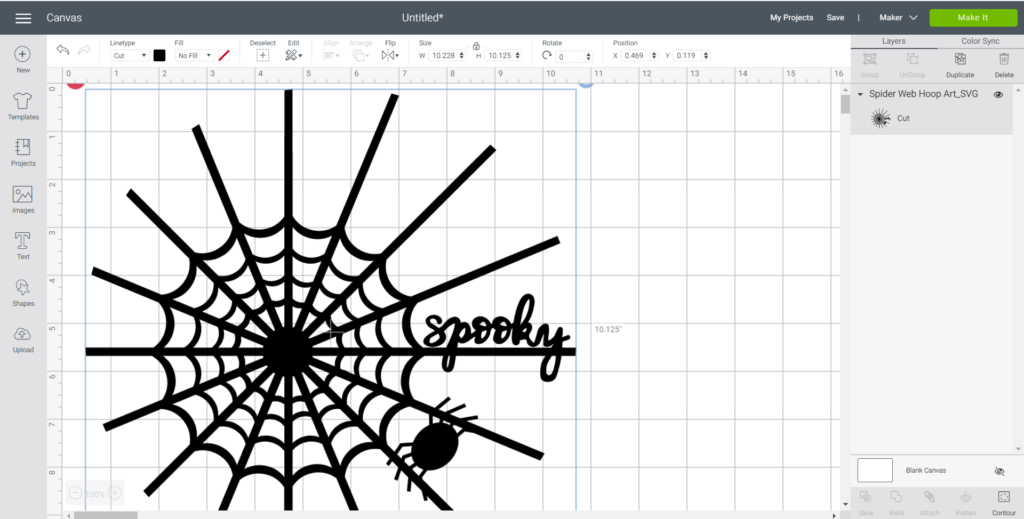
1. Open Cricut Design Space.
2. Click on the “+” sign to start a new project, opening up a blank canvas.

3. Click on the Upload button from the toolbar to insert the Spider Web SVG file onto the canvas.
4. Maintain the size at 10.125” across for a 10 inch hoop, or adjust by highlighting the image and clicking on the size box in the top toolbar.
Cutting your Halloween hoop art
1. Select “Make It” in the upper right corner to proceed with cutting.
2. Click the “Mirror” toggle button to on. This is necessary for ALL iron on vinyl cuts.
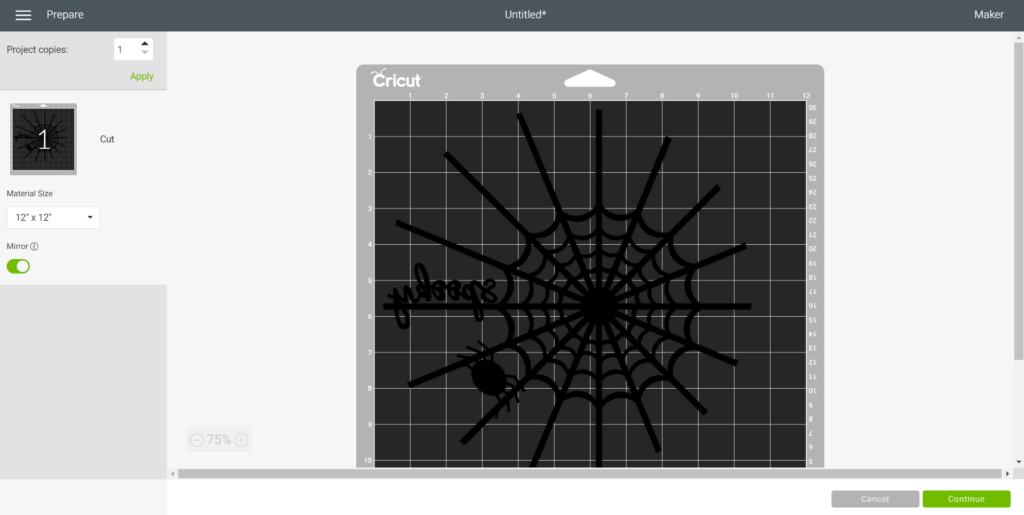
3. Cut the Everyday Iron-On Vinyl width to fit on the standard grip mat. Press continue.
4. Choose Everyday Iron-On Vinyl from the list of options in the drop down menu.
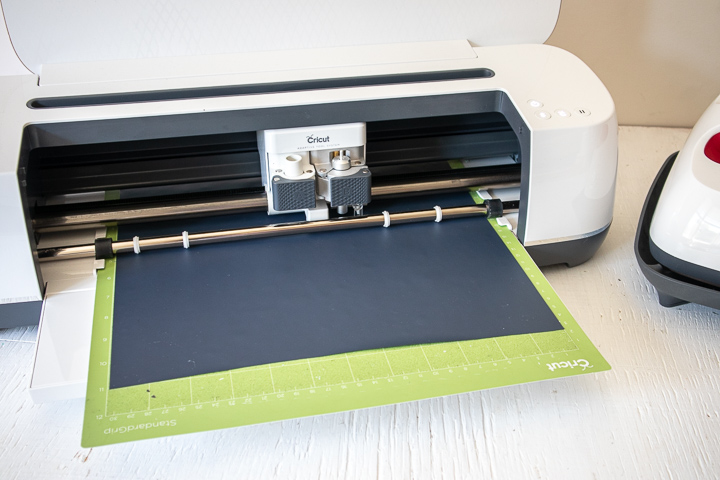
5. Place the Iron-On vinyl directly onto the standard grip mat with the SHINY SIDE DOWN. Scrape out any air bubbles.
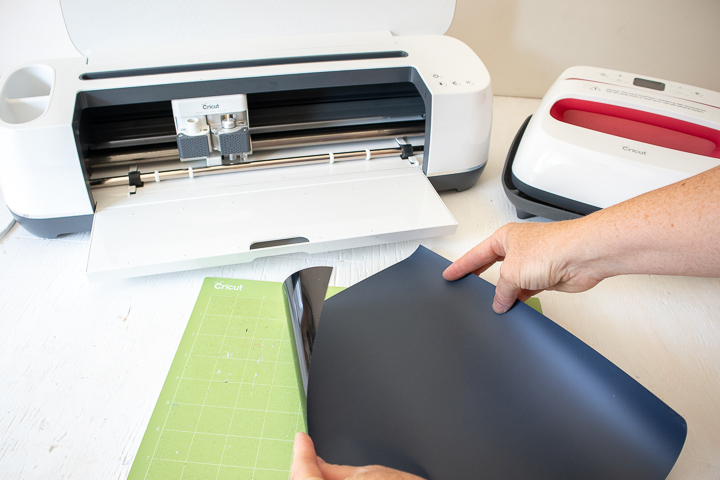
6. Following the instructions prompted on the screen, cut out the vinyl.
Preparing the spider web decal for application
1. Remove the Everyday Iron-On Vinyl from the mat. The Spatula tool might help you here.
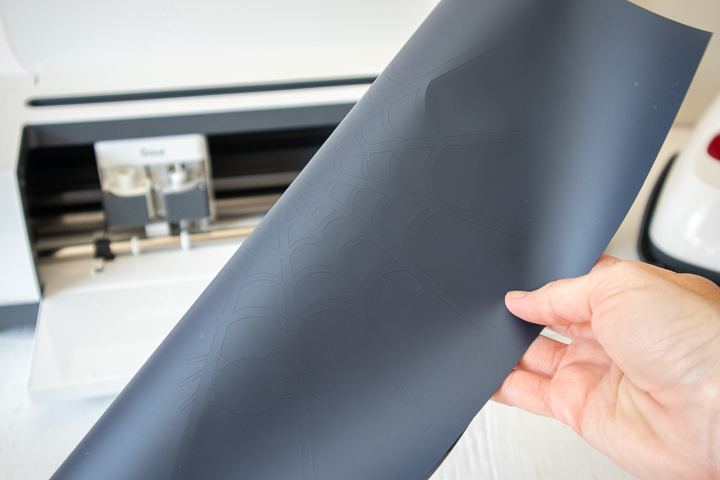
2. Cut around the image and put aside the left over vinyl for another project.
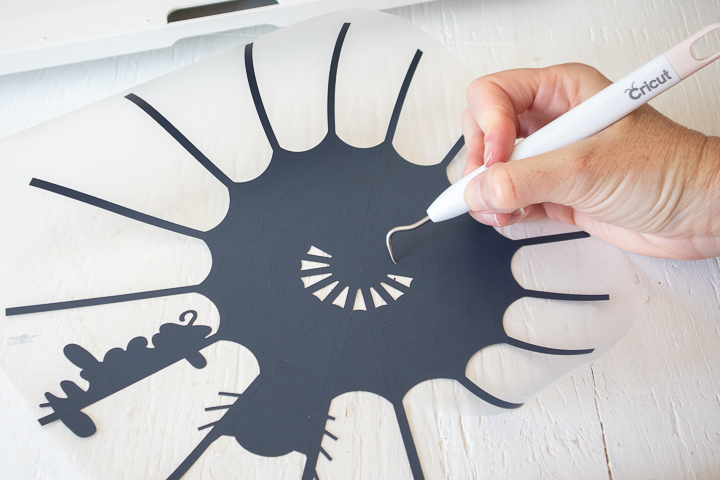
3. Using a weeding tool, peel away the excess vinyl leaving only the spider web image.
Applying the Image with the Cricut EasyPress 2
1. Position the EasyPress mat on a flat surface with the cotton fabric on top.
2. Set the temperature and time on the machine following the chart for the type of vinyl and material being used or use Cricut’s Heat Guide.
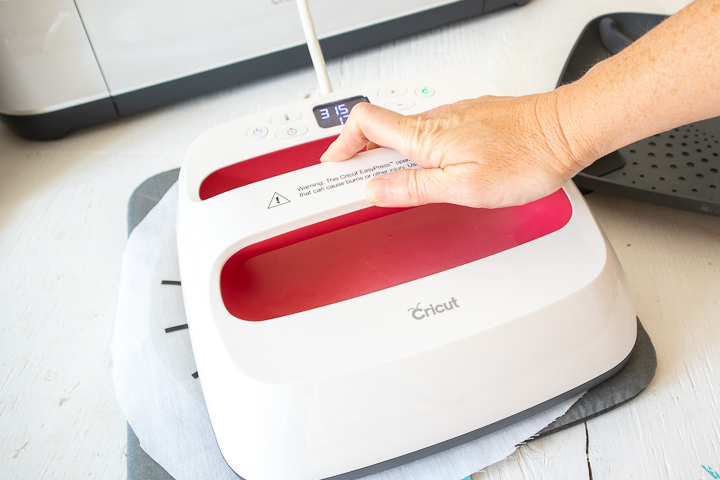
3. For 100% Cotton fabric and Everyday Iron-On Vinyl, set the EasyPress 2 to 315F.
4. Preheat the fabric (the cut circle shape) for 5 seconds. This will prep the fabric for the vinyl, removing all excess moisture as well as help to remove any creases and wrinkles from the fabric.
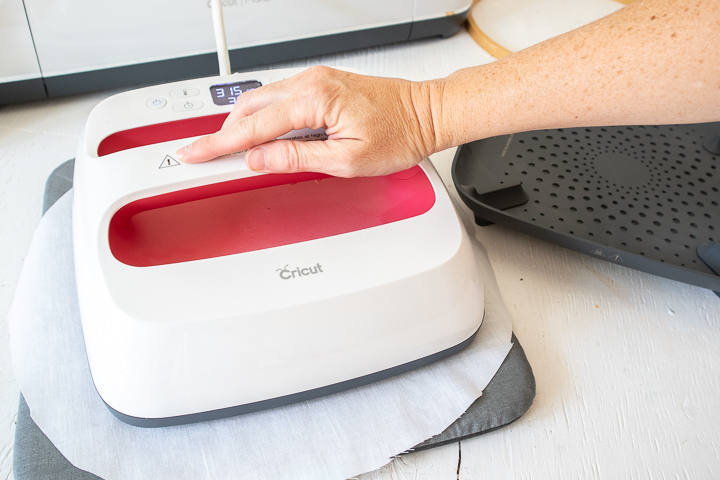
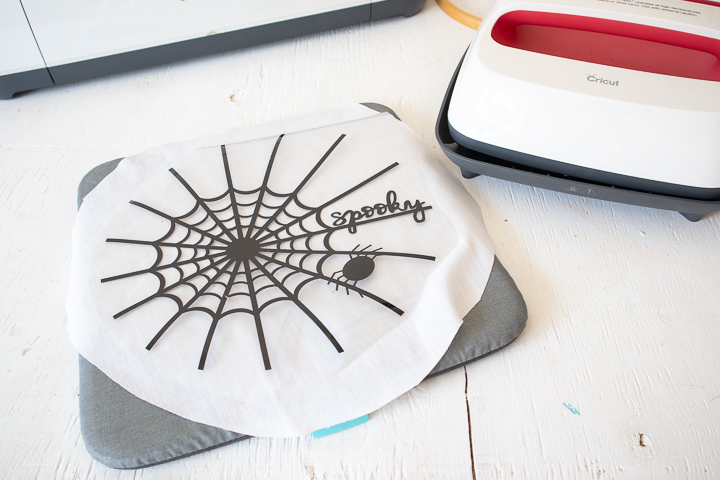
5. Place the cut image on the fabric with the shiny side up.
6. Press the image on to the fabric for 30 seconds with light pressure. If the entire image doesn’t fit under the EasyPress, then move the EasyPress over and heat press the image a second time.
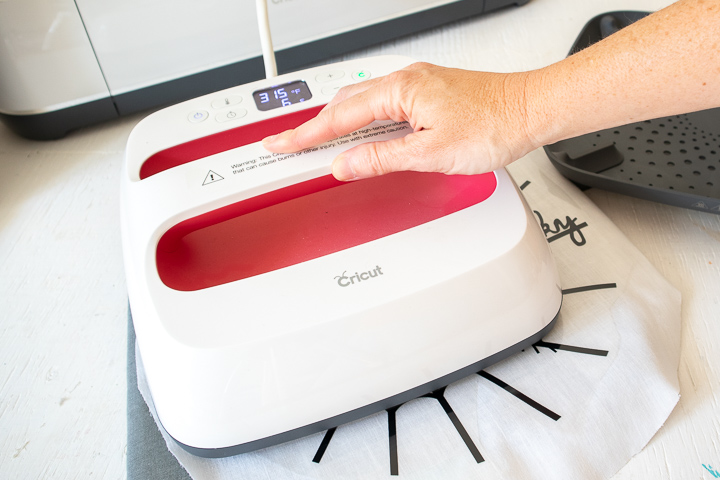
7. Turn the fabric upside down and apply heat for another 15 seconds.
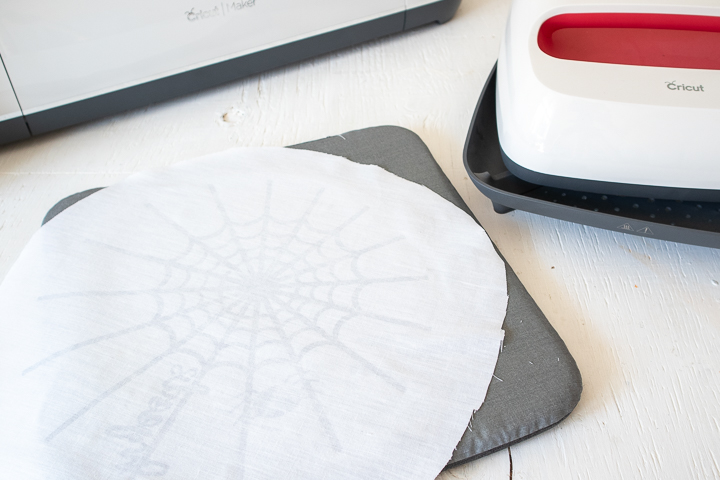
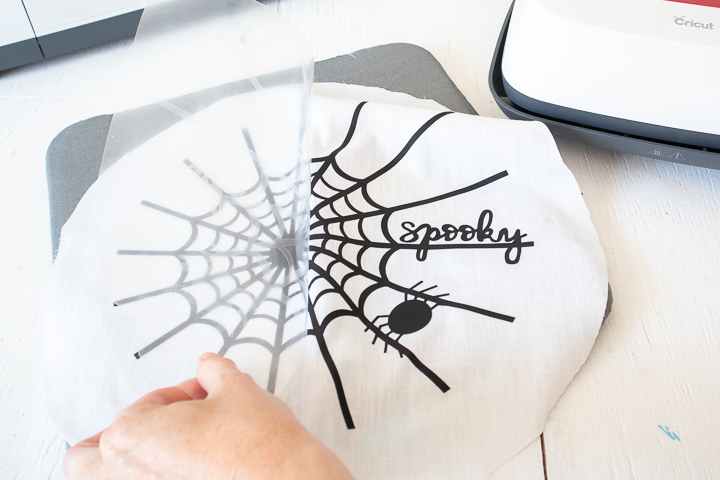
8. Peel the plastic part of the vinyl off carefully once it cools and discard.
Assembling the Halloween Hoop Art
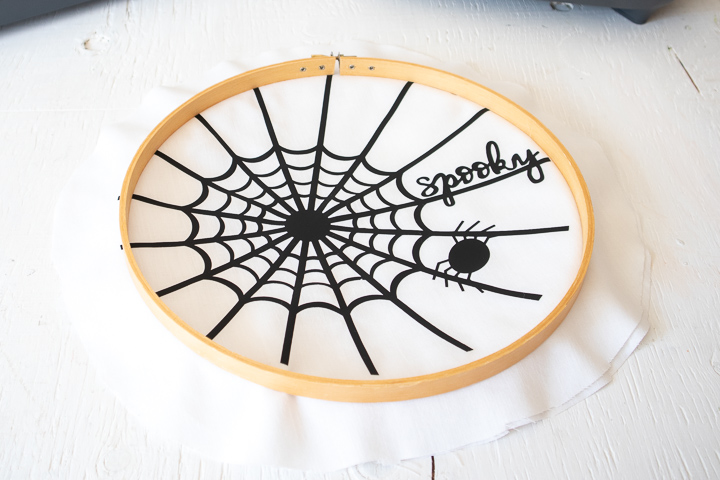
1. Insert the fabric into the embroidery hoop, after centering so that all vinyl edges are sandwiched inside the hoop, tighten the screw.
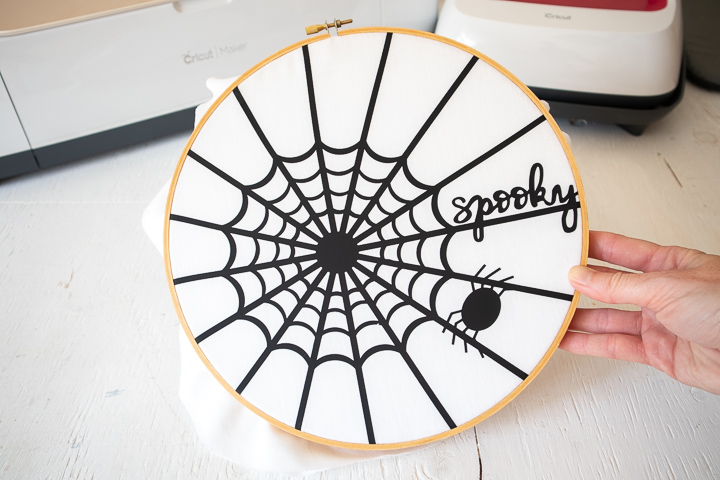
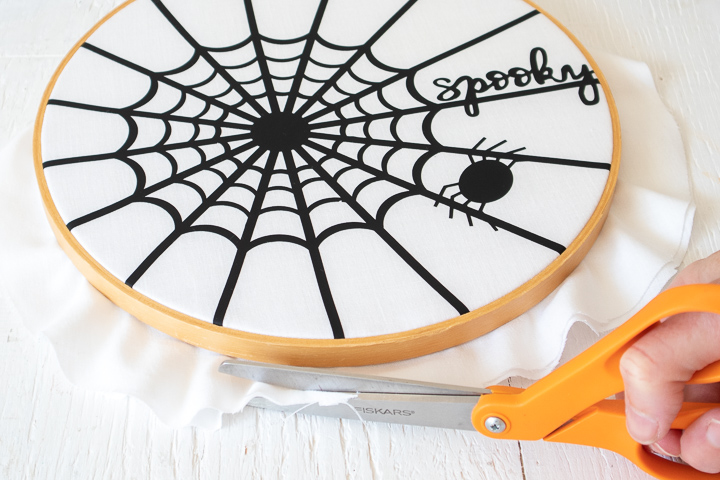
2. Trim away the excess fabric, display, and enjoy!

Where will you be displaying your Halloween Cricut decor? Comment below!
Get that Cricut on – more ideas right here
[ad_2]
Source link