
[ad_1]
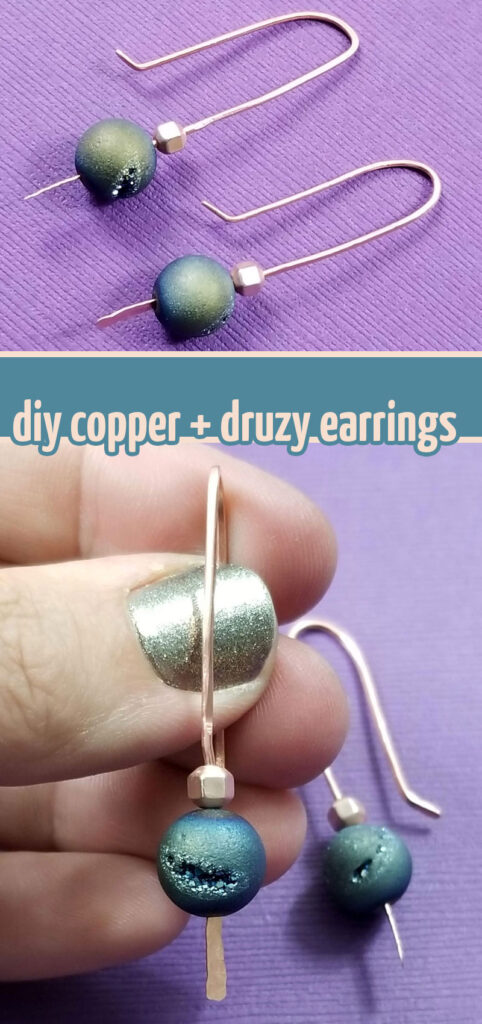
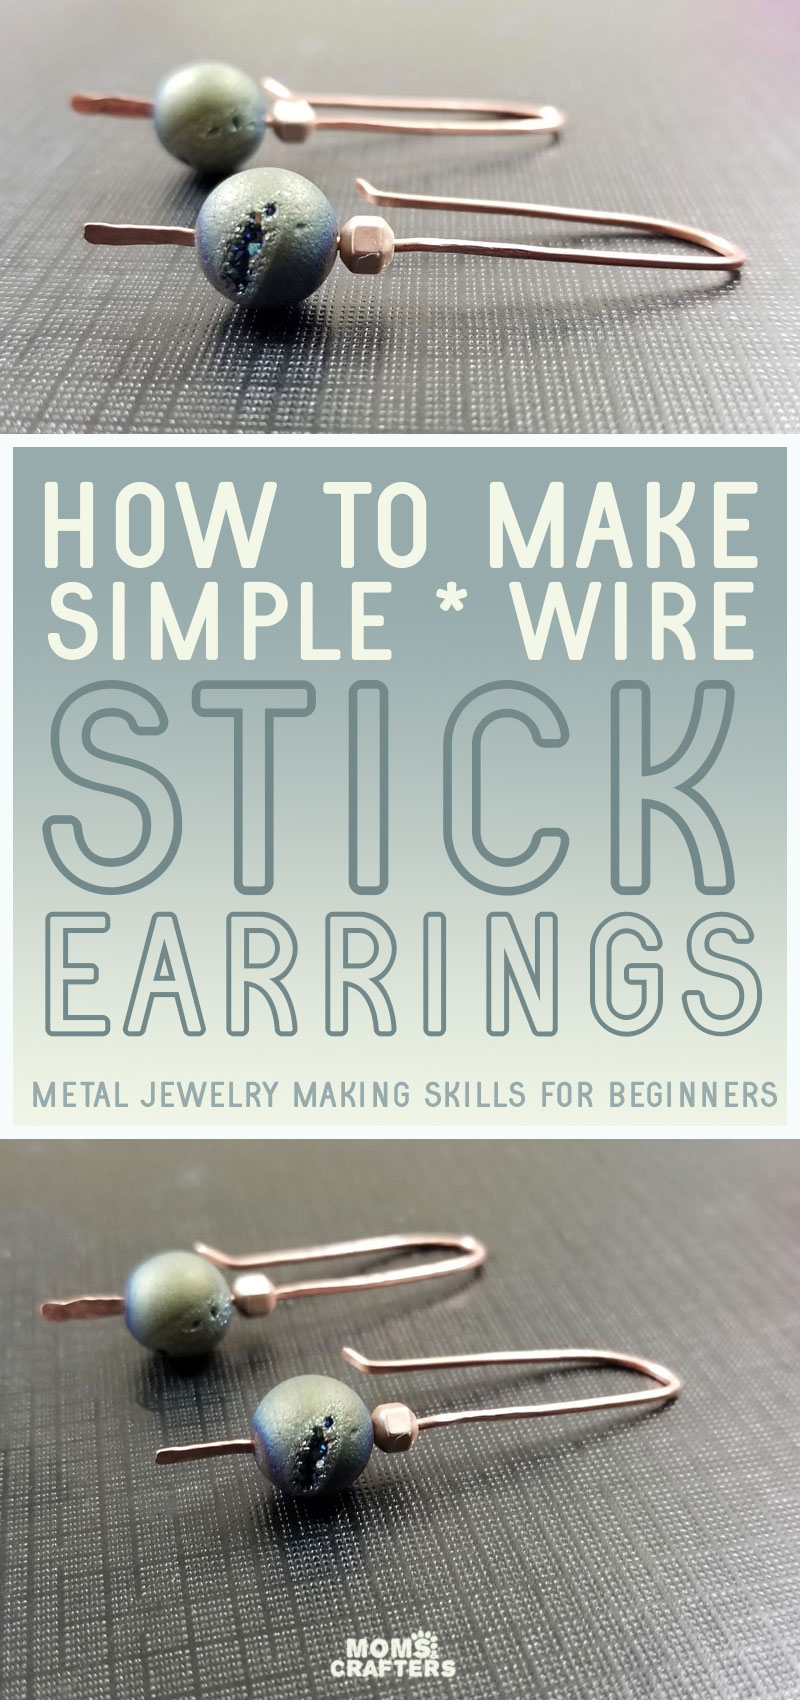
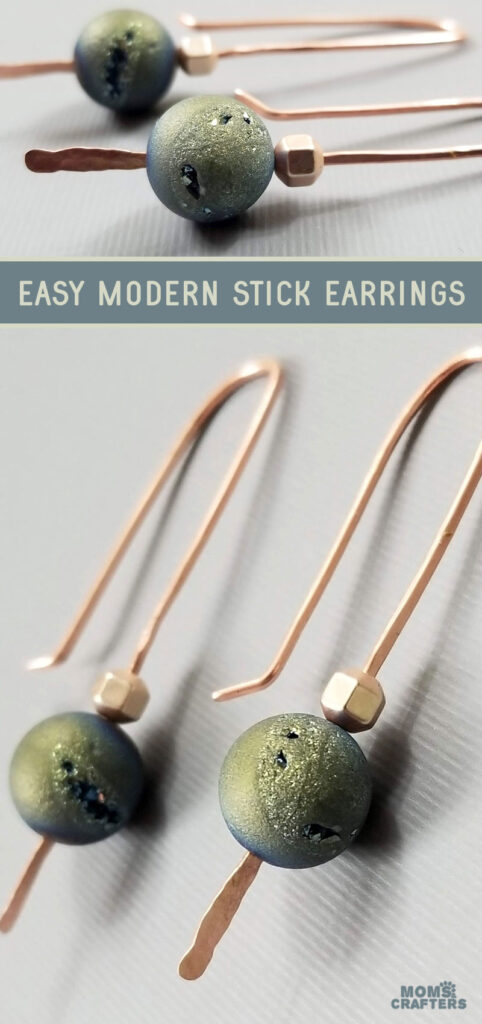
Make your own DIY metal earrings in this modern stick design – using very basic metal jewelry making skills! Visit my big list of DIY earrings for more inspiration. This post contains affiliate links.
Ages ago, while on a retail therapy run, back before the whole world went haywire, I ran into some stunning beads at Michaels.
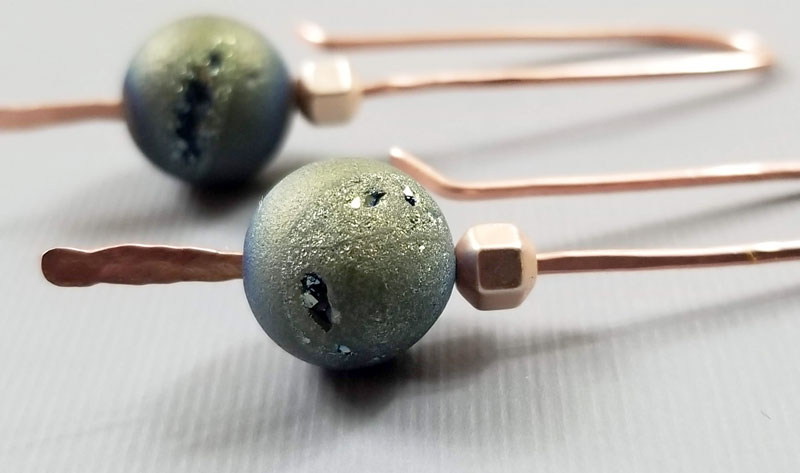
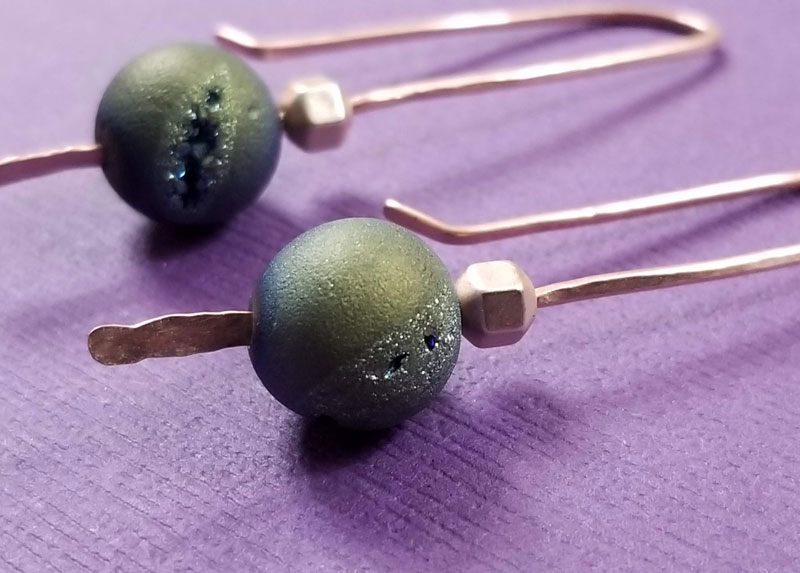
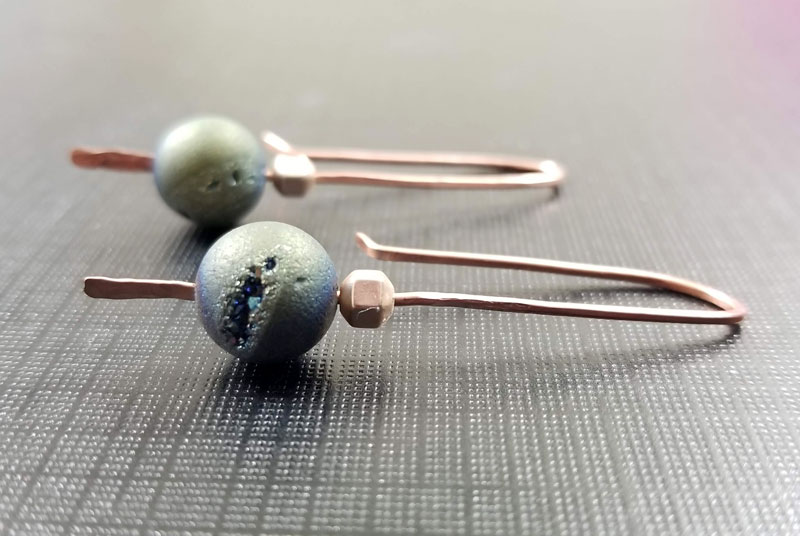
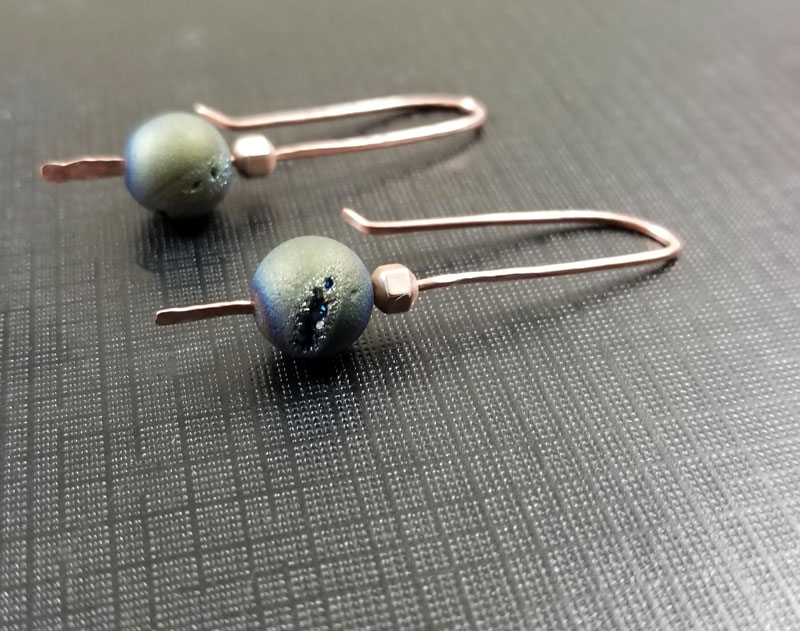
I knew these round druzy beads were destined for a very special piece that’ll totally showcase their beauty with a modern, minimal base.
But the truth is, the pair I originally made had to be remade because it just wasn’t there. So I made it, remade it, and then remade the do-over and got my perfect pair of DIY metal earrings.
The cool thing about this easy jewelry craft is that it’s a very simple, beginner skill-building project. You’ll learn:
- How to finish off the ends of your wire jewelry to smooth them out.
- How to hammer jewelry two ways
- How to work with softer more precious metals without nicking them.
- Plus, a little bit about precious metals and which ones you might want to choose for your projects.
When working metal into shapes beyond simple wrapping, I definitely recommend sticking to precious – “real”- metals.
It doesn’t have to be very expensive.
While I sometimes use sterling silver, I typically work with copper because of how affordable it is. I also love copper – so much so that I have a full tutorial on copper jewelry making from scratch.
If you’re just starting out, and still learning, I recommend you use copper (unless you’re totally without a budget. Then use platinum… 😉 )
If you love silver, it’s the next in line for affordability.
Non-precious metals and “crafting wires” aren’t ideal for projects like this. Even the “dead soft” weights are pretty hard, you’ll likely expose an ugly core, and they just don’t comply with your demands…
My favorite part of making wire jewelry is the ability to make it do what I want. When the wire behaves like your toddler and has its own way, it’s just not fun.
As for wire thickness or gauge:
Remember: the higher the gauge, the thinner the wire. When making a functional earring hook (or ear wire) you want something with the perfect balance: solid enough to hold its shape, but thin enough to not bother your ear.
I chose 18 gauge wire but feel free to experiment with what works for you.
Generally I keep this pack of thinner wire and this pack of thicker handy for making DIY metal earrings and jewelry.
Supplies for your wire earrings:
How to make DIY stick earrings:
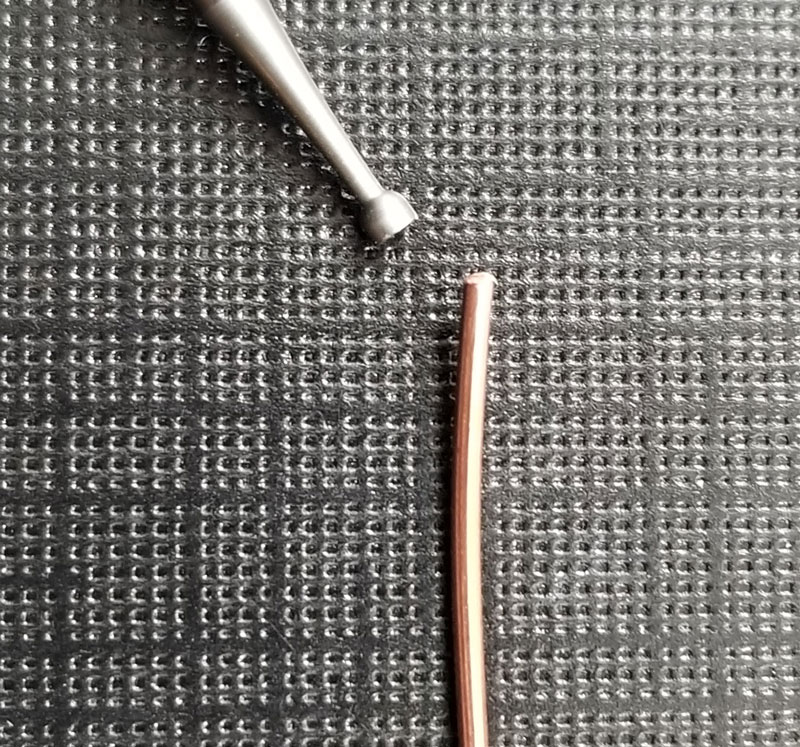
1. Smooth your end
Cut a piece of wire to size. To determine size, figure out how long you want it, double that, and add about a centimeter. Cut one piece for each earring. File the ends smooth.
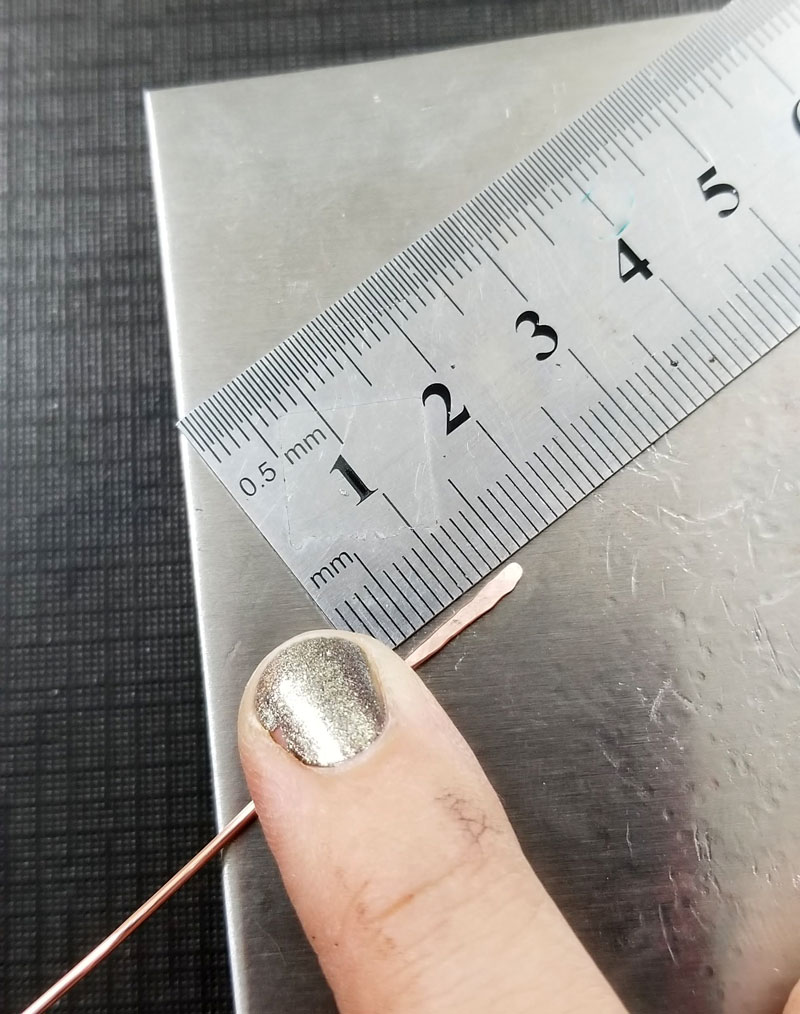
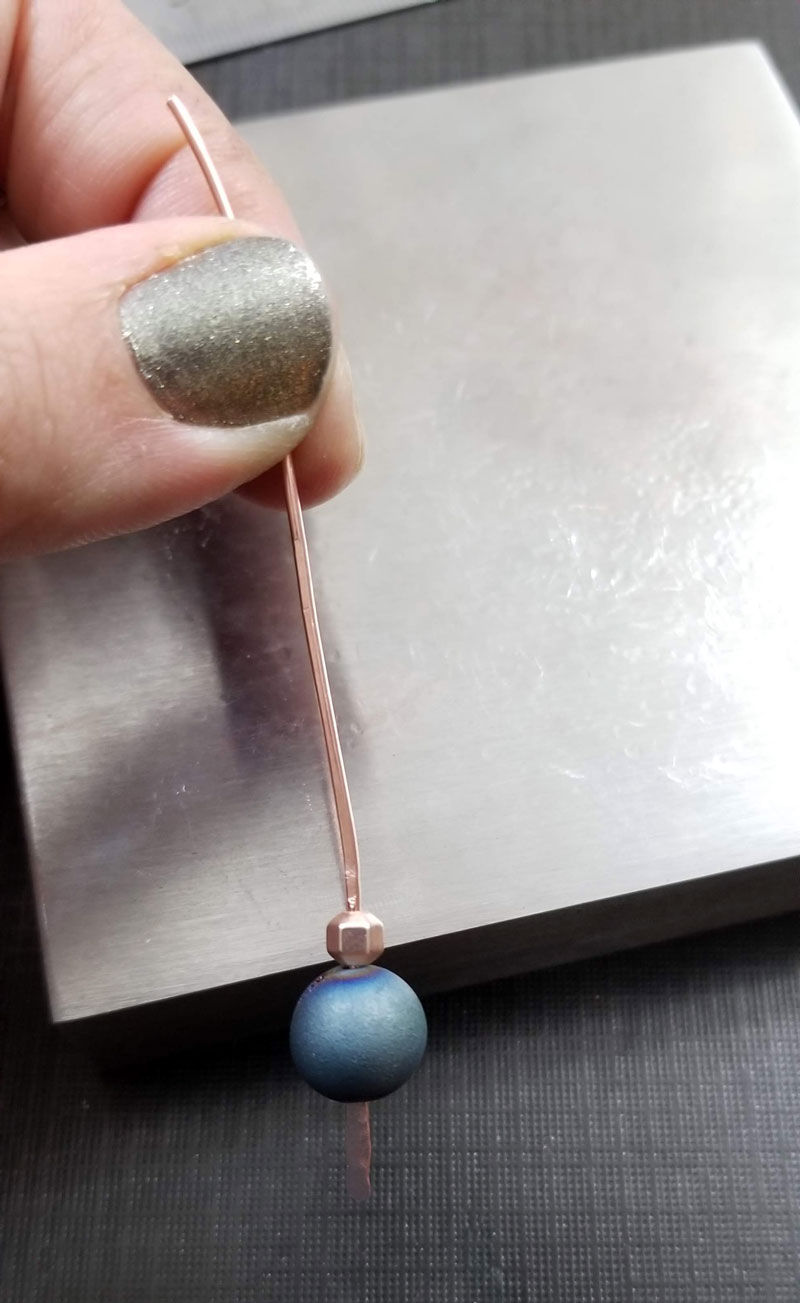
2. Flatten the tip
Place your wire end on your steel block. Flatten about 1.5 cm. at the end using the ball side of the ball peen hammer. The end will naturally look round – and it’ll taper. Don’t try to flatten the whole thing evenly.
As you hammer, you’ll find that your wire curves up. Simply flip it over and continue.
Your wire may break if you overwork it, so once you’re happy with how it looks, stop.
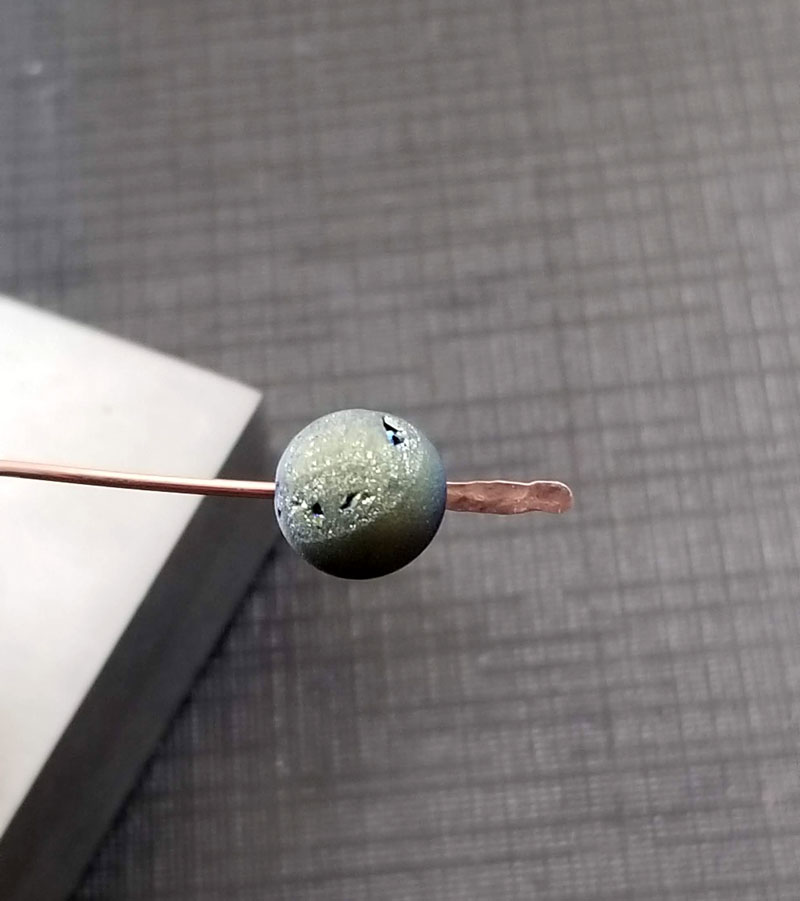
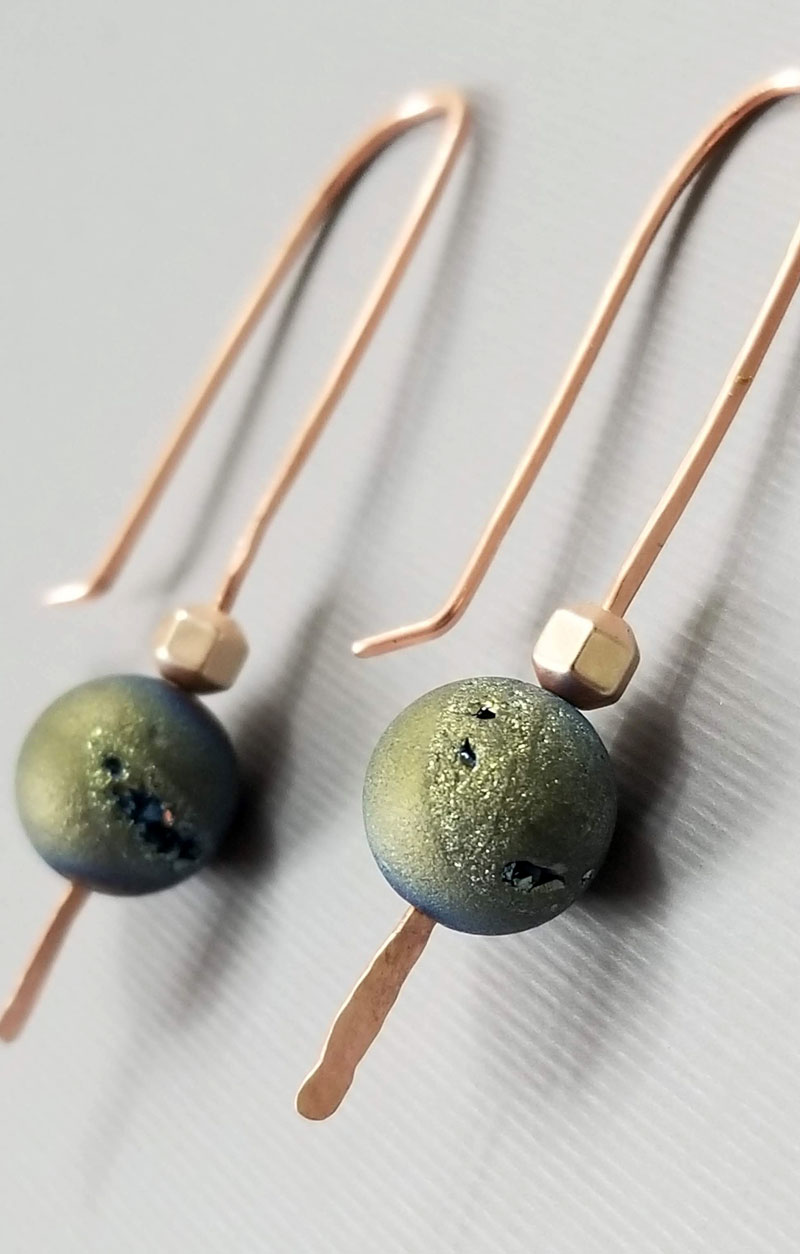
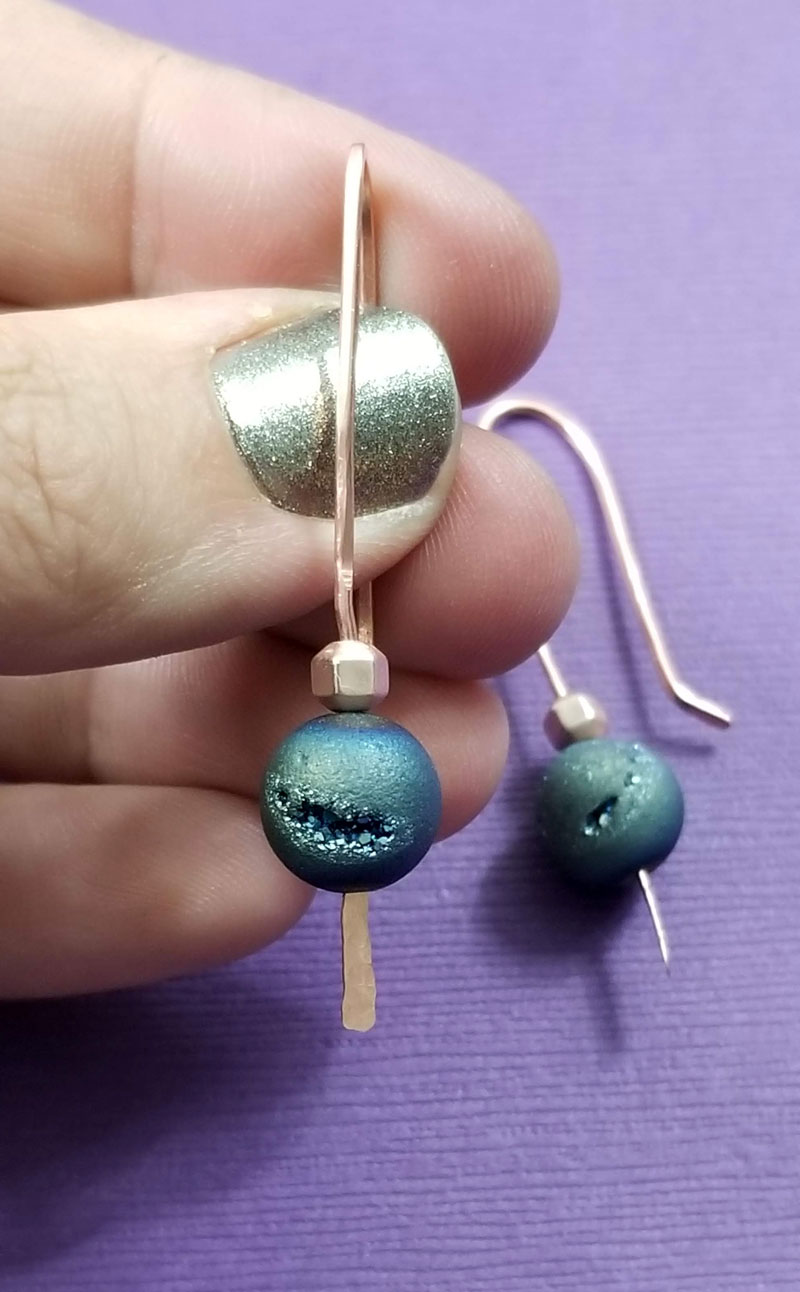
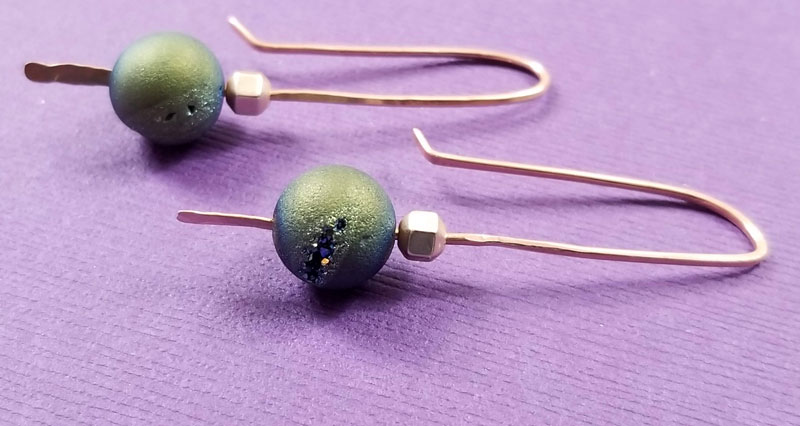
3. Add your bead
Add your main decorative bead. The widened bottom should stop it in place.
The bead may go over the top portion of your hammered section a little. Don’t worry about this – as long as the bead placement is even on both your earrings.
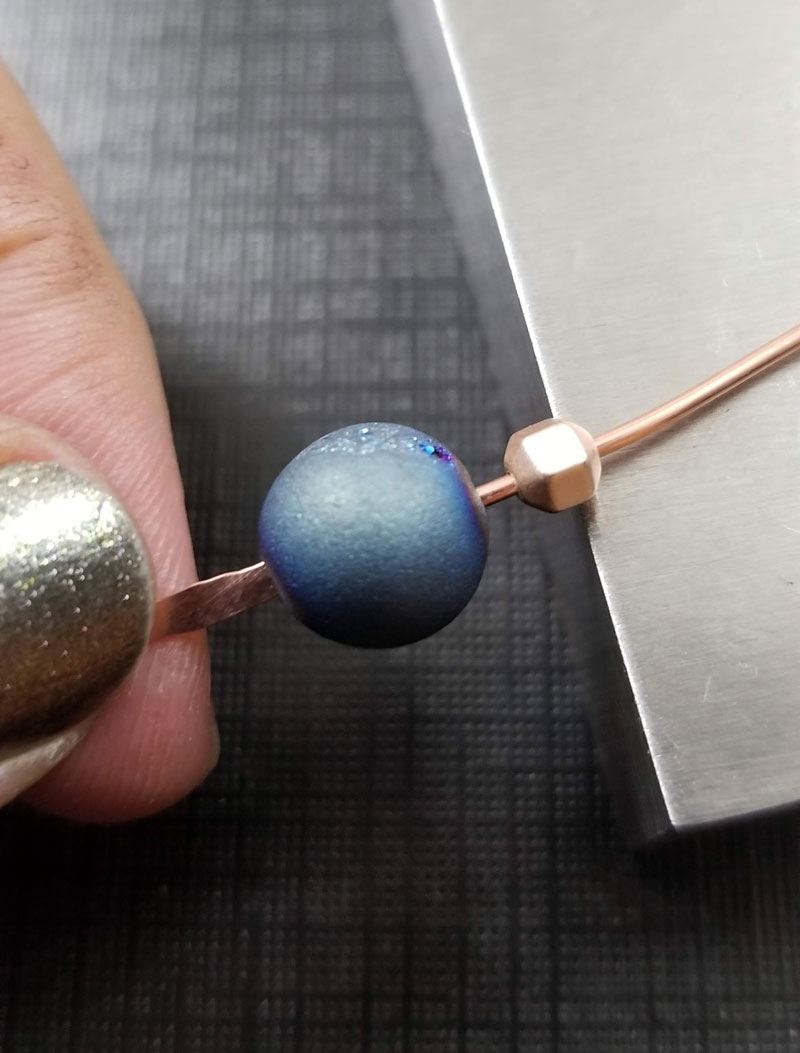
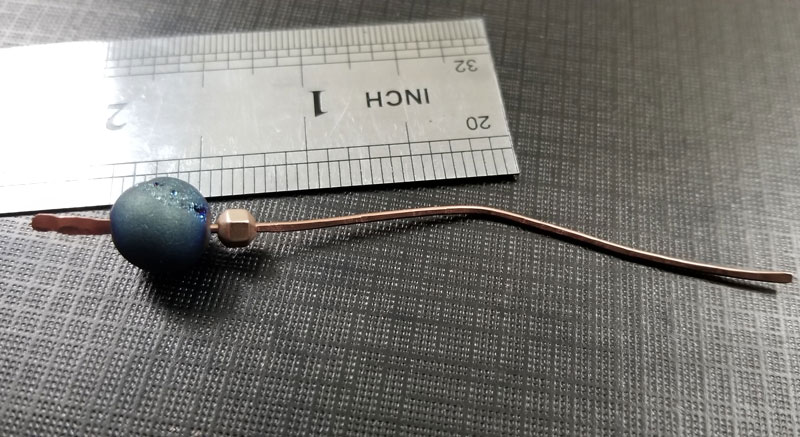
4. Add a spacer
You can add a decorative spacer bead if you want.
In my case, it wasn’t purely decorative. The hole on the spacer is smaller than the hole on the main bead, meaning I need to hammer less in the next step to hold it in place.
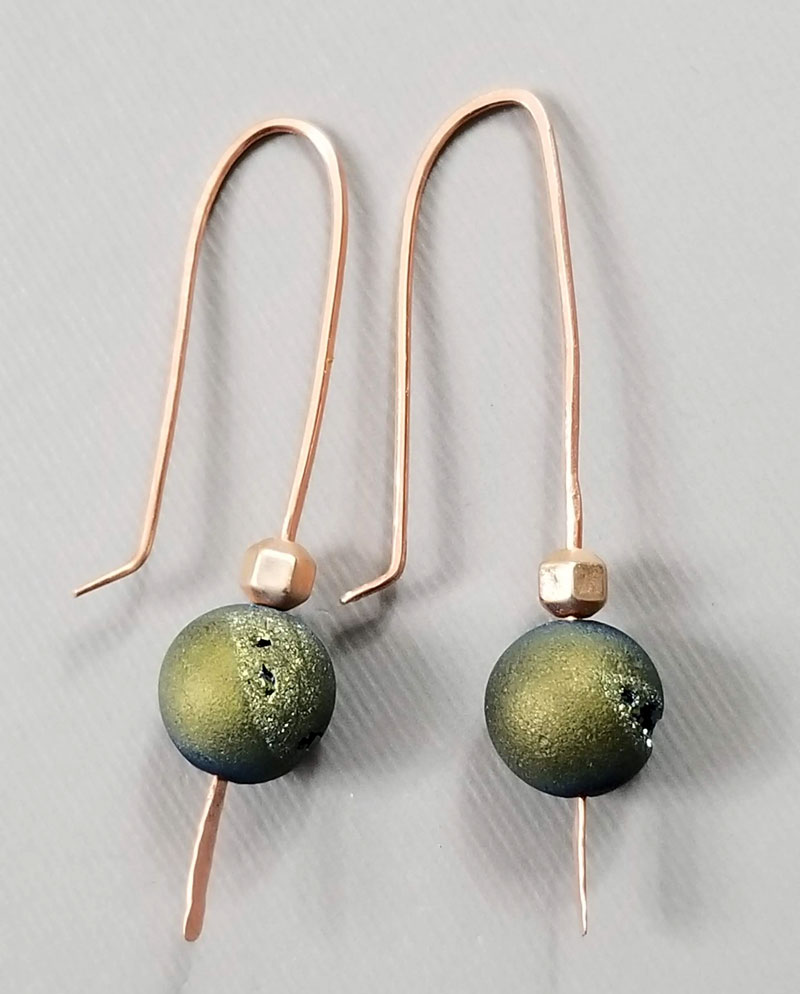
5. Flatten the front
Use the flat side of your ball peen hammer to work harden and slightly flatten the main front part of your earring.
To do this, you’ll want to place your earring on the bench block so that the beaded portion sits off the block and the wire sits on the block. I accidentally bent one while hammering but hey, perfection is overrated – isn’t it?
Hammer just enough so that your beaded portion of your DIY metal earrings are secured in place.
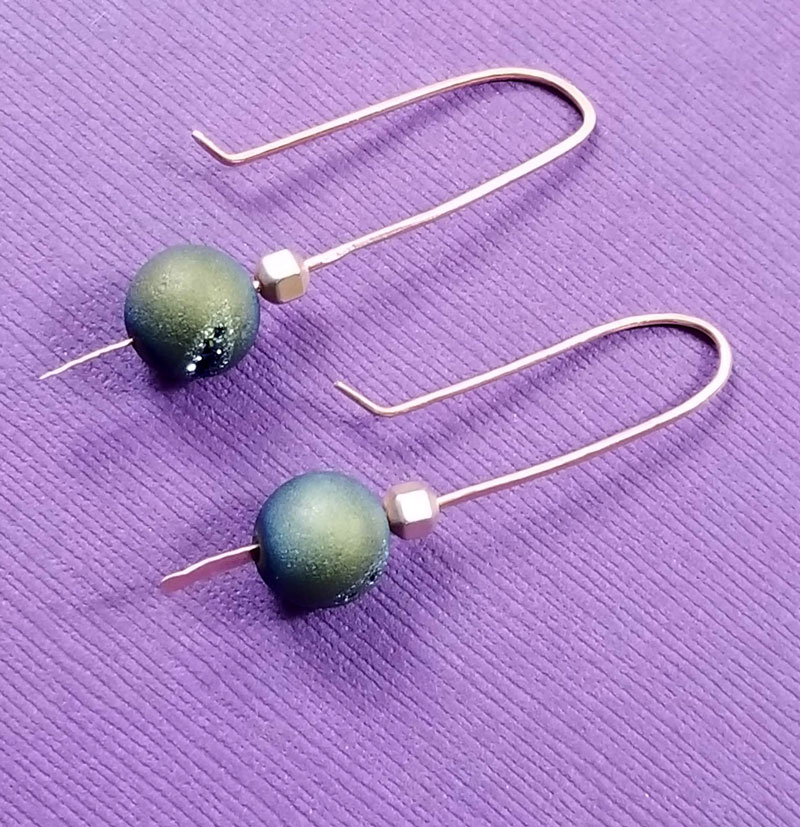
6. Shape your earring
Nylon jaw pliers prevent you from nicking your wire. Use these to curve your main wire at roughly the midway point.
Make sure the front is the right length for you – it’s okay if the back is a little shorter or needs to be trimmed.
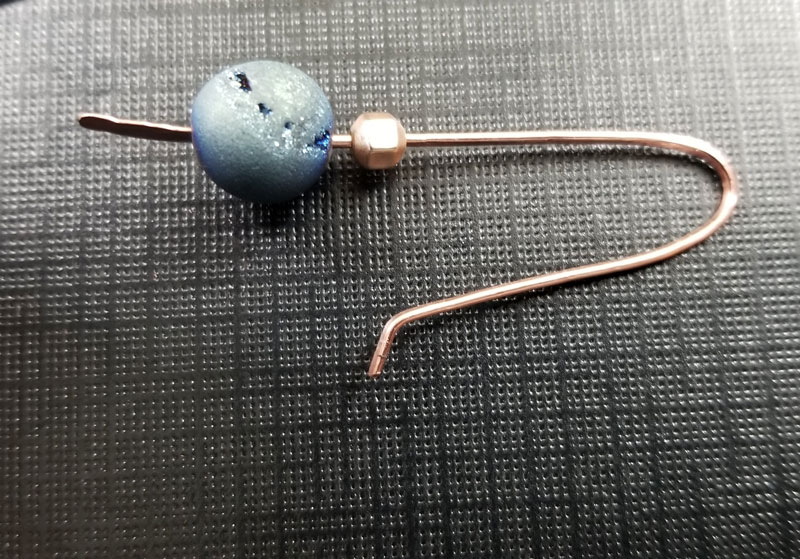
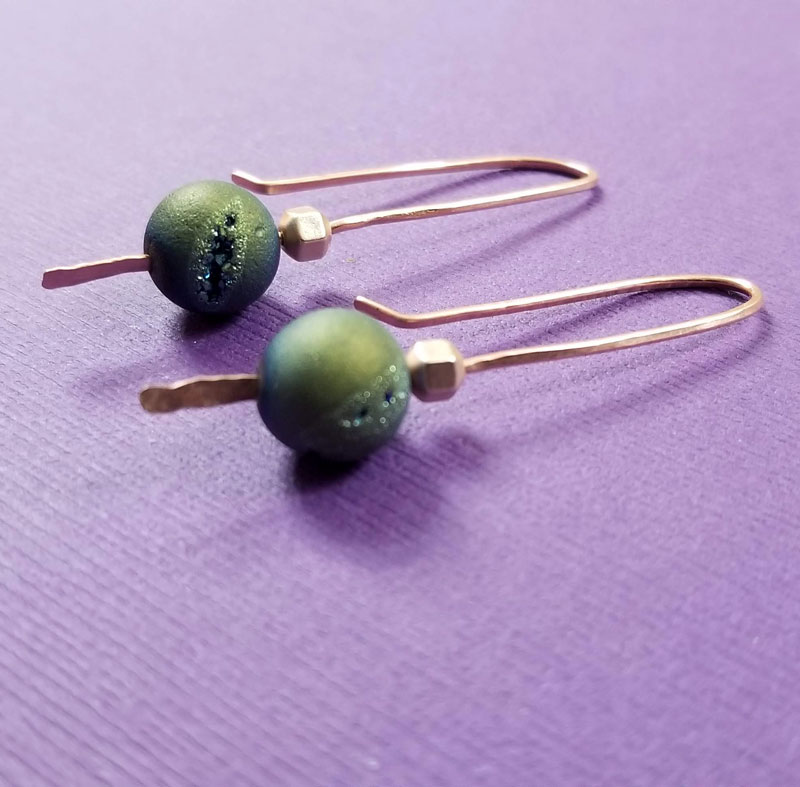
7. Finish it off
The earring is easier to put on if you bend back the tip (at the part where you’d put it in your ear) a little. I also like to gently hammer the earwire portion with the flat side of the hammer to work harden it.
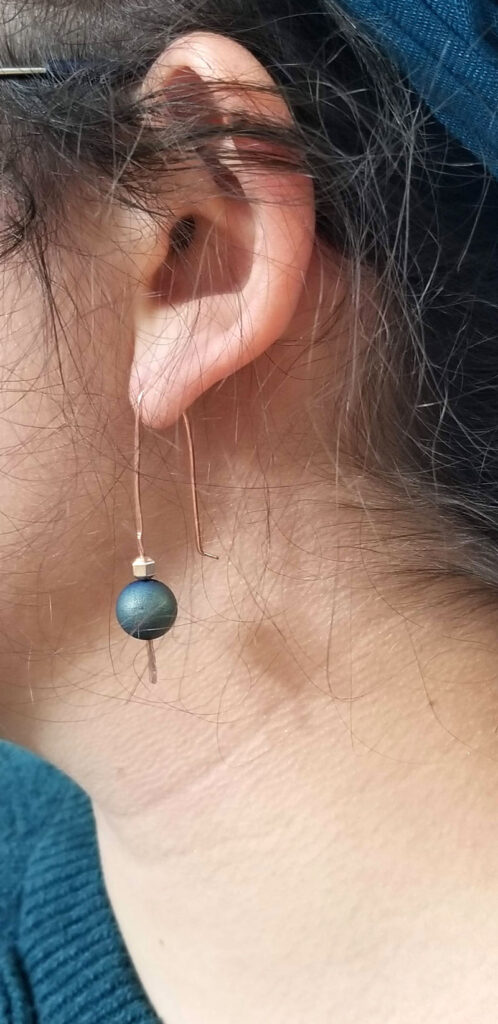
Your DIY metal earrings are complete!
I hope you learned a lot about making metal jewelry from this easy jewelry making project! What’s your favorite style of earrings to make and wear? Comment below!
[ad_2]
Source link