
[ad_1]
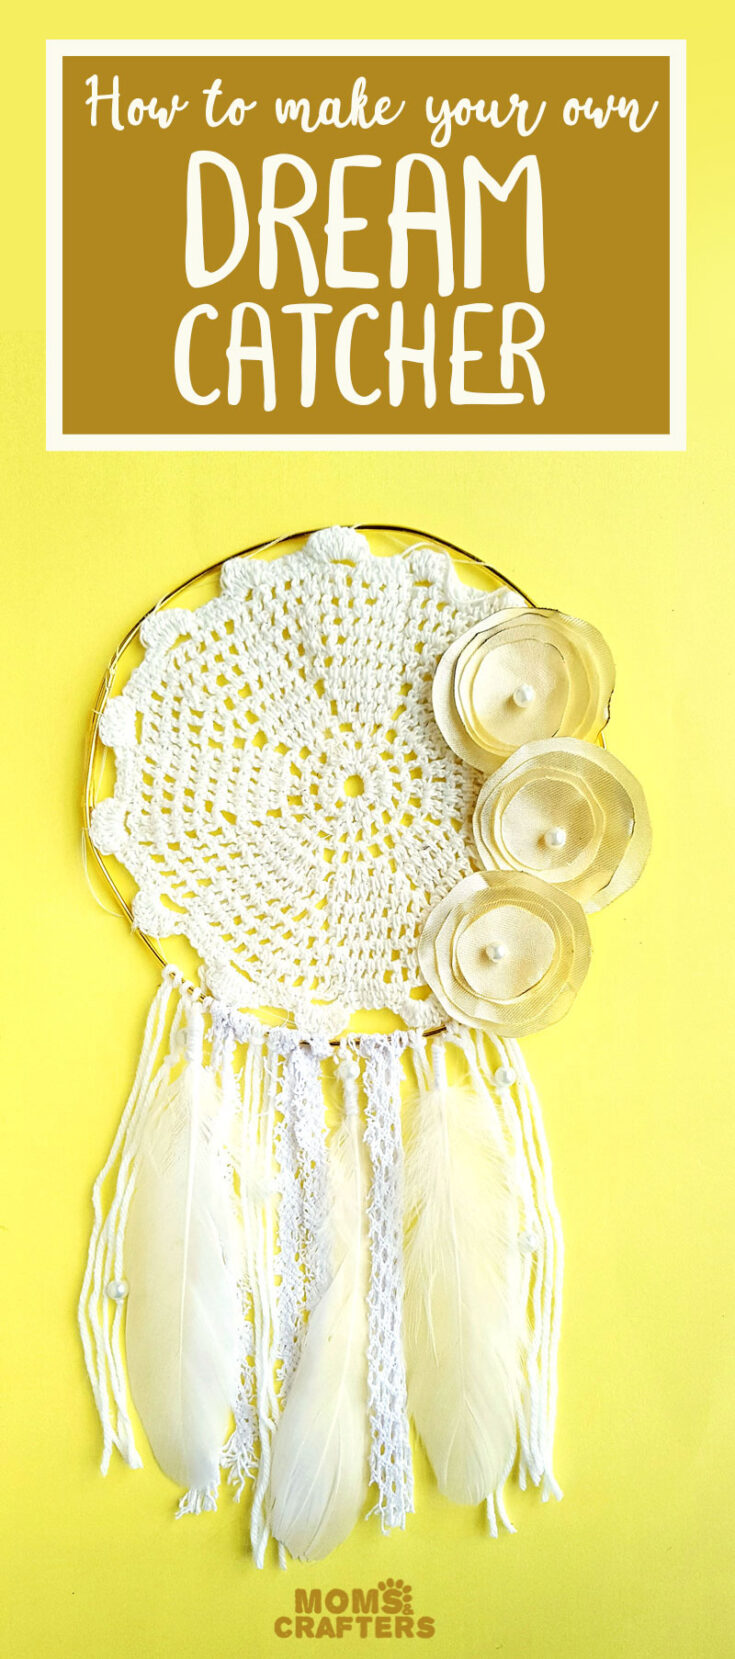
Learn how to make a dreamcatcher with an easy step by step tutorial! This easy idea is a cool craft for teens and tweens but great for grown ups too. This post contains commissioned links.
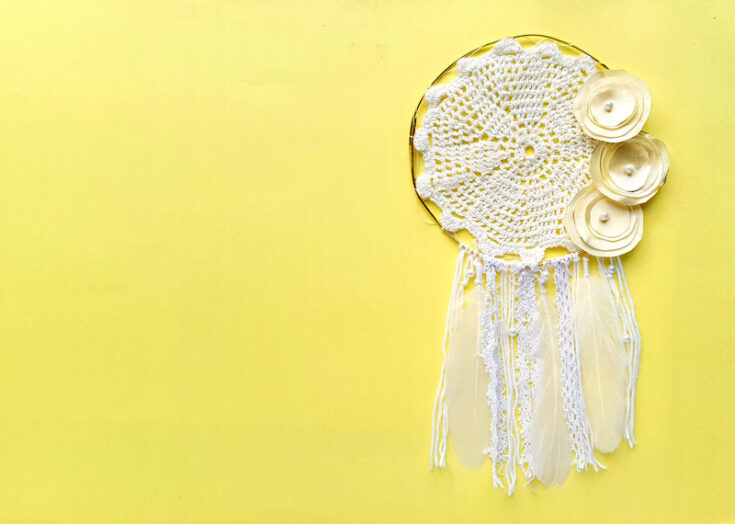
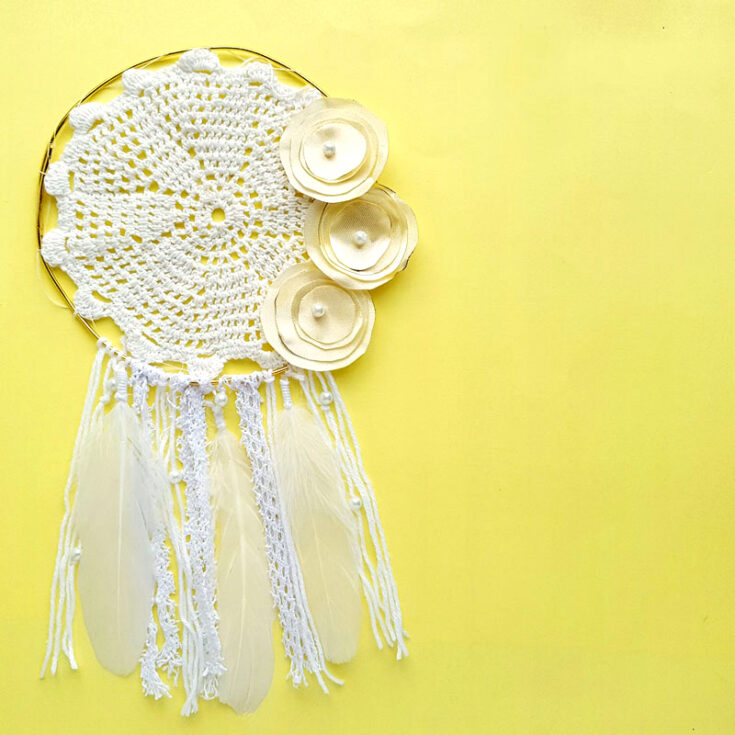
A dream catcher makes a beautiful wall hanging full of texture and personality.
And while they can look complicated, they are really easy to make. Learn how to make a dreamcatcher in a few simple steps.
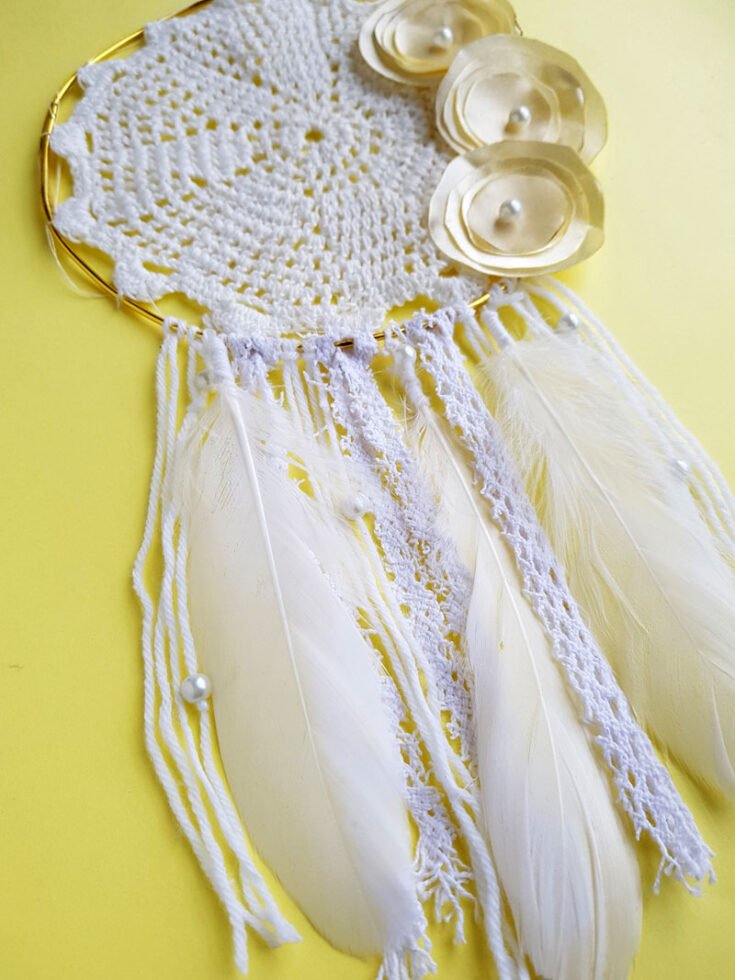
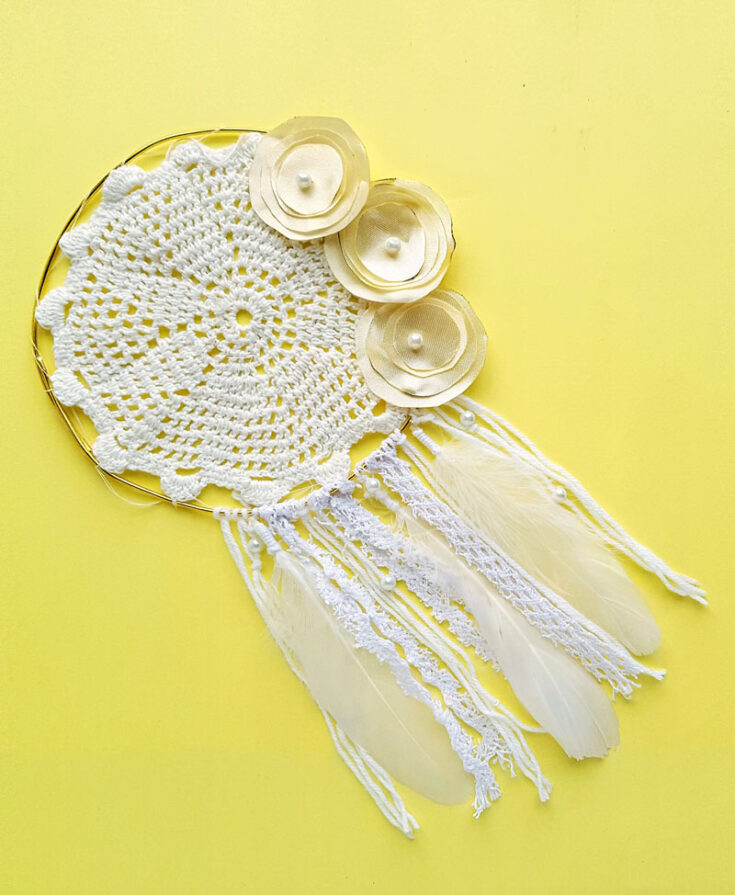
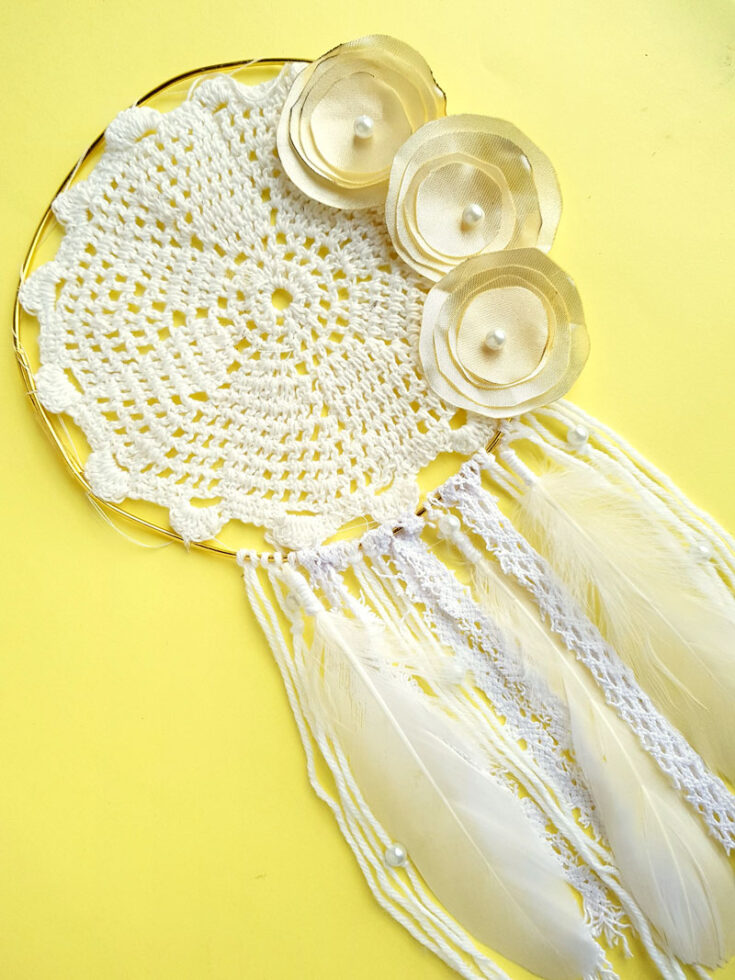
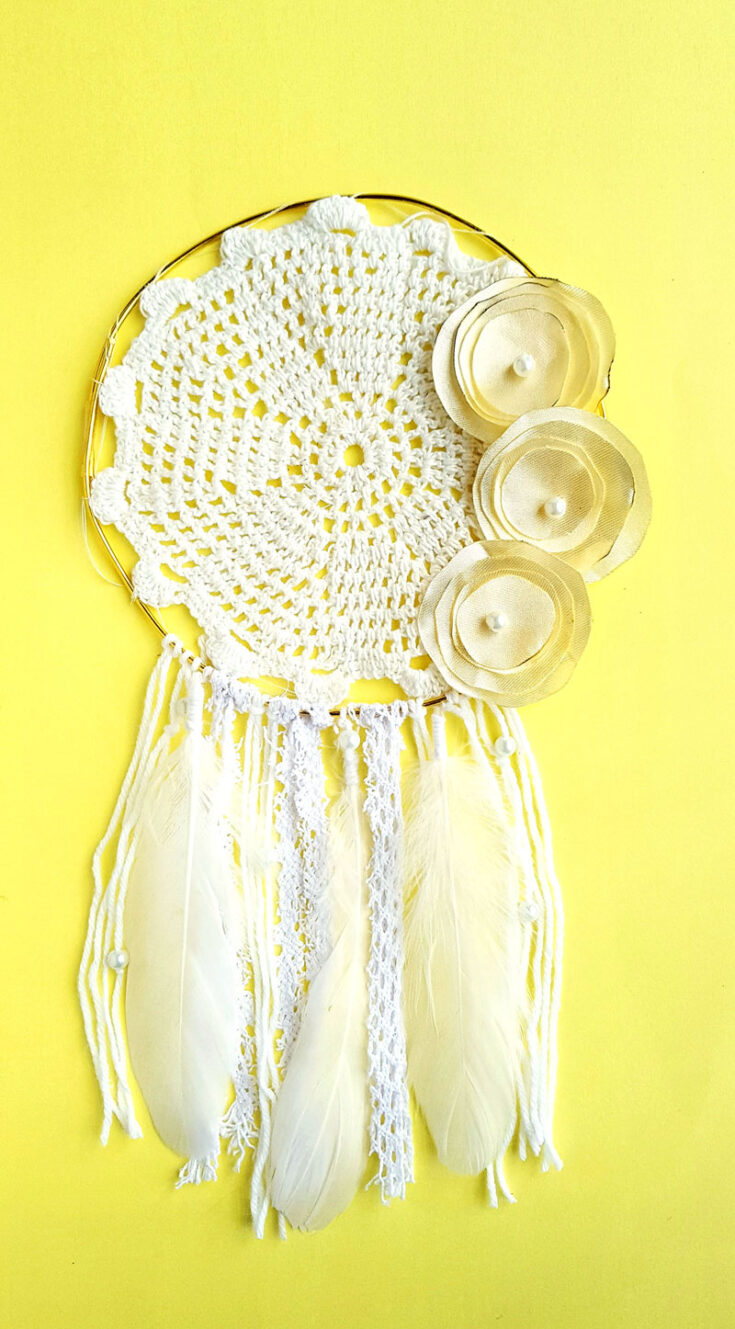
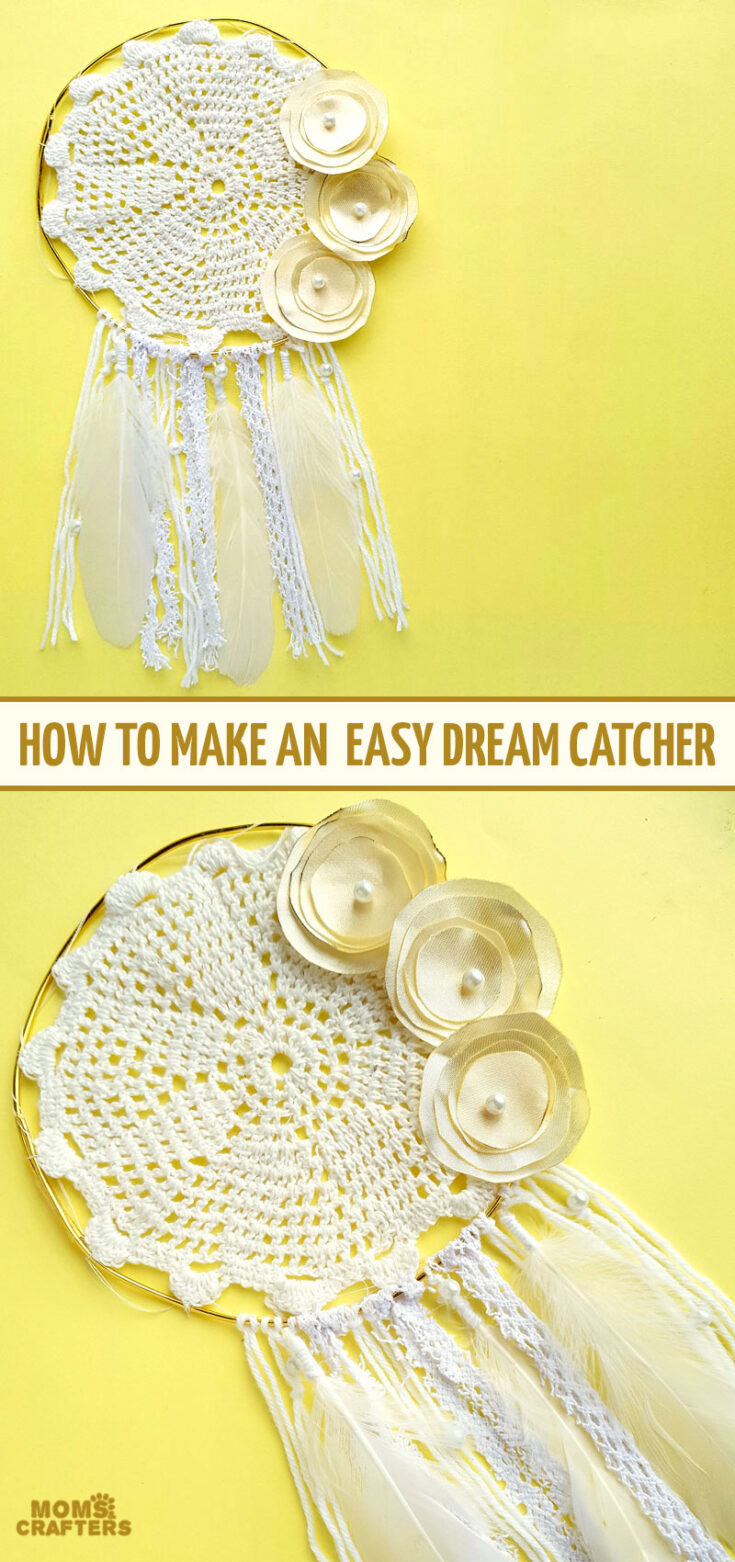
The trick on this one is to start with a crochet doily in the size you want the main frame of your dream catcher to be. You can make this yourself if you’re the crocheting type, or pick one up for a few bucks.
Hang a few ribbons, without worrying about elaborate macrame – or even beginner macrame! Focus on the combination of elements and textures to create this beautiful wall hanging.
The color scheme on this DIY dream catcher is all ivories, whites and creams (hey, can you tell the difference?) This tutorial will focuses on lacy elements such as lace ribbon and the doily mentioned above.
That gives it a festive, almost bridal look but also makes it a great way to decorate a tween or teen bedroom, a beautiful accessory for a feminine touch.
Once you have the process down pat, you know how to make a dreamcatcher to match any color scheme.
Try to make your own dream catcher using hints of mauve and rose. Or go for bold colors following the same process but with more modern shapes and materials.
So head on over the the tutorial below to learn how to make a dreamcatcher that’ll catch the eye of anyone who sees it!
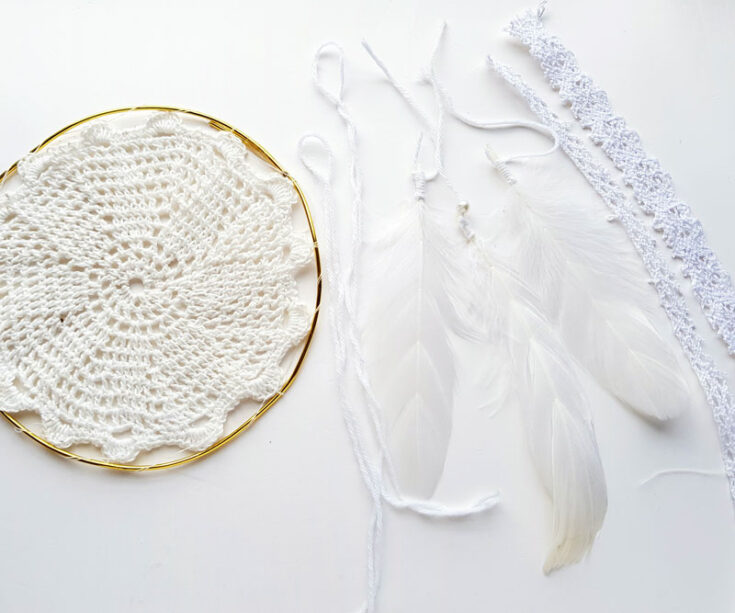
Dream Catcher Supplies
If you want to really get into making dreamcatchers, look for dream catcher supplies in destash assortments at thrift stores, or on eBay and similar websites. You’ll get a much more natural feeling eclectic mix, which adds so much texture and beauty to your piece.
How to Make a Dreamcatcher
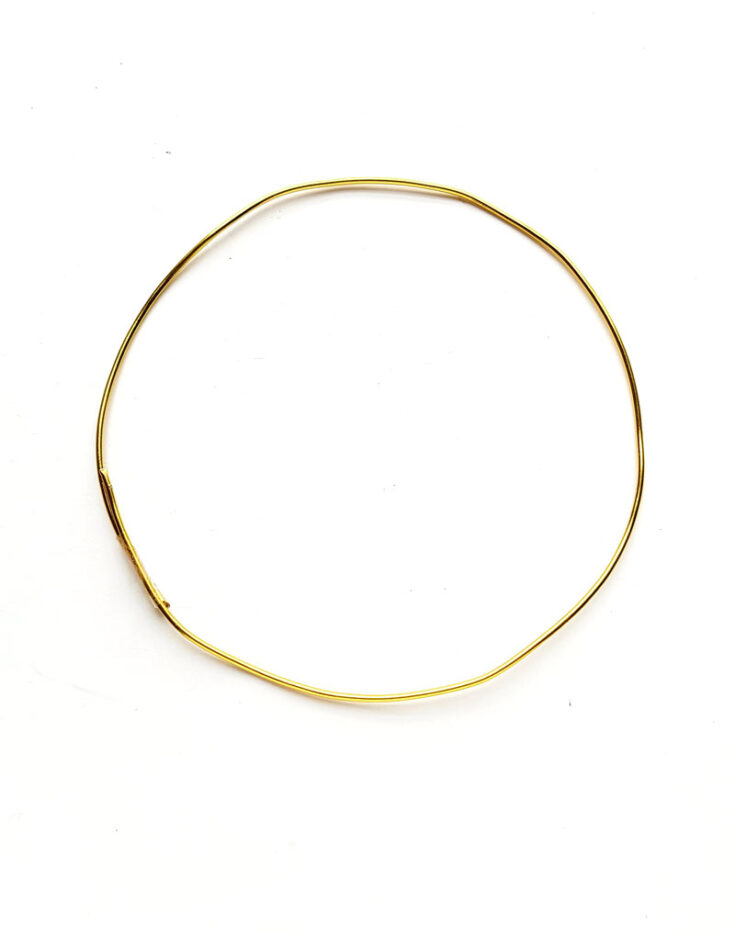
1. Decide which size you want your dream catcher to be (the doily should pretty much fill the hoop, so work with that if you need to). Prepare the round base from craft wire. If you’re using an embroidery hoop, remove the solid inside and use that.
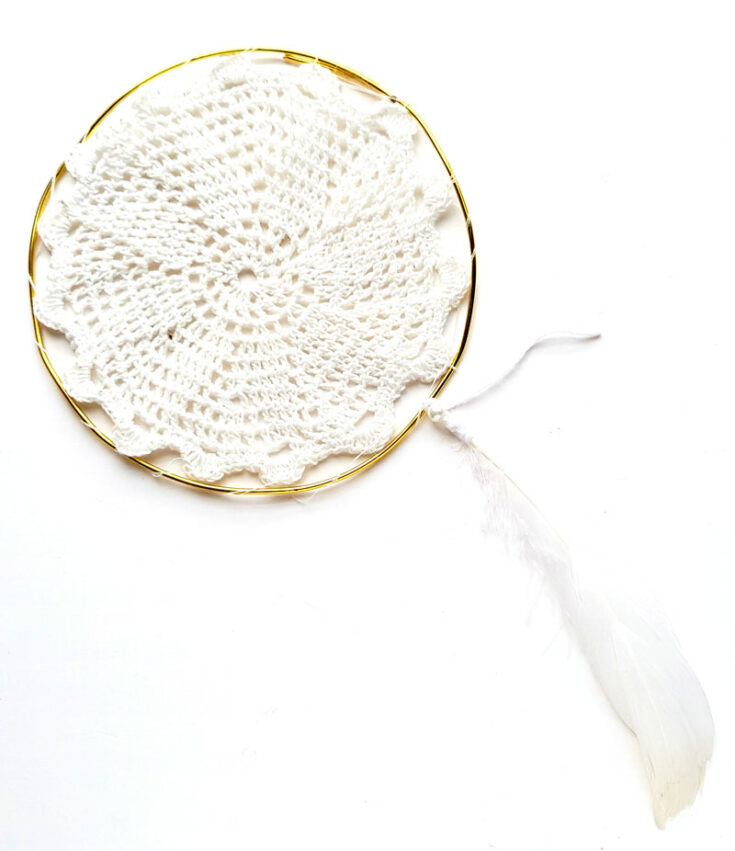
2. Place the base on a flat surface and then place the doily in the center of the base. Prepare your needle with matching thread.
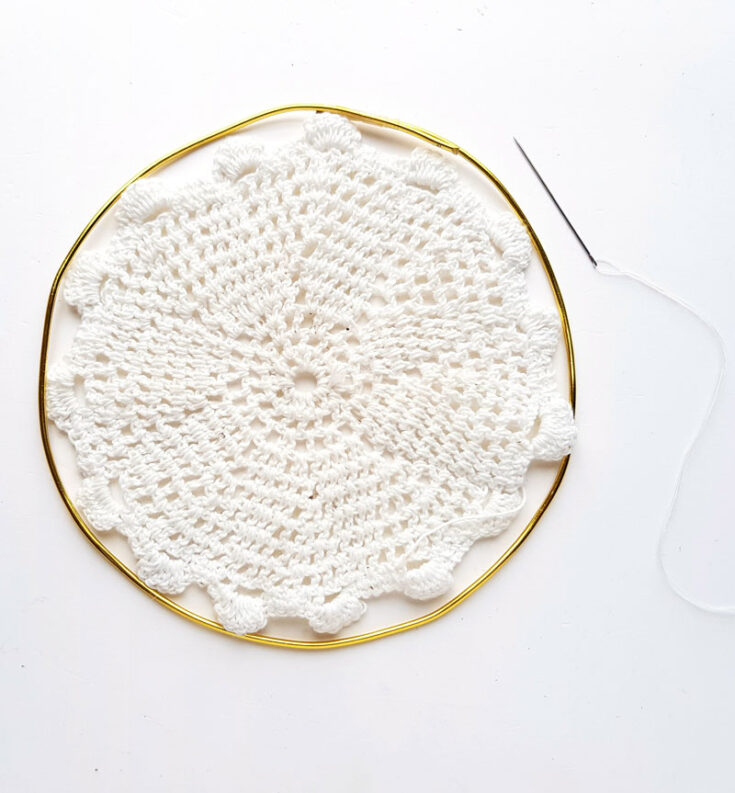
3. Draw the needle through the doily and then around the base a few times. Continue to do so at your desired intervals around the base. Once the doily is attached securely to the base, tie 2 tight knots with the remaining thread and trim.

4. Now let’s prepare those gorgeous satin flowers. Cut 4 round shapes of different diameters from the fabric. Don’t make it perfect – that’ll ruin the look!
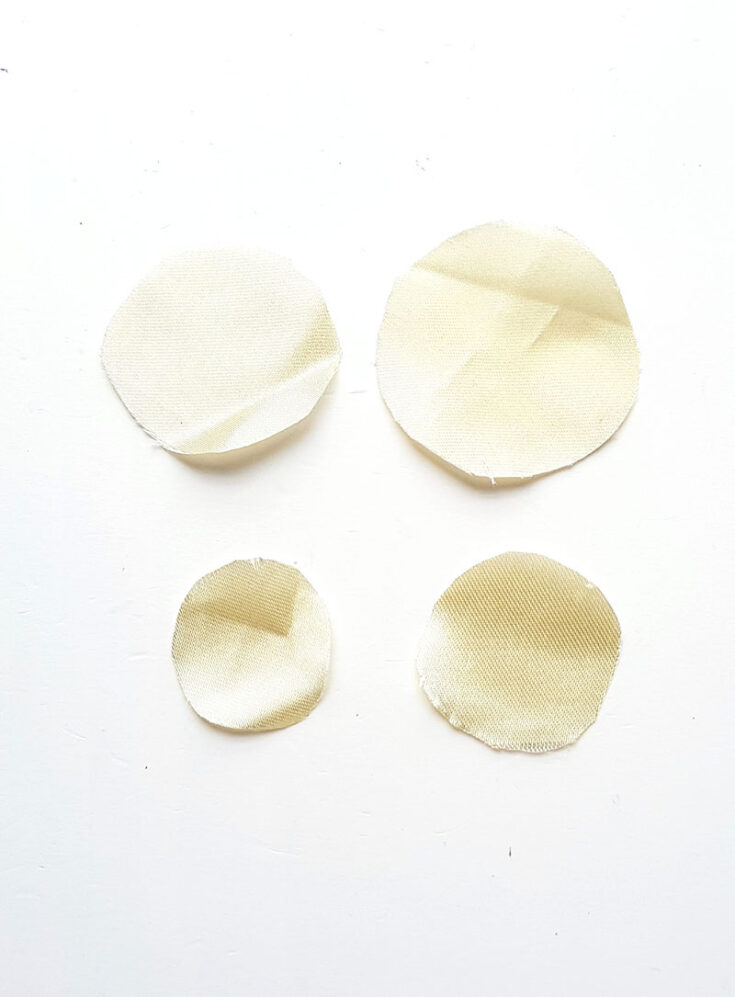
5. Use a lighter to burn the sides of the round satin cutouts. Do this carefully, over a sink or stove, or in some other contained area. Now place the satin pieces one on top of the others, starting with the largest at the bottom and getting smaller as you go up.
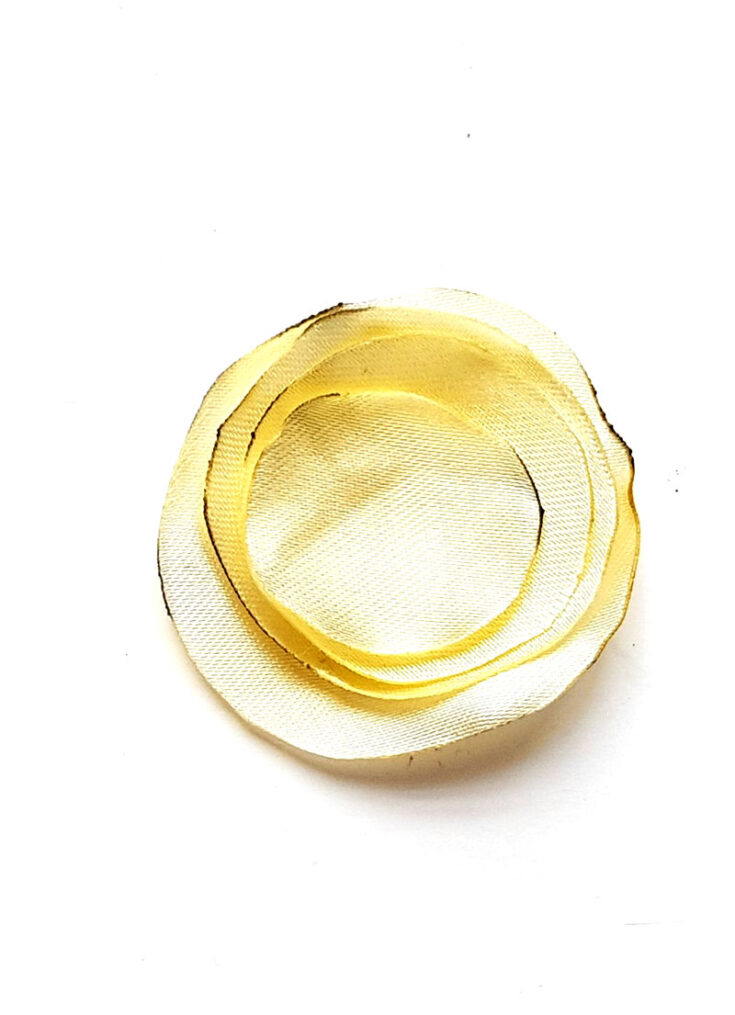
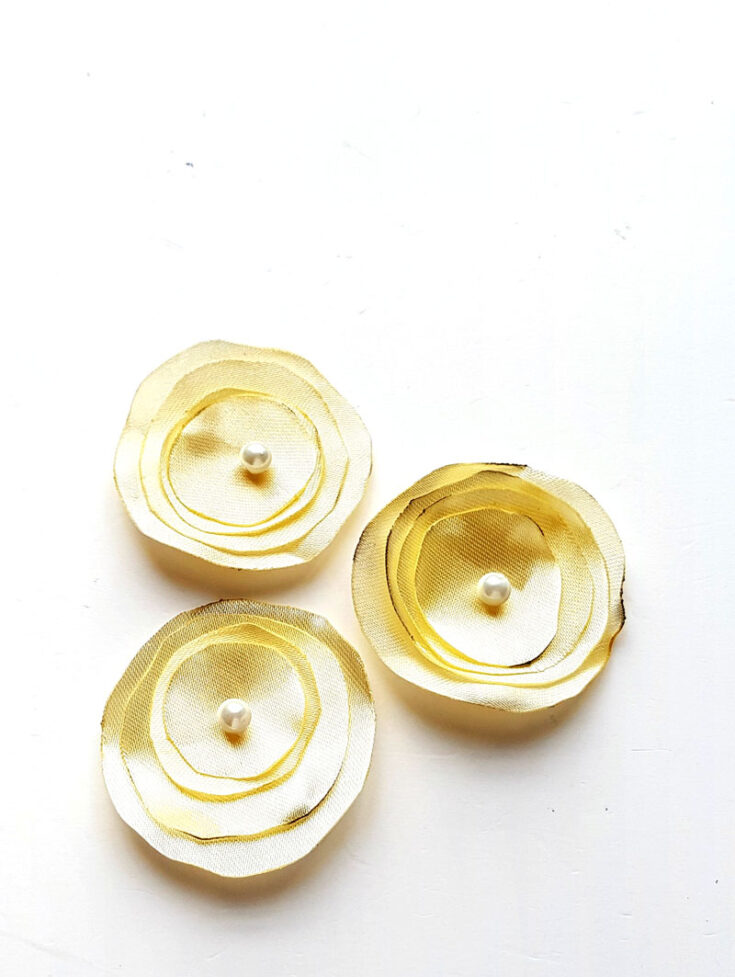
6. Prepare your needle with matching thread and stitch the center of the satin pieces to join them together. Attach a small faux pearl in the middle to complete the flower.

7. Once the stitching is complete draw the needle to the back of the satin flower. Tie a knot and cut off the extra thread. Make three-four of these – and then bookmark this tutorial to use it to make these gorgeous flowers in many other projects. Think: headbands, pins, appliques…
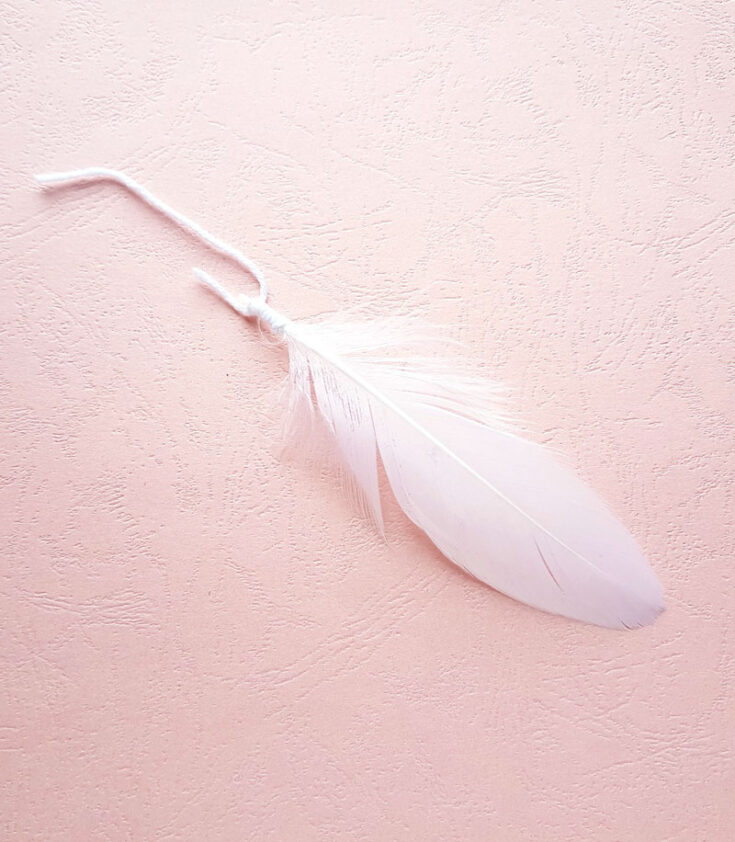
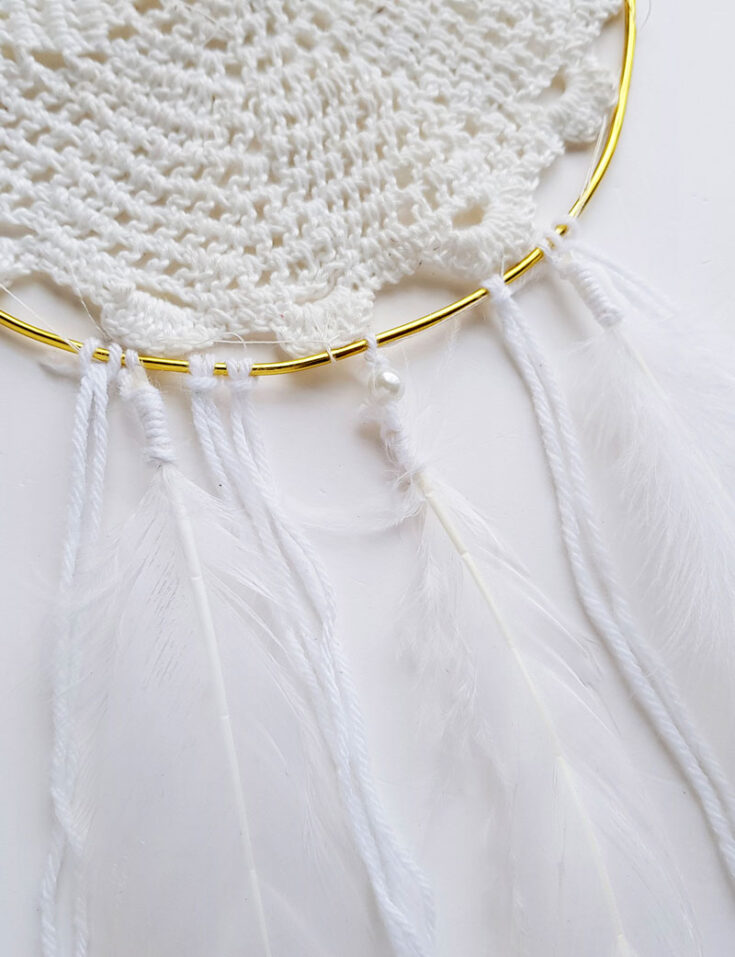
8. Grab a piece of yarn or twine and a feather. Attach the feather to the yarn by simply tying a tight knot around the shaft. You can get fancy and wrap or knot it a few times but you don’t have to. Prepare three of these – or however many you’d like (wink, wink).
Got all your parts ready? Let’s learn how to make a dreamcatcher by putting it all together!
9. Attach your feather-dangling strings first and attach those at somewhat balanced intervals. Tip: think balanced, not even.
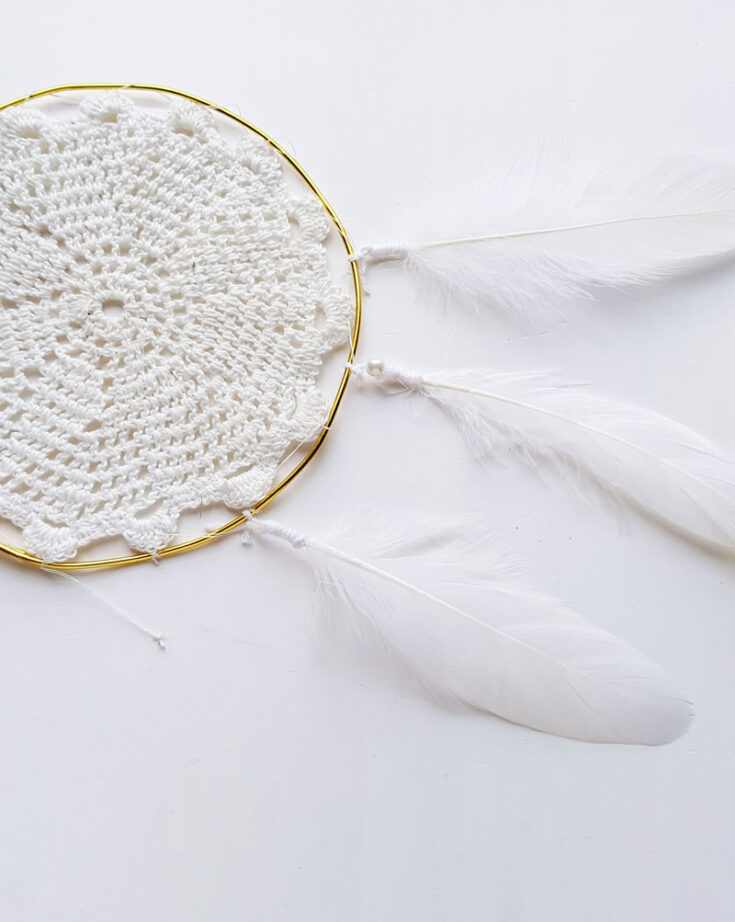
10. Prepare some plain strings and attach them to the base using rya knots. Rya knots are as basic as a knot gets and not really a knot so don’t stress about this. This tutorial is easy, as promised!
11. Attach some crochet lace around the base, between the yarn strands. Try to fill one quarter of the base with the yarns and lace.
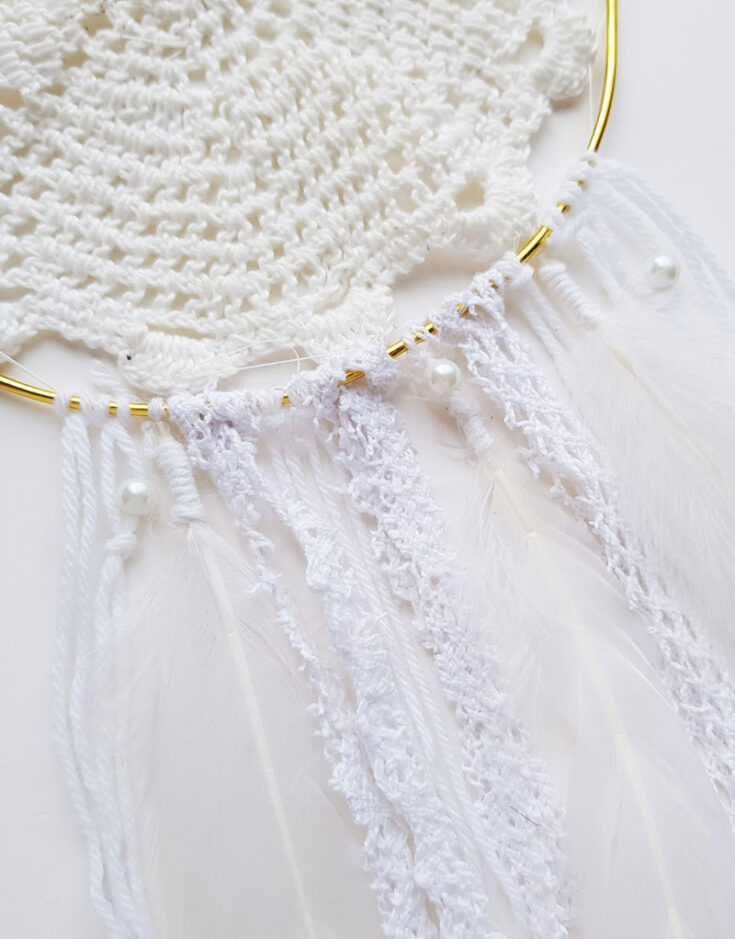
Once you are satisfied with the amount of yarns and lace, add some faux pearl beads through some yarn strands randomly. If your pearl holes are too big, simply stitch them on wherever you’d like them. And yes, this is totally optional, but it’ll look cool.
12. Attach your satin rosettes to complete making your dream catcher.
You are now done learning how to make a dreamcatcher the easy peasy way! What are your favorite dreamcatcher making techniques? Where do you plan to hang your beauty? Comment below!
[ad_2]
Source link