

[ad_1]
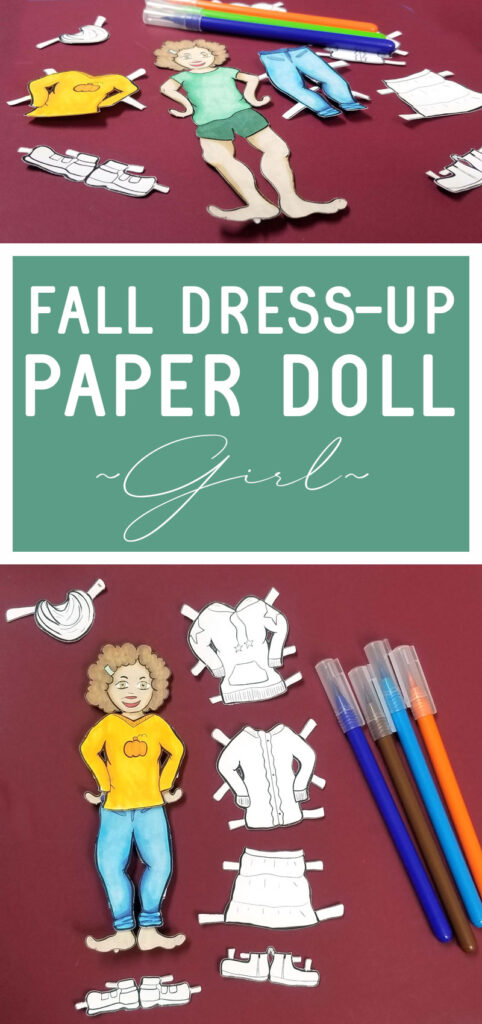
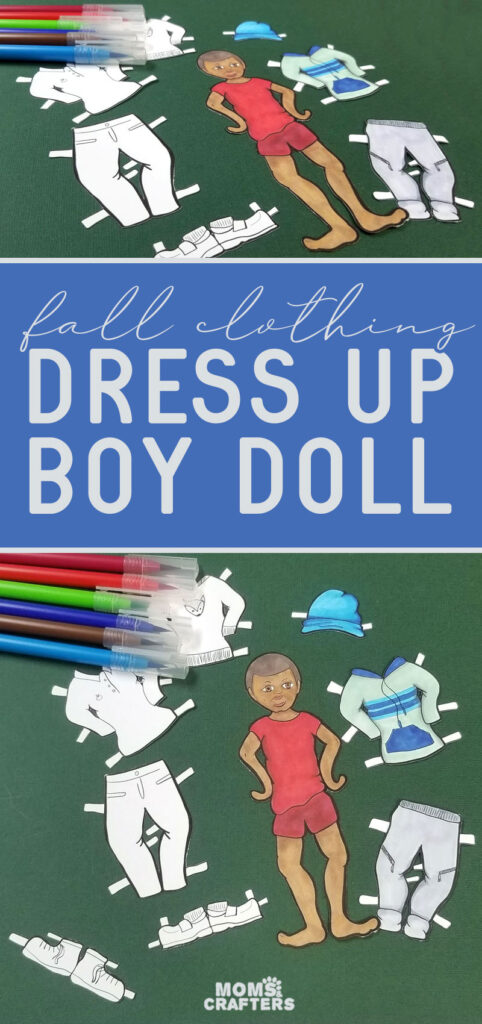
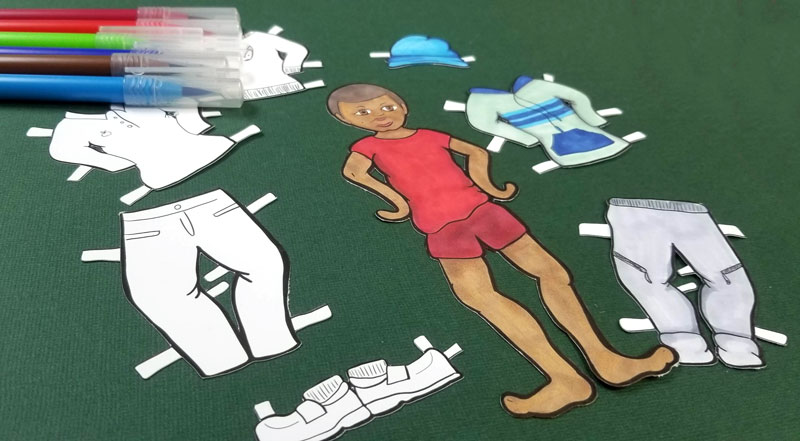
Print and craft some fall paper dolls to teach kids about weather-appropriate clothing. You can find my free paper doll coloring pages here or scroll down for this one. This post contains affiliate links.
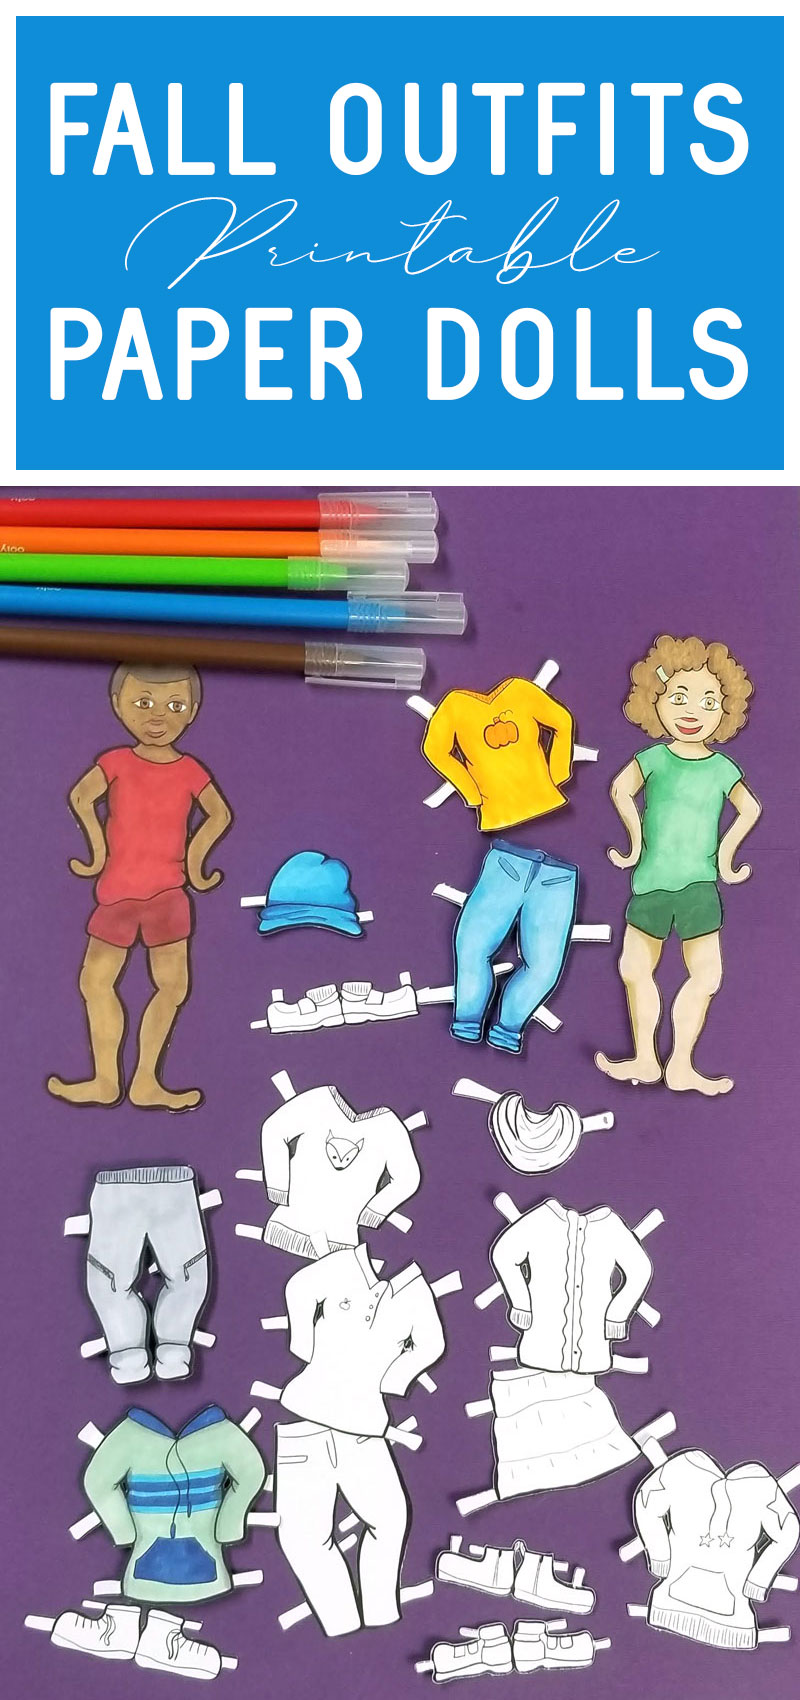
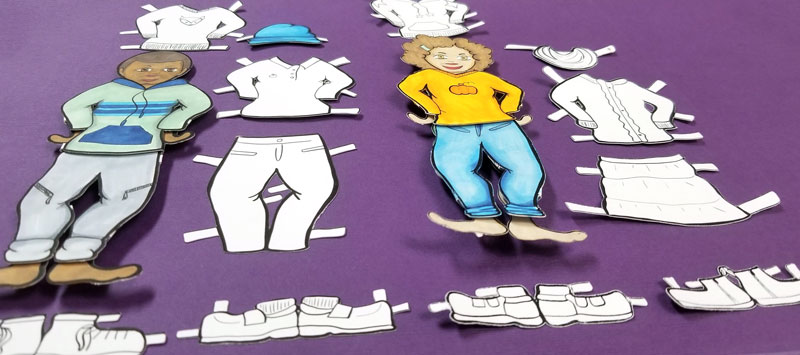
This past year, I published winter dress up dolls, then a summer version, Spring paper doll templates, and now I’m thrilled to share with you the fall version!
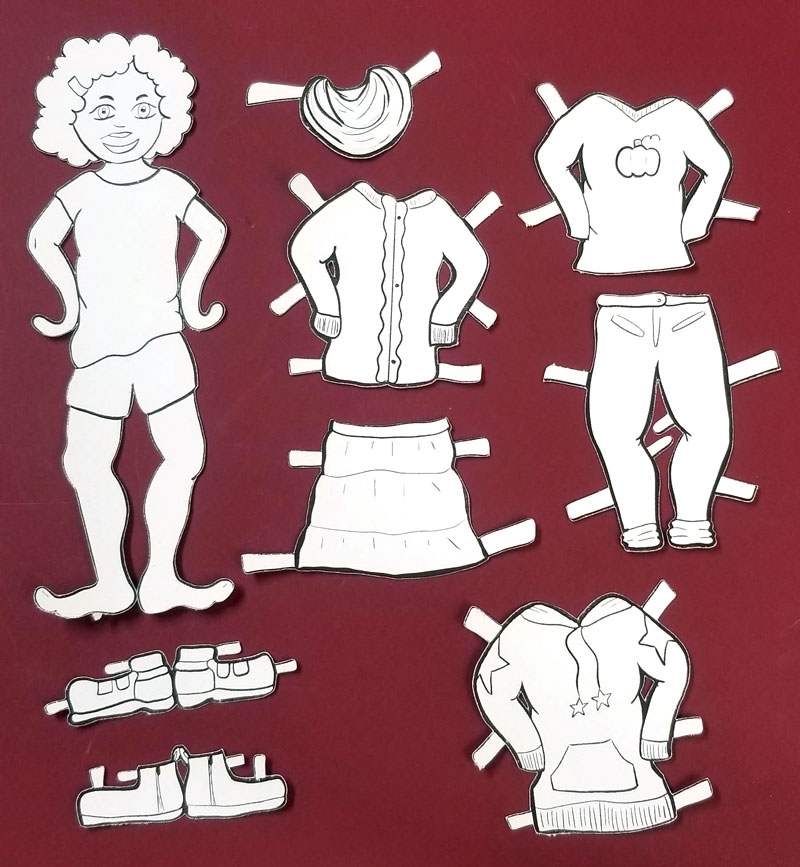
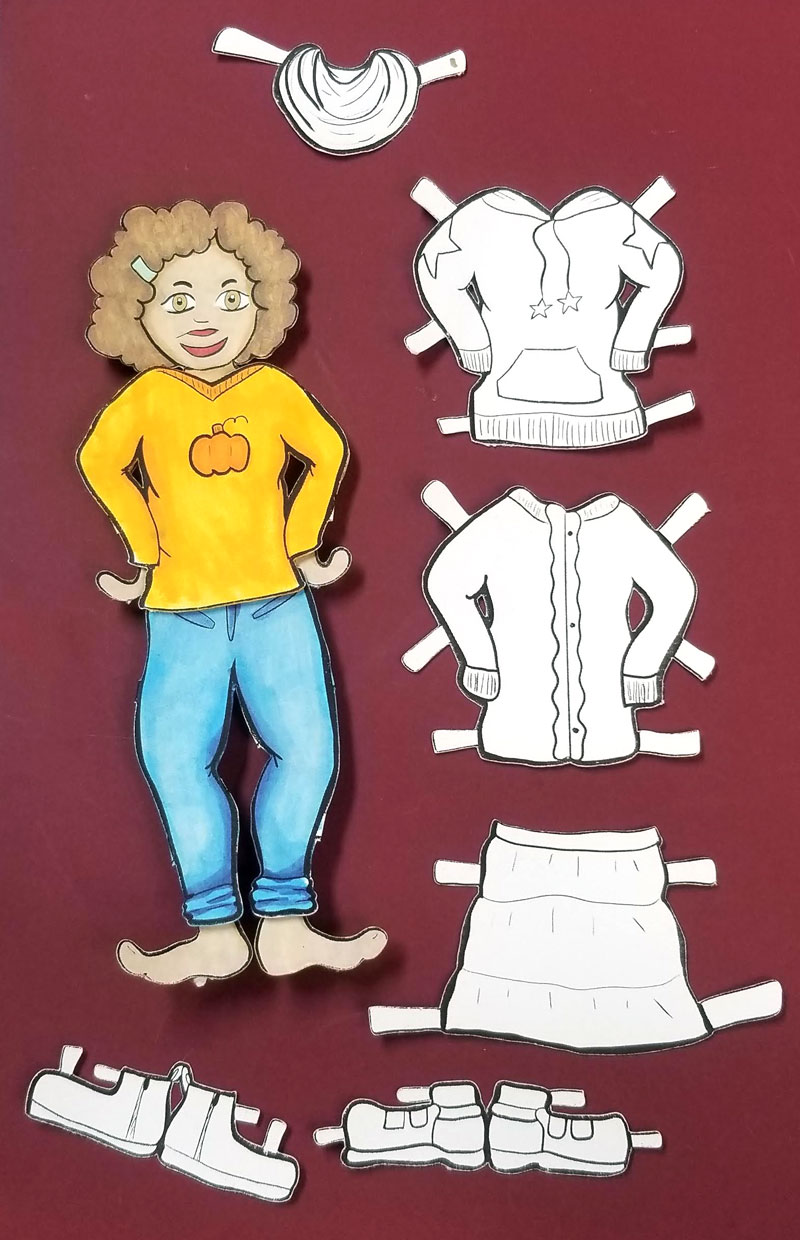
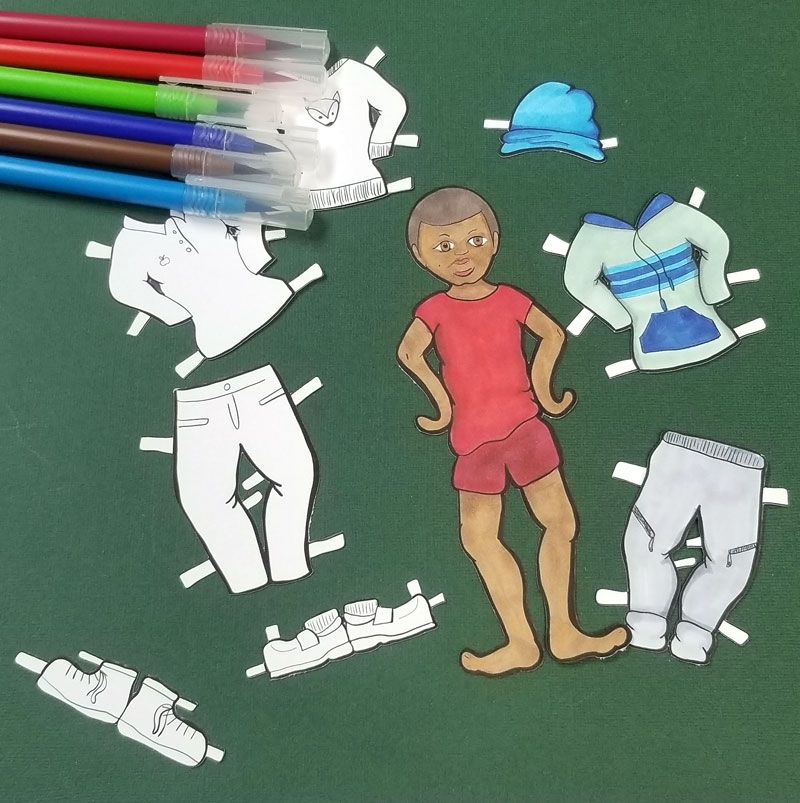
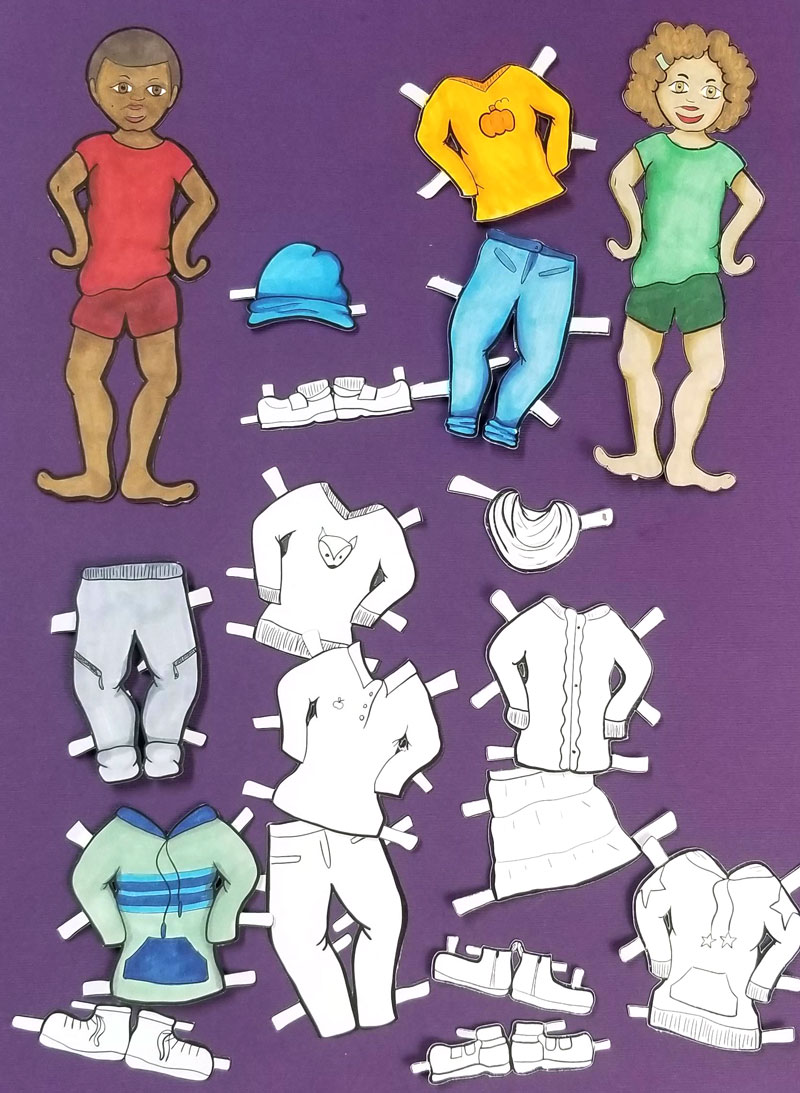
This set is just like the others: you can choose a boy, a girl, or both, and then color and craft seasonally-appropriate clothing.
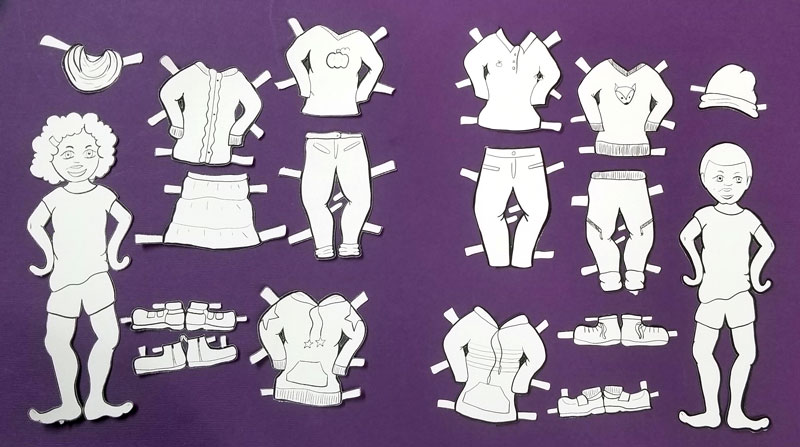
They are compatible with each other – you can use them together as a set! I used the same template but redesigned the base doll so that you have different characters, but they can swap clothing. The only catch is that the clothing I designed for the summer dolls needed skimpier undergarments, so if you use the summer clothing on this base doll, the sleeves of the undershirt might show through a little.
The fall dress up dolls are a fantastic paper craft for kids, tweens, and teens! They were my favorite thing ever growing up, and I’m so happy to recreate this fun paper toy for today’s kids. This is a fantastic screen-free fall activity, and fun for siblings to make and swap too.
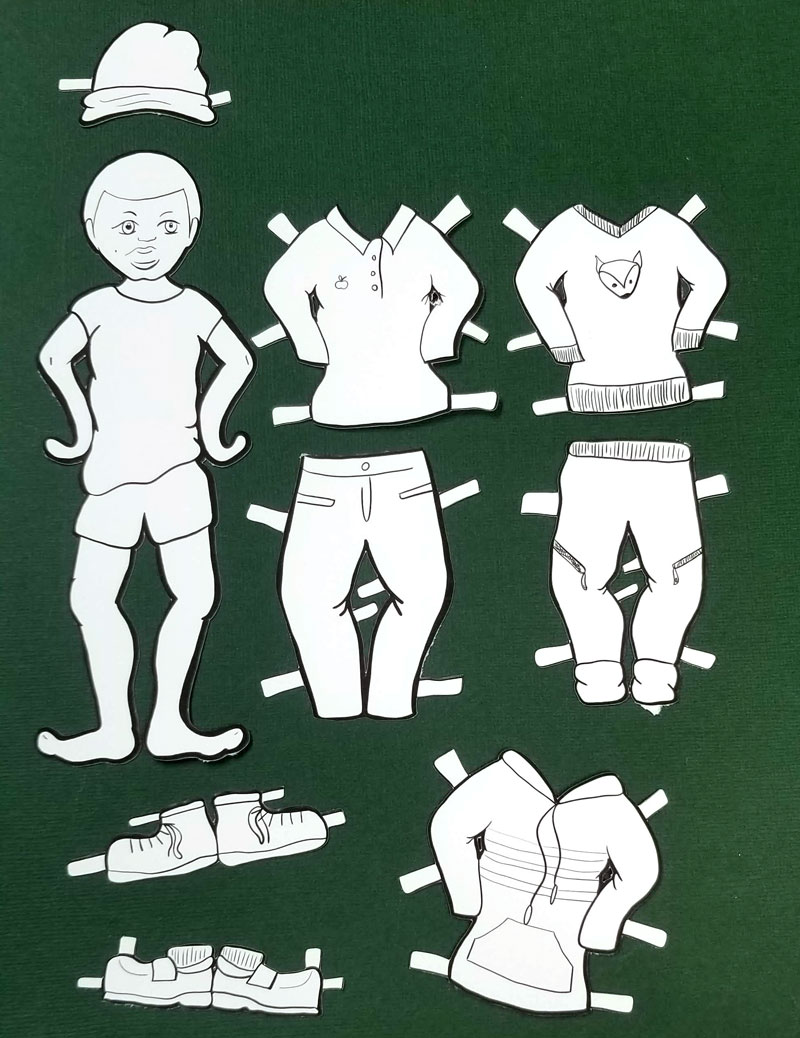
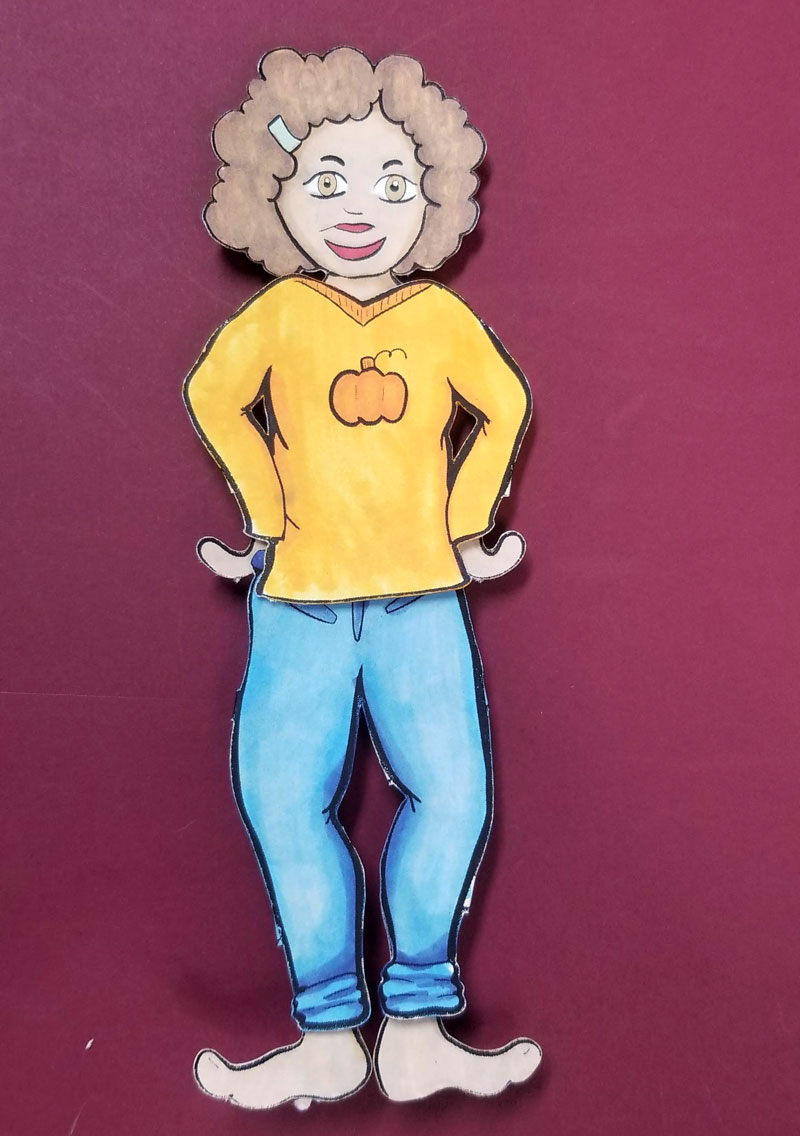
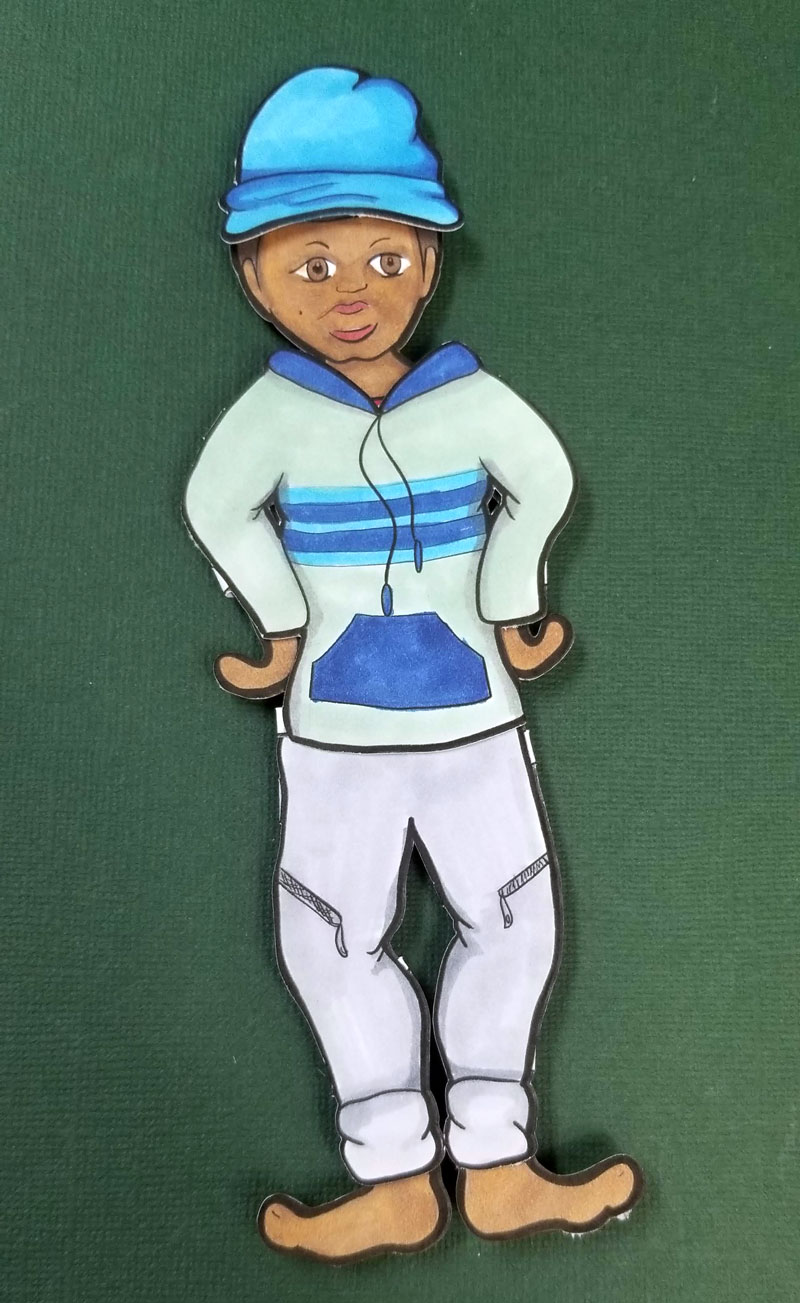
Little details such as ribbing on the sweatpants, a beanie hat for the boy and an infinity scarf for the girl make these paper dolls so much more fun!
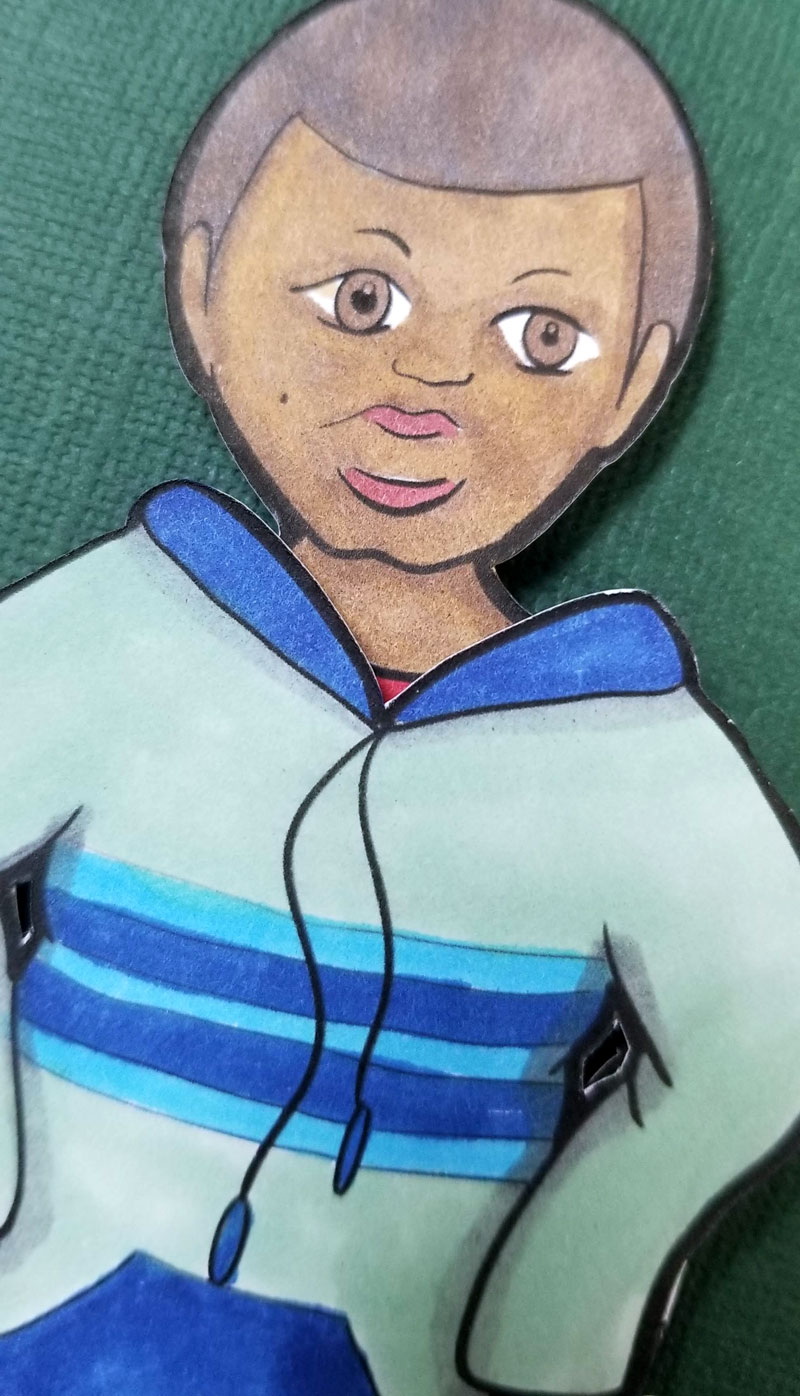
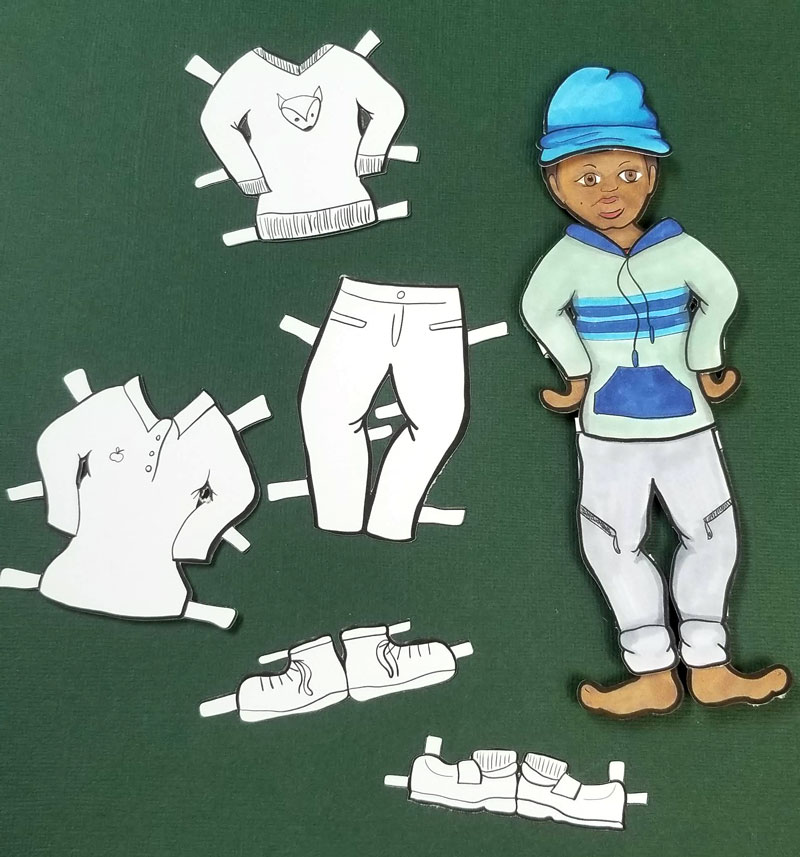
I illustrated these digitally using a pen in my Surface pro – so you get sharp lines with hand-illustrated, storybook feel. I kept it somewhat realistic for children to relate to, and focused on different hair styles, eye shapes, etc (your child adds the skin tone!) so that every child can feel part of this! Each set’s boy and girl has a slightly different look.
On this one, I focused on a shorter buzz cut for the boy and totally curly, short hair for the girl.
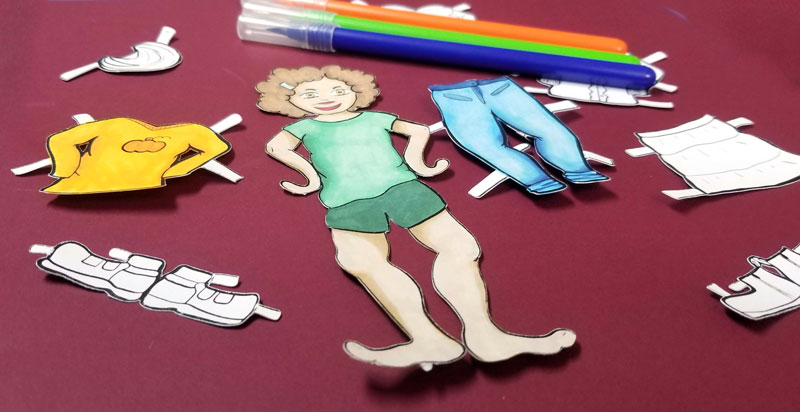
I highly recommend Crayola’s Colors of the World products for this – kids will love being able to match their own and their friends’ skin tones. I personally colored it with Prismacolor Premier markers (not pictured) in both portrait and regular colors.
There are two ways to assemble this summer paper craft. You can cut it by hand with the included PDF file, or use the PNG images that I formatted special for Cricut’s Print then cut feature.
I did mine using the Print then Cut feature on my Cricut Maker. I recommend doing it this way if you have kids who don’t like doing a lot of cutting, or if you’re gifting this as a “craft kit” to a loved one.
Download your fall paper dolls here
Click on the image to get the set you want! You’ll be taken right to the listing in my Etsy shop. If you’re looking for the winter set, get it here. Or find the Spring set here. Summer dolls can be purchased here.
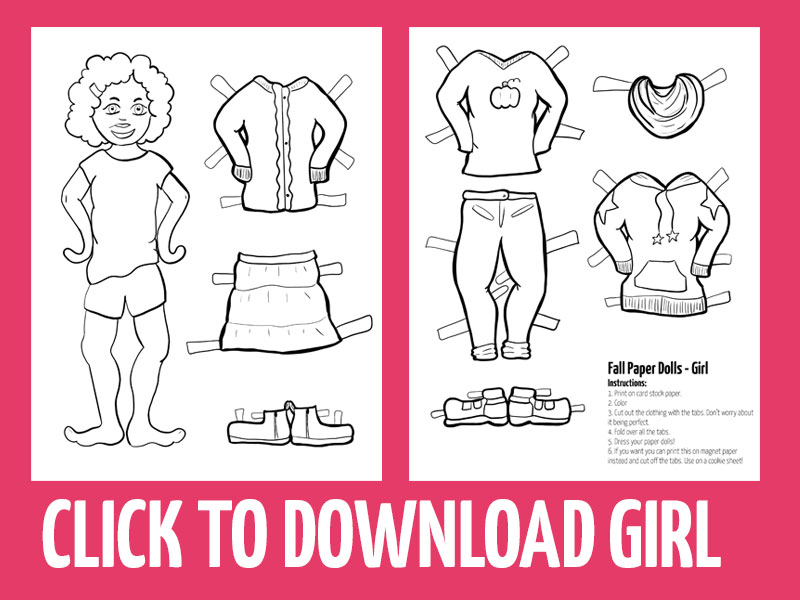
Get the girl paper dolls here!
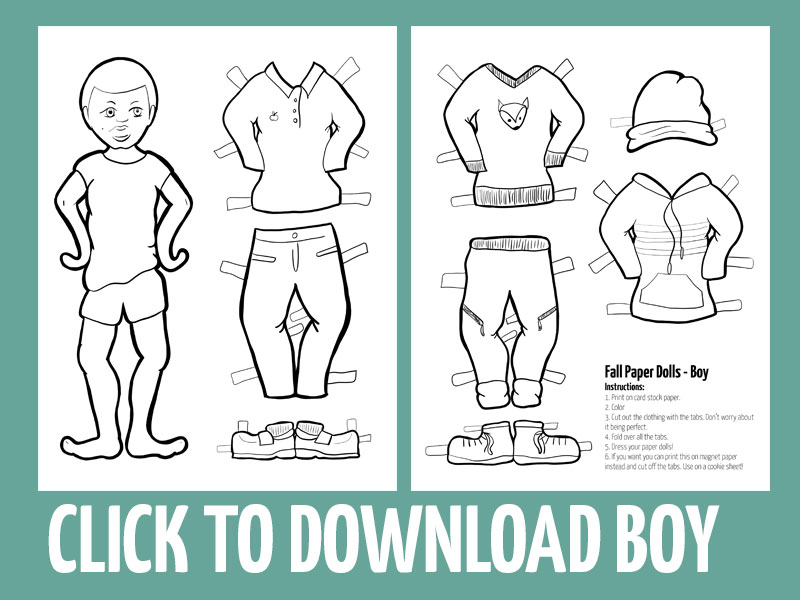
Get the boy paper dolls here!
Get the boy and girl paper dolls bundled here!
How to assemble your fall paper dolls
Supplies:
Instructions: (also included on your actual printables.)
- When printing, choose to print actual size so all paper dolls are compatible with each other.
- Print on card stock.
- I find it easier to color before cutting, unless you’re cutting it in advance for your child.
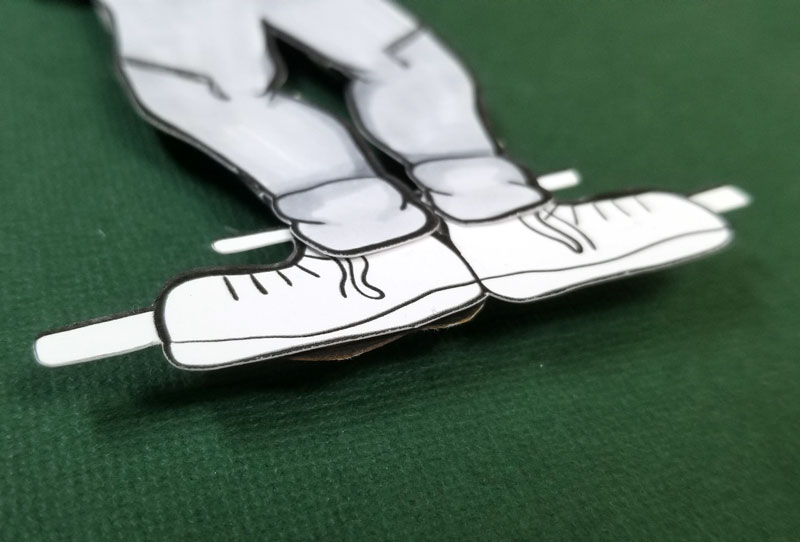
- Cut out around the outer border.
- Fold down the tabs.
- Dress up your doll!
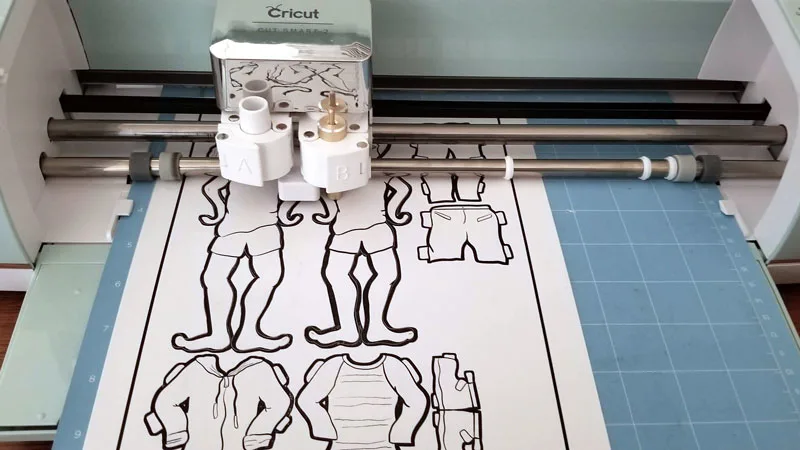
Print then Cut with a Cricut machine
Using your Cricut Explore Air 2 or Maker with this makes it easier, especially if you want to prep it for a class, or gift it as a “craft kit”.
I made these fall paper dolls with Print then Cut-ready PNG files. These files have white backgrounds on the areas you’ll want to color, but are transparent around the cut border.
You need:
How to print then cut this fall paper craft
First, download the Zip file that you received with your purchase and move your images to a new folder. The tutorial below was screenshot on my Spring set on my Explore Air 2, but the tutorial is the same for this fall set on the Maker.
Open Design Space and create a new project. Click “Upload” and then “Upload Image”.
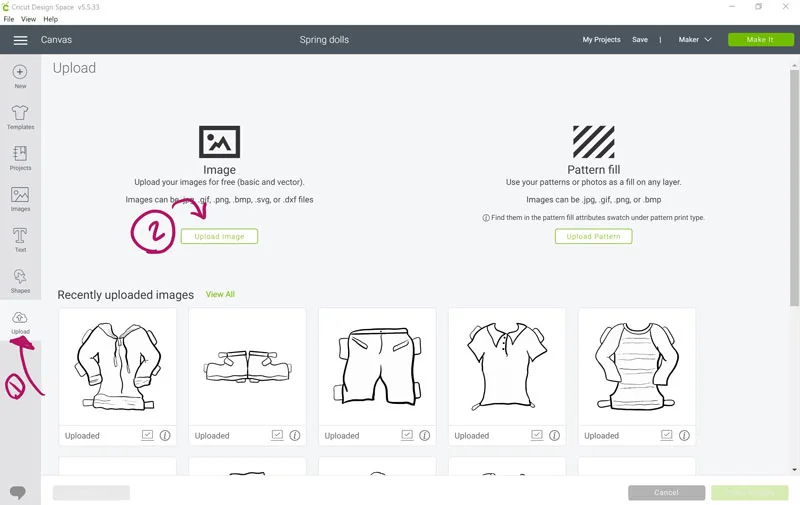
Find the image you want to upload. You can upload the individual elements separately, or choose the one that has everything laid out to fit the max size for Print then Cut.
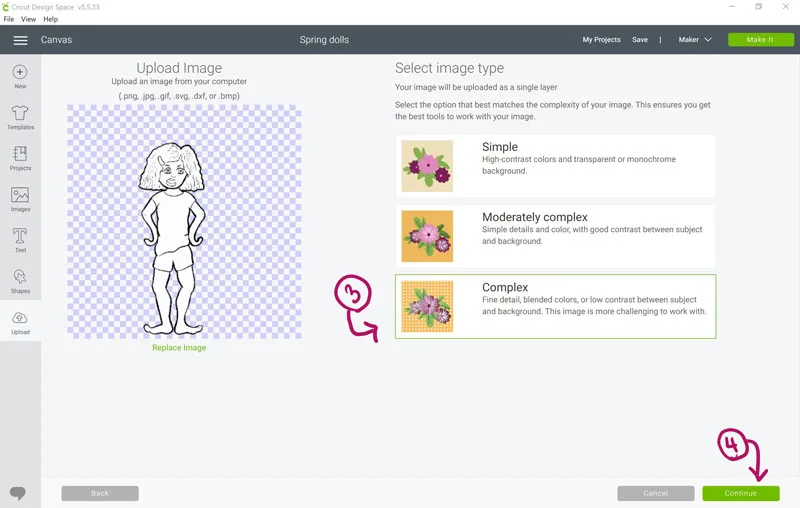
Choose “Complex” and then continue.
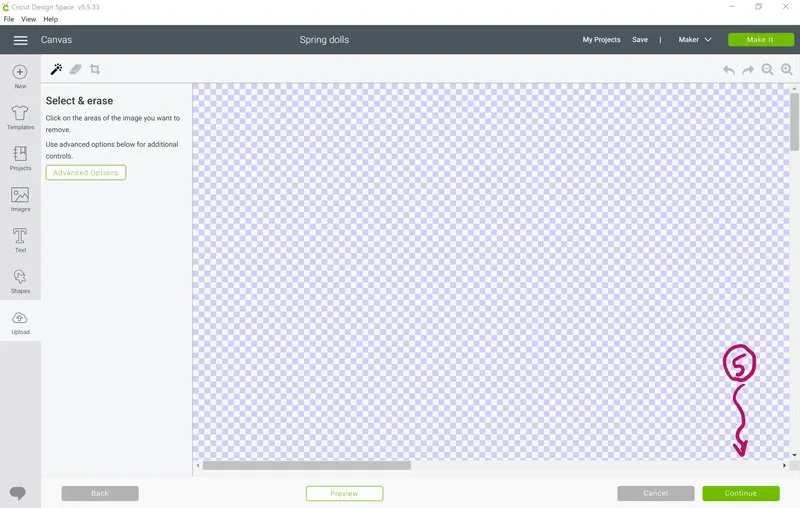
You don’t need to do anything on the next screen – just hit “continue”. The checkered background is for transparency.
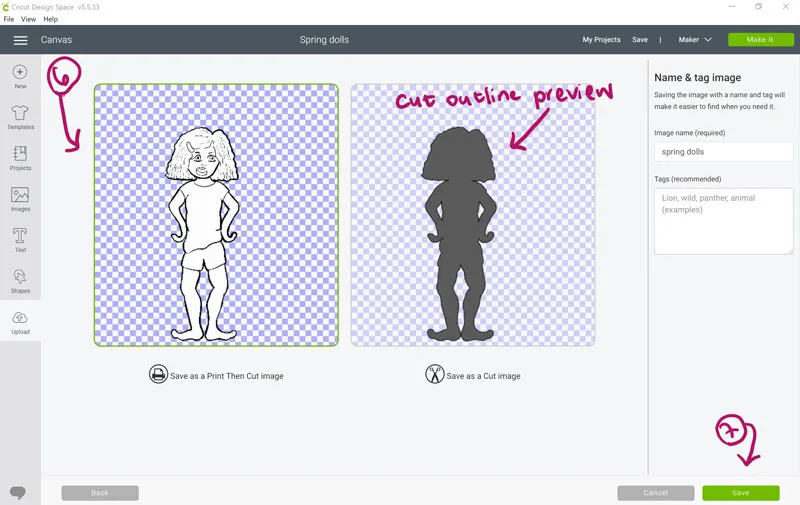
Choose “save as a print then cut image” but take a peek at the “cut image” because that’s exactly how your image will cut after it prints. Name and tag your image so you can easily find it later.
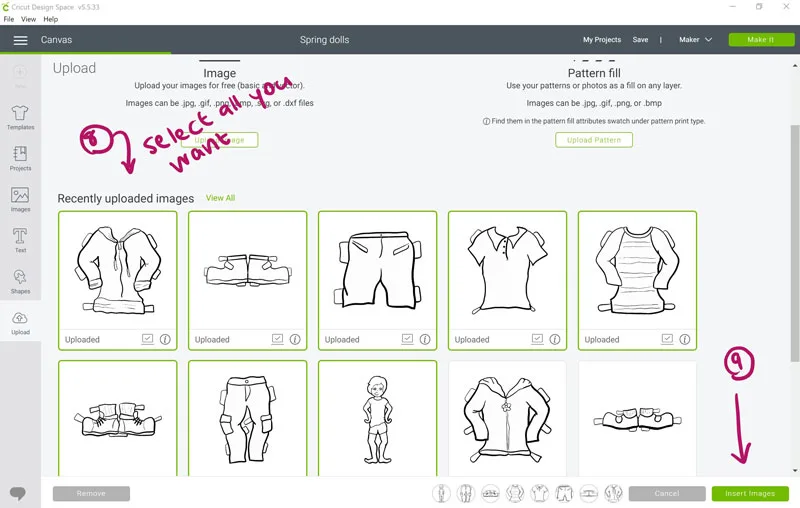
Do this for each image. Once all your images are uploaded, select them and hit “insert images”.
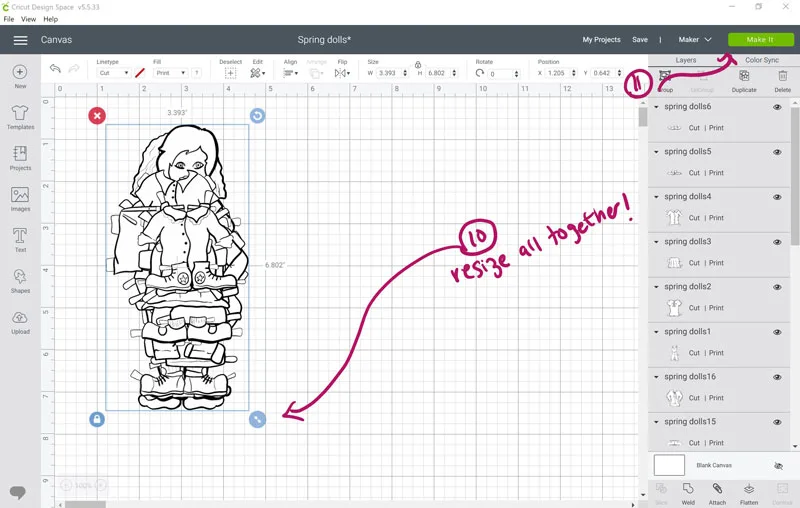
Resize your images to the desired size – but make sure you do it proportionately so that the clothing fits!! Your max size for “Print then cut” is 9.25×6.75 inches so make sure it fits. Then hit “make it”.
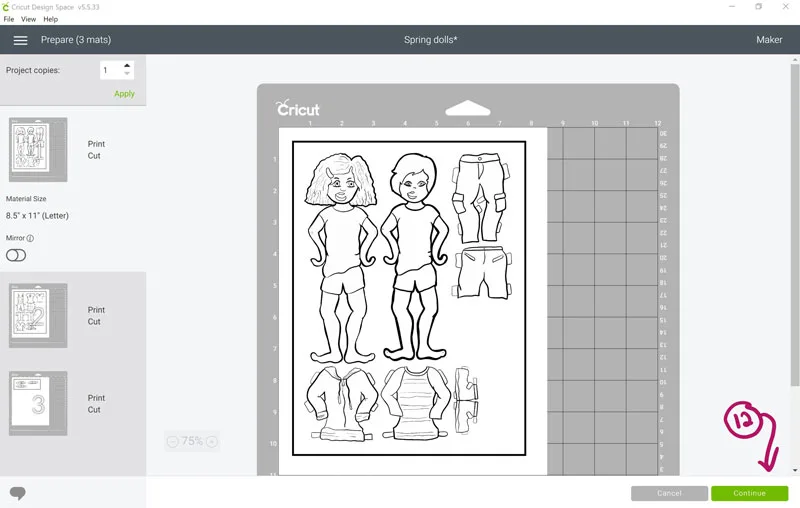
Design Space will automatically lay out your fall paper dolls to print then cut. It’ll also add a box around your print file. That’s their “registration” marks – the scannable points from where Design Space figures out where to cut. Hit “Continue” and keep on following the prompts to print then cut your image.
I leave bleed “on” when I print then cut, so that if my calibration is slightly off, it still looks good.
You’ll see that when you set up your cut, there’s a blue light that first locates the box around your image.

Then it’ll cut beautifully.
If your cutting is a bit off, you may need to calibrate your machine. Read how to calibrate Print then Cut here.
Remove your parts carefully using the spatula and weeding tools.

More paper crafts for kids
[ad_2]
Source link


