
[ad_1]
Step 1
We start by sticking our cabochon on a piece of felt. We can then safely go and make a coffee, because we have to wait a moment for the glue to solidify!

Step 2
We will sew with a single thread, so either you can make a knot at the long end of the thread, or you can go through the felt from the bottom up and back down, and then you can tie the knot. I prefer the second option. I also like working with a long thread so I start with a 1.5m piece. But not everyone has so much patience, so you can trim the cabochon one and make a wall and picot.


Step 3
Pass the thread up through the felt and thread on two TOHO 11/0 beads onto the needle. Push your needle into the felt just behind these two beads. You can then pull them to the end of the thread to make it easier.


Step 4
Now the needle must come out from below – up exactly between our two sewn beads.

Step 5
Push the needle through one of the beads and take another two TOHO 11/0’s on the needle. Puncture the felt at such a distance that both new beads fit together nicely.


Step 6
Going from the bottom – up again, pierce exactly again between our two “new” beads. Push the needle through the outer bead and take two TOHO 11/0’s again.


Step 7
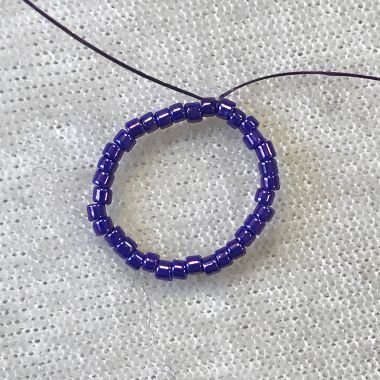
Sew around the entire cabochon, adding two beads until you close the perimeter. Remember that the gaps are not too big and we always add TWO beads after each. There must be an even number of beads in our circle.
Adding the last two beads go up, piercing from below between the two beads and go through the last bead we added and through the first added at the very beginning closing the circle.


Step 8
We will now create the second row. The thread now comes out of one of the beads (1). Take the 11/0 bead on your needle, skip one bead (2) and go through the next bead (3). In the photo I have marked the beads with numbers to make it easier.

Step 9
Next, we will create another row in the same way. Thread on a new bead, skipping one of the first. This time the thread comes out of the No. 3 bead, skip No. 4 and go through No. 5.

Step 10
Repeat the action until we close the next row. At the end go through the last bead from the first row and the first bead from the second row.


Step 11
Now, between the beads from the second row (marked “x”) we will add one TOHO 11/0.


Step 12
At the end of this lap, go through the last bead from the second row and the first from the third row.

Step 13
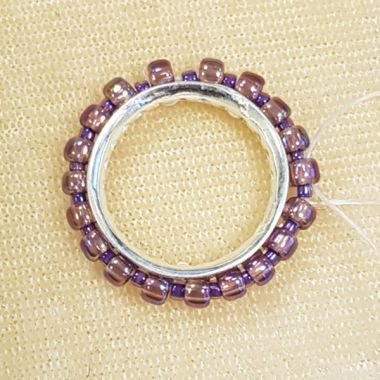
We will now close the gaps with TOHO 15/0 beads. Our thread now comes out of the first bead on the third row. We take a TOHO 15/0 bead on the needle and go through the second bead in the third row. Fill in the gaps until we close the next row.


Step 14
At the end of the row go through the last 11/0 bead and the first 15/0 bead. For reinforcement, you can go through the last row of thread again, pulling it gently.


Step 15
Now cut out the cabochon at a distance of about 1mm from the edge. I always follow the seam underneath, then there is no fear that you will cut a thread or leave too much felt. You can now drink a sip of coffee ;).

Step 16
Because I like working with long threads, I just need them to cover my stone with a “wall”. For this purpose, I pass the thread from the top of my “wall” down. Break through the felt coming out from underneath and return so that the thread comes out of the front of the work.


Step 17
Now we need a backing (possibly thin felt). You can stick the work to the skin (if I stick the skin on, I do not do it all over the surface but I leave a margin of about 2mm) and only cut out. You can also draw a contour with a well-sharpened tailor pencil and cut it out.


Step 18
We take two size 11/0 beads. The thread comes out from above, and push the needle into the skin underneath and from below back up so far that both beads sit on the edge.


Step 19
Use your needle to thread through the outer bead from below.


Step 20
Add one 11/0 bead and thread into the skin from below, heading upwards. I always do it a bit slanted.

Step 21
Thread into the outer bead from below.


Step 22
Repeat the steps until you have covered the whole base. Take a TOHO 11/0, dig into the skin from below, go up, pierce into the sewn bead from the bottom, pick up a TOHO 11/0 and dig into the skin from below … and so on … :).


Step 23
Make sure you are not forcing the last bead to sit in the row. It is better if there is a bit of a gap than for the row to wave. Coming from the last bead which the thread comes out of, thread the needle into the first bead on our row, breaking through the skin but from the inside, as you can see in the picture. We can then get back into the first bead from our row.


Step 24
The cabochon is now enclosed, which we can now decorate.


Step 25
The thread now comes out of the bead in the base row downward and goes up through the bead next to it, as shown in the photo below.

Step 26
Go through the nearest bead from the first row of our wall where we covered the stone.

Step 27
Collect beads in the sequence 1 x TOHO 15/0, 1 x TOHO 11/0, 1 x TOHO 15/0.

Step 28
The thread comes out of the bead (1) and through into the next bead from the first row – the bead (2) in the picture.


Step 29
This makes a pretty pattern around the stone.


Step 30
Once we have completed the picot, our needle comes out of one of the beads from the first row – in the picture it is marked with the number (1). We now need to go through the top of our picot, sticking to one 15/0 bead and one 11/0 bead.

Step 31
The thread should come out of the bead 11/0 at the tip of the picot. We now take one 8/0 bead and push your needle into the bead at the top of the picot next to it.


Step 32
Carry on adding the size 8/0 beads around the cabochon.


Step 33
When you add the last 8/0 bead, go through the 11/0 and 15/0 bead, as in the picture to tuck the beads closer into our beaded wall.

Step 34
Next go through the 11/0 bead from the first row of our “wall” and direct the needle so that it comes out under the picot, next to the wall.


Step 35
Thread the needle from below through a bead from our base “wall”, so that you are in a place where you can begin to form the ring.


Step 36
When we are in the place where we want to create the ring, take one 11/0 bead and thread through the bead next to it.

Step 37
Go back through the first bead.

Step 38
Pass the needle through the bead we just added.

Step 39
Take 7 x 11/0’s and go once again through the first bead we added.

Step 40
Pass through 4 beads from the formed loop.

Step 41
Take 7 beads and go through it again, but only through the fourth, middle bead on the loop.


Step 42
Go through four beads on the new loop and take another 7 beads.


Step 43
As before, go through the fourth, central bead of the newly formed loop.

Step 44
Create such loops until you get the right length for your finger. We will give the ring an even nicer shape next, which will shorten it a little bit, so make sure it is a bit longer than measured by your finger. 🙂


Step 45
Go through four beads on the last loop and thread through our base row from below.


Step 46
Go through the next bead.

Step 47
Go through the middle bead from the last loop once more.

Step 48
Once again, thread through the base row the same way to strengthen the ring.


Step 49
Go again through the middle bead from the last loop and the beads (1) and (3) from the same loop. Pull the thread so that it passes under the bead marked No. (2).


Step 50
Go through the next bead on the loop.


Step 51
Again, go through the beads (1) and (3) and pull so that the thread passes under the bead (2).


Step 52
Repeat these steps until you reach the end of the ring.


Step 53
Thread through the bead on the inner base row from below – inside to out.


Step 54
Now change direction by going back in through the next bead on our base wall.

Step 55
Pass the needle through the first bead which forms the ring and now you can start to shape the other side of our ring, going through the beads (1), (2), (Ś) in the same way as we did before.


Step 56
As you reach the end, the thread should be in this place.

Step 57
Take one size 11/0 bead and push your needle through the bead from our base row, located next to the beads from which our ring “comes out” (initial beads marked with numbers (1) (2)).


Step 58
Go through the bead marked (2).


Step 59
Go through the bead next to it, marked in the previous picture (1).


Step 60
Change direction again, passing your needle in through the next bead on the base row.

Step 61
Pick up a size 11/0 bead and go through the first bead which formed the first loop.


Step 62
Now we need to go to the other end of the ring, where we will also add these two strengthening beads in the same way we did just a moment ago.


Step 63
Add these two beads and go around the base “wall”, going in and out of the beads in alternate directions to strengthen. Do this a few times so that the thread is secure. You can now cut your thread.


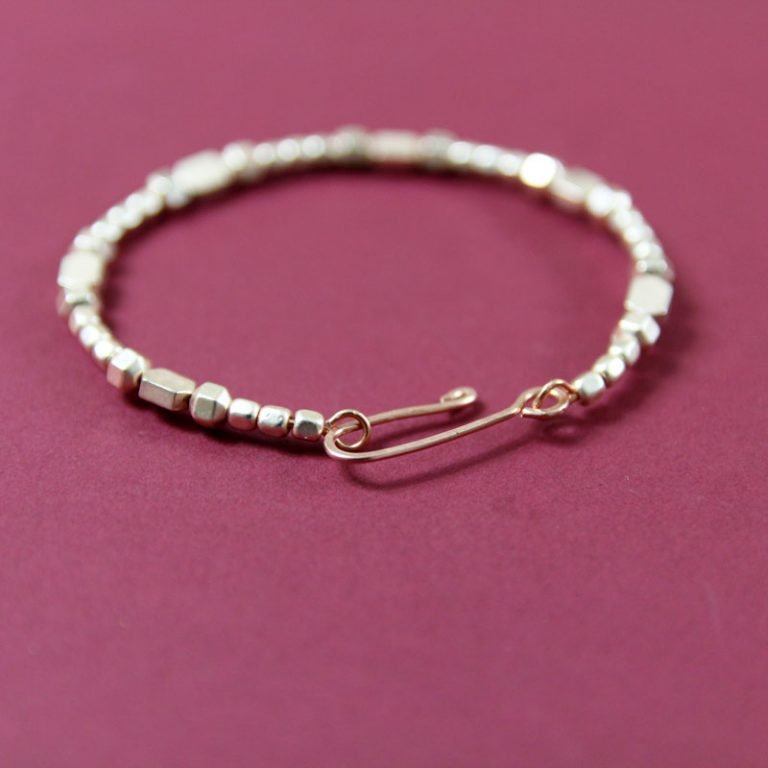
Step 64
Your Arabela ring is ready. What do you think? My dream as a little girl is once again fulfilled! 🙂
We hope you enjoyed this project. Please don’t forget to rate it and please do visit any of our social media pages to share your finished piece. We would be delighted to see how you did it Your Way!
What better way to relax and unwind than with a tray of beads, a cup of tea and a group of like minded people? Our Facebook Page is the ideal place to go to share with the beading community. Whether you want to chat, exchange ideas or show us your works of art…. All are welcome to join <3

[ad_2]
Source link