How to make wire jewelry clasps * Moms and Crafters

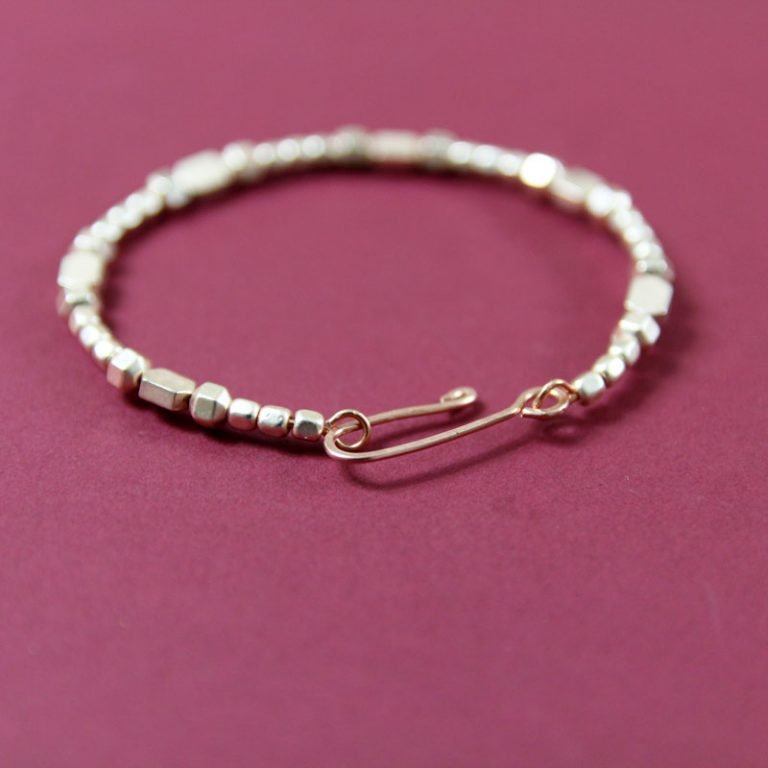
[ad_1] Learn how to make wire jewelry clasps to really slay those jewelry crafts! It’s really easy, even for copper jewelry making beginners. This post contains affiliate links. If you’re making your own jewelry using wire, you can make simple clasps for bracelets and necklaces! Here, I teach you how to make wire jewelry clasps. These clasps are best for wire jewelry creations because they really flow with the look. They are stupid simple S hook clasps that anyone can make. Use these on stiff bracelets or on necklaces. Loose bracelets will be less secure with this clasp. I originally…

Read MoreHow to make wire jewelry clasps * Moms and Crafters

Joy vs. Explore Air 2 vs. Maker

[ad_1] This Cricut machine comparison will help you figure out which Cricut is best for your specific needs. Choose between the Joy vs. Explore Air 2 vs. Maker and then check out my other review, is Cricut Access Worth it? This post contains affiliate links. Cricut has three current machines for sale, and each one has unique advantages. This post is designed to help you choose the right one for you, because the answer will not be the same for everyone. I am privileged to own all three machines: the Maker, Joy and Explore Air 2. I am also a…

Read MoreJoy vs. Explore Air 2 vs. Maker

21 Free Stuff for moms and babies * Moms and Crafters

[ad_1] Sharing is caring! There are so many legitimate free stuff for moms that can truly help, so I decided to list some for you. You might also find my list of the best baby products on a dime helpful. Disclosure: this post contains affiliate ads that earn me a commission. Sample availability and offerings change over time and anything specific mentioned below is just an example of what you might potentially get. Information is accurate as of 2 When I was pregnant with M, finances were extremely tight, and I was very much on the lookout for free stuff…

Read More21 Free Stuff for moms and babies * Moms and Crafters

Droplet Window Earring Pattern | Project Tutorial | Blog

[ad_1] Step 1 Take a metre of thread and add your beading needle to one end. Pick up 19 x size 8 seed beads and 19 x size 15 seed beads, alternating between the two. Thread through these a second time and pull the beads into a loop shape. Slot this around one of your silver bead frames and pull the thread tighter to secure it onto the frame. Knot the two ends of thread together to secure. Take your main thread and pass through a few beads. Sew down through one of the bead frame holes and up through…

Read MoreDroplet Window Earring Pattern | Project Tutorial | Blog

HOW TO MAKE – Elizabeth Earrings with New Swarovski Innovations | How To | Blog

[ad_1] Step 1 Cut a 1m length of thread, attach a needle to one end and string on 36 seed beads. Pass the needle back through the beads to make a loop. Go back through them again and tie the ends of thread in a knot to secure. Step 2 Begin your peyote stitch by threading on a bead, skipping the seed bead, and going up and through the next one. Repeat until you have gone all the way around the circle. Step 3 Once you reach the start of your circle, ‘step up’ by passing the needle through the…

Read MoreHOW TO MAKE – Elizabeth Earrings with New Swarovski Innovations | How To | Blog

Bejewelled Bee Brooch | How To | Blog

[ad_1] Step 1 Take your 3 sew on droplet shape stones and place them on a square of felt measuring approx. 4 x 4 inches / 10 x 10cm. Cut an armspan of thread and sew up through the felt and through a stone. Leave a 20cm length underneath for the tail thread.  Pick up a small purple bicone bead and thread back down through the same stone.  Thread up through the other hole on the same stone and repeat for all 3 droplets. Don’t worry about the thread on the underside of your design, this will be covered later…

Read MoreBejewelled Bee Brooch | How To | Blog

How to Make – Hand-Painted Wooden Bead Tassels | How To | Blog

[ad_1] It’s so easy to forget about the most simple ways of personalising your own jewellery. Starting with a simple wooden surface can lead to a whole host of amazing designs being applied on top. These brilliant round wooden beads make a great base for painting with acrylic paints, drawing on with paint pens or decorating/dying in any other way you can think of. These beads have a bit of a shine, which means they might repel water based colours and paints, but there are plenty in a pack to experiment with! Get your paints ready and follow my tutorial…

Read MoreHow to Make – Hand-Painted Wooden Bead Tassels | How To | Blog

Daisy Chain Headband – by Poppy Byford | Project Tutorial | Blog

[ad_1] Step 1 Start by printing out your daisy template onto a4 paper. Your daisies should measure approx. 8.5″ long (22cm). Print your template Step 2 Firstly you need to cut your foundation in half and pin together. Once you have printed of the template, you will need to cut it out and pin to your beading foundation and draw around the template. Then fill in the Daisy details as a rough guide Step 3 Then you need to cut around the daisy shape which will give you your final shape for the headband. Step 4 Where you pinned the…

Read MoreDaisy Chain Headband – by Poppy Byford | Project Tutorial | Blog

Beaded Bridal Tassel Earrings | Project Tutorial | Blog

Step 1 Take approx. 1metre of thread and add a needle. Thread on approx. 8cm (3″) of size 15 ivory seed beads followed by 3 x size 15 gold tone seed beads and 1 x size 15 ivory again. Move these beads down the thread leaving approx. 15cm of tail thread. Miss the last ivory bead and thread back up all of the gold and ivory beads you added. The last ivory bead will act as a stopper for this strand of your tassel. Step 2 Again, thread on 8cm (3″) of ivory beads, 3 x gold and 1 x…

Read MoreBeaded Bridal Tassel Earrings | Project Tutorial | Blog

Raspberry Clay Jewellery | Polymer Clay Designs | How To | Blog

[ad_1] Step 1 To begin, wash your hands and clear your work surface to minimise the amount of dust that could get stuck on your clay. If you find that you keep getting dust on your clay, take a spare bit of clay and roll it over your hands to pick up all the particles. Lay out some greaseproof paper. It is easier to work straight onto the paper that you will cook the clay on later, so you don’t misshape your clay when you’re moving it between surfaces.  Pinch off some of your different coloured clays and mix together…

Read MoreRaspberry Clay Jewellery | Polymer Clay Designs | How To | Blog